Tag: IP
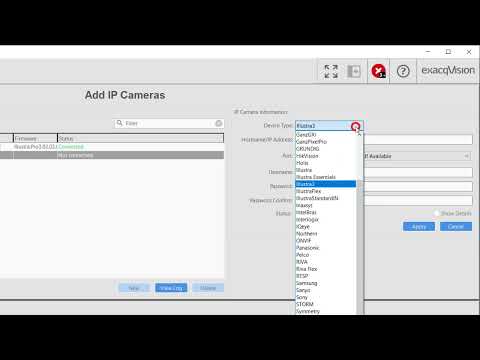
This video provides instruction on how to add an IP camera to your ExacqVision system, as well as details on the settings used to add your devices.
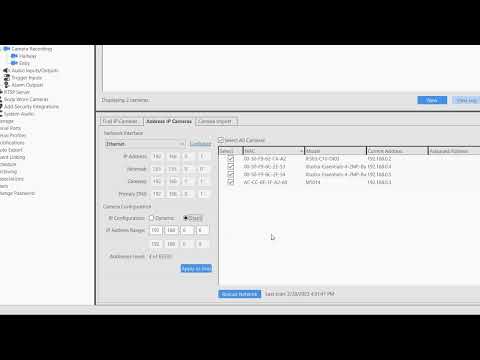
This video will introduce you to more advanced methods of adding IP cameras to your ExacqVision system.
The Find IP Cameras and Address IP Cameras tools, as well as performing bulk camera imports are covered in this video.
The exacqVision software currently only sends notifications on the rising edge of a change in state, which allows it to send notifications on a loss in video or IP connection. In order to send notification on a reconnection we must detect the falling edge of the state change. This can be accomplished with a Source Group using the following steps which will assume you are monitoring an IP camera connection.
Follow the user manual for help in setting up your notification profiles.
From the Event Linking page, click on the New button (1) and select Source Group from the Event Type list (2).
Next, create an Event Source by clicking the New button (3).
In the window that appears give your new Source Group an identifiable name that describes what it does (1).
Choose the New button under Group Event Sources.
In this example we a monitoring an IP camera connection, so select IP Camera Connection from the list of Event Types.
Next, change the radio button selection for the Event Source to When not alarmed (4). This is what tells the software that the state has changed from an alarmed connection to no-longer alarmed, which is reconnected.
Finally, select your IP device from the list (5) and click Apply.
Back in the Event Linking window, select Notify from the Action Type menu (1).
Select your Action Target, in this case we have named our Email message profile Camera Reconnect (2) but it will display the names of the profiles that you have created.
Click Apply to complete the set up.
<br>
Creating-a-notification-on-IP-Reconnection.pdfStep 1 – Verify Camera Compatibility
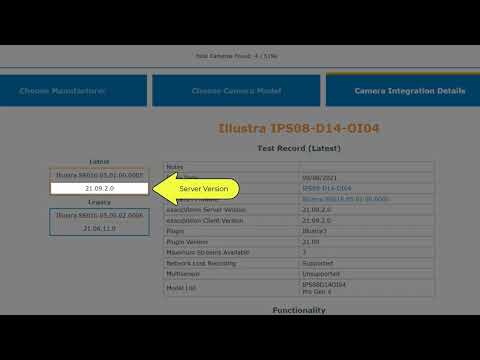
Use the exacqVision IP Camera Integration database to confirm that the camera is supported for the exacqVision Server version being used.
To determine the server version, refer to the article How can I find the version of my exacqVision Client, Server, or Web Service software?. If the camera is supported, but the Server version is outdated, check the exacqVision license to ensure that it has the proper SSA for the version of software you need.
If an upgrade is allowed, refer to the Downloads page.
If the sever SSA expired before the camera was integrated, user must contact Sales to purchase an upgraded SSA.
<br>
Step 2 – Verify Camera Firmware
Verify that your camera firmware is compliant with the tested version on the exacqVision IP Camera Integration database by searching the model number of the camera and clicking on the Results button.
If your camera’s firmware does not match the test record paired with the server version, contact the camera manufacturer for firmware updates.
IMPORTANT: Many camera manufacturer’s do not support downgrades to camera firmware, so this is not recommended unless the manufacturer tells you to do so.
<br>
What if my camera or firmware isn’t listed
Refer to the “Will Exacq Support My Camera” section of the article titled, “What IP cameras are supported by exacqVision?“
<br>
Step 3 – Verify Use of Correct Device Type
Ensure that you are using the correct plugin. Within camera test record of the exacqVision IP Camera Integration database is the supported plugin to use. Select this from the Device Type field within the exacqVision Client when adding the camera or other IP device.
<br>
Step 4 – Verify Network Connectivity
- Open a web browser on the computer running the exacqVision Server software.
To do this, you might need to be logged in to the operating system as an Administrator. On older systems, the default username/password is admin/admin256. On newer systems, the username and password is configured when the machine first runs.<br><br> - Enter the IP address of the camera as the URL and press Enter.
If the camera does not appear in the web browser, exacqVision probably cannot connect. This could be a network issue.
- Try to ping the camera using CMD (Windows) or Terminal (Linux).
- Enter
ping 192.168.xxx.xxx
(using the camera’s actual IP address). - If the camera responds, try rebooting it. If it does not respond, the camera could not be found at that address, or has an internal problem preventing it from responding, the user may need to contact the site’s IT personnel to assist in locating the networking problem.
If the camera appears in the web browser, exacqVision should be able to connect to it. Check the log files for the system and see why it is not connecting:
- Open the Config page (gear icon on top-left). Highlight the server name in the site tree (right above ‘Configure System’).
- From the ‘System Log‘ tab, select a start and end time that contains the connection attempt.
- Look in a log entry referencing either the plugin used (camera manufacturer) or the IP address of the camera. Use the Search option on the top right of the System Log window to help filter the results.
- There should be an indication in the log as to why the camera could not be connected to. Common reasons are username/password mismatch and network timeouts.
<br>
Videos on Troubleshooting
<br>
Troubleshooting Camera Connections
<br>
Troubleshooting with VLC
<br>
Modern computer networks require each device on the network to have a unique IP address. These addresses are used so that computers know how to communicate with each other and so that network equipment knows where to route the traffic crossing its path.
When using the ExacqVision Desktop Client application from a client workstation to connect to your ExacqVision Server application on another machine, perhaps on the other side of your office, you will need to enter the server’s IP address so the two machines can communicate.
However, TCP/IP includes some “shortcuts” that make routing communication more efficient when two applications running on the same machine need to communicate. These “shortcuts” are called loopback addresses and tell the machine not to bother sending the message out onto the network only to have the network send it right back.
127.0.0.1 is an IP address that always refers to “this machine”; the local computer. An ExacqVision Client can always connect to a server running on the same computer using the 127.0.0.1 IP address, regardless of the actual IP address being used by the NIC in the computer. The same can be said for “localhost,” which may be used in place of the address 127.0.0.1 in many applications. Both “localhost” and the address 127.0.0.1 refer to “this machine.”
Do not delete 127.0.0.1 or ‘localhost’ from your systems list. Using 127.0.0.1 instead of the actual IP address of the NIC ensures the fastest and least troublesome connection to the ExacqVision Server running on the same computer.
<br>
The 127.0.0.1 loopback address is an IPv4 address. While IPv6 has been a growing protocol for several years, it is still primarily used by service providers and external routing. Within private networks such as offices and homes, the older IPv4 protocol is still standard.
In case you’re wondering, the loopback address in IPv6 can be written as:
0:0:0:0:0:0:0:1 or as ::1
At the time of this writing, ExacqVision Server does not support IPv6 addressing.
<br>