Categories
Knowledge Support Support exacqVision Server Categories

Unable to Find MAC Address During Exacq Cloud Drive Archiving Setup

Description 

After performing all steps found in Knowledge Base Article #7697 up to Step 4 – Add User to NVR (Cloudvue Manager) searching for the MAC address.  A search for the devices MAC address in Cloudvue Manager does not return any results.

Product 

  • exacqVision Server

Steps to Reproduce 

  • Perform all steps found in Knowledge Base Article #7697 up to Step 4 – Add User to NVR (Cloudvue Manager) searching for the MAC address.
  • Access Cloudvue Manager
  • Select Search then Search Video Devices
  • Enter the MAC address of the NVR and press enter to search

Expected Results 

  • MAC address is found

Actual Results 

  • MAC address is not found

Solution

  • In the exacqVision Client delete the archive target
  • Change the following line in archivepi.xml to ensure the system is using the endpoints used to reach Cloud Drive 2.0

Default Paths

Linux

/usr/local/exacq/server/archivepi.xml

Windows

C:\Program Files\exacqVision\Server\archivepi.xml

Change the following line in archivepi.xml


From

Defaults Type="4" Address="https://exacq-messaging.cloudvue.com" SearchAddress="https://exacq-gateway.cloudvue.com/v1/exacq"

To

Defaults Type="4" Address="messaging.cloudvue.com" SearchAddress="gateway.cloudvue.com"
  • Re-create the archive target using the instructions from Knowledge Base Article #7697
Categories
Knowledge Support Support exacqVision Server Categories Products

Axis cameras are freezing and choppy on exacqVision server 22.06 and 22.03

Description 

The Axis cameras are choppy and freezing on the exacqVision Client Live view page and when checking the logs showing.

AxisPI Warning 10.100.1.35 EdgeStor - error 56 attempting to get<br>the list of disks. This command will be retried in 30 seconds..
AxisPI Verbose 10.100.1.35 Network error 56 from request<br>axis-cgi/disks/list.cgi?diskid=all using scheme https.

Product 

exacqVision Server 22.03 to 22.06

Steps to Reproduce 

Install exacqVision Server version 22.03 or 22.06 and connect to Axis cameras

Solution

Updating the ExacqVision server to version 22.09.5.0

Windows 64bit, here

Windows 32bit, here

Ubuntu Linux 64bit, here

Ubuntu Linux 32bit, here

Categories
Knowledge Support Support exacqVision Client exacqVision Server Categories Products

Stretch cards not showing in exacqVision server/client but showing in OS

Description 

Analog stretch cards are not showing in exacqVision server or client but they are showing in the OS. Installation of drivers will not remedy the issue nor will reinstalling exacqVision.

NOTE: Please take a backup of your server settings and config as reinstalling the OS will wipe everything.

Product 

  • exacqVision Server
  • exacqVision Client.
  • Exacq Hybrid NVRs with Stretch capture cards

Expected Results 

Stretch cards show in exacqVision Server and Client.

Actual Results 

Stretch cards do not show in the exacqVision Server or Client.

Solution

Try a clean re-install of the OS.

Categories
Knowledge Support Quick Start Guides Documentation Support exacqVision Client exacqVision Server Categories Products

Setting a Static IP on an ExacqVision Server

Product 

ExacqVision Server

Solution

  1. Open the ExacqVision Desktop Client application and click the gear icon from the upper-left toolbar to enter Configuration mode.<br><br>
  2. Using the navigation tree along the left-hand side, locate the name of the server. If this is a new system that has not been renamed it will simply read ‘ExacqVision Server’.<br><br>
  3. Click the plus (+) icon beside the server name to expand the options, then click on the Configure System node.<br><br>
  4. Then navigate across the top to the Network tab.<br><br>
  5. Select the interface you want to change.

    On a dual NIC system, you should have a ‘Data’ and a ‘Management’ interface. It is recommended to use ‘Data’ for camera connections and ‘Management’ for all other network traffic coming in and out of the server.
    See the Example Network Diagram for Dual NIC Systems, that illustrates this concept.<br><br>
  6. The right-hand side of the Network settings will populate with the settings for the selected interface you chose on the left.

    Within Network Configuration you may choose Dynamic or Static. Dynamic will obtain an IP address automatically from an available DHCP server on startup. To set an IP manually, select Static.<br><br>
  7. Enter the desired static addresses for:
    • IP Address
    • Netmask (Network Mask)
    • Gateway
    • Primary DNS (required)
    • Secondary DNS (optional)

      If you are unsure of these settings, please check with the network administrator of the installation site. Ensure that the IP Address is not in use by another device on the network.<br><br>
  8. Once completed, click the Apply button. Allow a moment for the system to update the network settings. You can then add it to your ExacqVision Client.

<br>

Categories
Knowledge Support Support Illustra exacqVision Server Categories exacqVision Integrations

Illustra Cameras Show Video Loss after Server Reboot or exacqVision Server Service Restart

Description

Intermittently, Illustra cameras will show as “VIDEO LOSS” in the video panes after restarting the ExacqVision server service or rebooting the Exacq unit.  To restore normal operation, these Illustra cameras must have their “Enable” select box unchecked and then checked again in the “Add IP Cameras” configuration page.

Products

  • ExacqVision Server
  • Illustra cameras

Steps to Reproduce

The failure mode was intermittent and may require multiple restarts of the ExacqVision Server or just the Exacq server service in order to manifest on server software versions between (but not including) 21.12 and 22.09.

Expected Results

The expectation is that the Illustra camera video streams would be available for display on the ExacqVision clients.

 Actual Results

Occasionally, the Illustra camera video streams display as “VIDEO LOSS” panes on the ExacqVision clients.

 Solution

Downgrade to exacqVision Server version 21.12 or once available upgrade to exacqVision Server version 22.09 or higher.

Categories
Video Library Configuration exacqVision Client exacqVision Server Youtube Video Library Categories Products

Event Linking

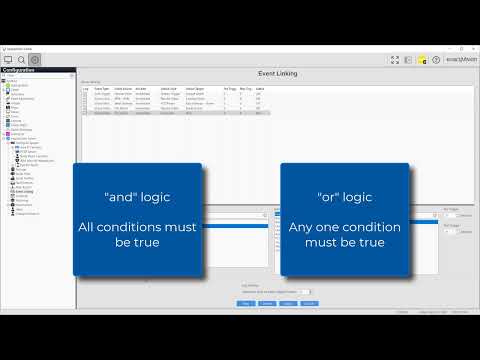
Event Linking gives you the power to create automated actions based on your selected events. Sending email notifications when motion is detected, activate an alarm output when an input trigger is detected, automatically export a video clip when a button connected to an input is pressed, turn a PTZ camera to a preset point if motion is detect on another camera, and much more… a wide variety of combinations can be achieved.
Categories
Video Library Configuration exacqVision Client Categories Products

Auto Export

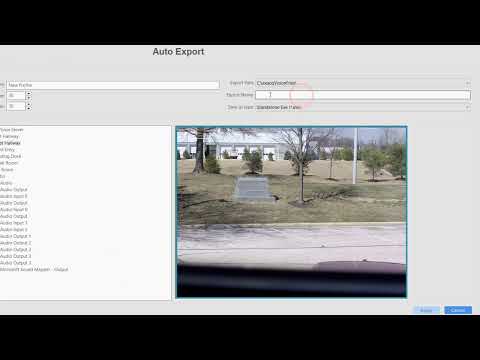
Configuring your Auto Export settings allows you to create profiles which can be utilized by Event Linking to trigger automated file exports, or burning CD/DVDs, on your chosen activity, such as a trigger input, a serial data keyword, access control event, and more.
Categories
Knowledge Support Support exacqVision Client exacqVision Server Categories exacqVision Hardware

Powershell Group Policies Blocking exacqVision Server Scripts

Description 

Group Policy settings have been observed to block exacqVision Server Scripts even after the machine has been removed from the domain.

Product 

  • exacqVision Server
  • Group Policy
  • Windows PowerShell

Actual Results 

  • Issue 1: Date/Time settings are grayed out in the exacqVision Client.
  • Issue 2: Users are unable to apply a license; MAC address shows all 0’s.

Expected Results 

  • Issue 1:  Date/Time settings are not grayed out and settings can be pushed from the exacqVision Client
  • Issue 2:  The MAC address is correct and a license can be applied.

Verification

  1. Open Windows Powershell (Admin).
  2. Change the working directory to “C:\Program Files\exacqVision\Server\scripts”
    cd C:\Program Files\exacqVision\Server\scripts\
  3. Run one or more of the following scripts:
.\timeconfig.ps1
.\netconfig.ps1
.\sysinfo.ps1
.\raidprep.ps1

PowerShell script command example

Resolution

-Run the following command replacing Script.ps1

-If one or more of the scripts fails after then a re-image may be necessary. 

<br>

Categories
Knowledge Support Support exacqVision Enterprise exacqVision Client exacqVision Server exacqVision Webservice

How to Manually Add Older Package Versions of exacqVision Software to the Update Packaging Utility

Title

How to Manually Add Older Package Versions of exacqVision Software to the Update Packaging Utility

Description 

The exacqVision Software Updates Packaging Utility offers an option to Upload a License File.    The advantage of using a license file is it will provide relevant versions if any of your systems have an expired SSA “Software Subscription Agreement”.  In the event this fails the following instructions can be used to create an update package zip file manually to included older versions of exacqVision Software which than can be imported as a zip file in exacqVision Enterprise Manager

Notice

Video available, 2022-04-27 Software Updates Packaging Utility and Legacy Releases, Knowledge Base Article #10156

Product 

  • exacqVision Client
  • exacqVision Server
  • exacqVision Web Server
  • Enterprise Manager

Objective: 

  • Create a Packaging Utility zip file to be used as a template 
  • Download installers for older versions of exacqVision Software 
  • Modify the contents of the zip file, specifically evFileInfo.txt. to include needed packages
  • Create new Packaging Utility zip file

Create Initial Packaging Utility Zip File

  • Access the Software Updates Packaging Utility page at https://exacq.com/webapps/packaging-utility/
  • Select “Recent Software Versions
  • Select one of the available recent software versions
  • Click Zip Selected Files, a new page will appear showing files are being zipped
  • When complete select “Click to Download Packaged Files
  • Note: Be patient, zipping the files can sometimes take a very long time 
  • Use File Explorer to locate the downloaded zip file
  • Right-click the file, select Extract All, a windows will appear, click Extract
  • A new sub-folder will be created containing the contents of the zip file, we will be working with this folder in later steps

Download Legacy Software 

  • Open the Legacy Downloads page at https://exacq.com/reseller/legacy/?file=Legacy/index.html
  • Enter the SSA “Software Subscription Agreement” Expiration Date
  • Expand the results 
  • Download the desired software, any combination of Client, Server or Web Service for the desired platform
  • Move the downloaded software to the folder created in the sub-folder created earlier

Modify evFileInfo.txt

The evFileInfo.txt file, included in the zipped packaging utility will have a section similar to that in lines 8-22 of the following example for each software installer included in the package.  These sections can be duplicated, then modified to create additional sections for manually downloaded packages.   

Example

In this example In addition to the most recent version(s) we have an NVR with an expiration date of 2019-12-27.  It is running on an Linux 64-bit OS so as a result will need to add ev-Server-Linux-x64  Version 19.12.6.0 to evFileInfo.txt.

  • Create Initial Packaging Utility Zip File as described above
  • Extract the contents of the Packaging Utility Zip File
  • Follow the Download Legacy Software section to download the 19.12.6.0 Windows x64 server software. 
  • Open evFileInfo.txt with a text editor (Notepad++ recommended)
  • Copy a package section (lines 8-22) and paste at the end of the file
  • Modify the following lines 
  • Change Package Header from [ev-Server-Windows-x64-22.03.1.0] to [ev-Server-Linux-x64-19.12.6.0]
  • Change Version=22.03.1.0 to Version=19.12.6.0 
  • Change Date=03-10-2022 to Date=02-12-2020
  • Change Link=https://cdnpublic.exacq.com/22.03/exacqVisionServer_22.03.1.0_x64.exe to https://cdnpublic.exacq.com/19.12/exacqVisionServer_19.12.6.0_x64.deb
  • Change Package=Windows-x64 to  Package=Linux-x64
  • Change SSA=03-15-2022 to 12-15-2019
  • Change Filesize=195773668 to Filesize=40963192
  • Change ChecksumHash=9be92a1161d6a465755bb2a5807511e7 to 2ac483f67c6eaa5de876da1f6f685f60
  • Change Extension=exe to Extension=deb

Gathering Needed Information

Information can be gathered from two locations, the Legacy Downloads page and the command prompt as indicated below. 

Command Prompt

  • Opening 
    • Open File Explorer, navigate to the folder created earlier 
    • Click in a blank area of the address bar, the current path will be hi-lighted
    • Type “cmd” and press enter a command prompt window will open in that directory 
  • File Size
    • type dir ex*, a directory of the file within that directory will be displayed
    • The filesize will be immediately to the left of the filename
  • ChecksumHash
    • Type certutil -hashfile <file> MD5
    • The MD5 hash of <file> will be displayed

Create New Packaging Utility Zip File

  • Once all changes have been made, save evFileInfo.txt 
  • From File Explorer, select all of the files in the folder 
  • Right-click and choose send to compressed folder 
  • This resulting file can be used to Refresh Versions in Enterprise Manager
  • See the exacqVision Enterprise Manager section of Knowledge Base Article #2374 “Using the Software Updates Packaging Utility” for further instructions
Categories
exacqVision Server Products

Hanwha cameras stop recording motion after a day or two

Issue

There is an issue reported for Hanwha cameras that it stops recording on motion after a day or two unless disabled the cameras and re-enabled again to make it works and start to record on motion

Fix

The issue was solved on ExacqVision Server version 22.03 or higher