Categories
Knowledge Support Highlighted Support exacqVision Client exacqVision Server Categories Products

Checking Your Case Status

Did you know that you can check the status of cases you created within the Exacq Support Portal?

After logging into the Exacq Support Portal, open the Support menu. Select My Cases from the menu.

A list of cases that appears will list the status of the case as open or closed. Further details can be found for specific cases by clicking the View Details link.

NOTE: Cases shown are only those where your logged in user account is assigned to the case.

<br>

Categories
Knowledge Support Documentation Quick Start Guides Support exacqVision Client exacqVision Server Categories Products

Setting a Static IP on an ExacqVision Server

Product 

ExacqVision Server

Solution

  1. Open the ExacqVision Desktop Client application and click the gear icon from the upper-left toolbar to enter Configuration mode.<br><br>
  2. Using the navigation tree along the left-hand side, locate the name of the server. If this is a new system that has not been renamed it will simply read ‘ExacqVision Server’.<br><br>
  3. Click the plus (+) icon beside the server name to expand the options, then click on the Configure System node.<br><br>
  4. Then navigate across the top to the Network tab.<br><br>
  5. Select the interface you want to change.

    On a dual NIC system, you should have a ‘Data’ and a ‘Management’ interface. It is recommended to use ‘Data’ for camera connections and ‘Management’ for all other network traffic coming in and out of the server.
    See the Example Network Diagram for Dual NIC Systems, that illustrates this concept.<br><br>
  6. The right-hand side of the Network settings will populate with the settings for the selected interface you chose on the left.

    Within Network Configuration you may choose Dynamic or Static. Dynamic will obtain an IP address automatically from an available DHCP server on startup. To set an IP manually, select Static.<br><br>
  7. Enter the desired static addresses for:
    • IP Address
    • Netmask (Network Mask)
    • Gateway
    • Primary DNS (required)
    • Secondary DNS (optional)

      If you are unsure of these settings, please check with the network administrator of the installation site. Ensure that the IP Address is not in use by another device on the network.<br><br>
  8. Once completed, click the Apply button. Allow a moment for the system to update the network settings. You can then add it to your ExacqVision Client.

<br>

Categories
Video Library Configuration exacqVision Client Categories Products

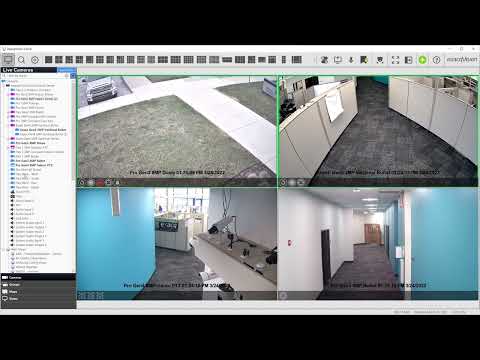
Getting Started With ExacqVision Client

Get acquainted with the ExacqVison Client software.

Additional videos are available for each page and function in the client.

Categories
Knowledge Support Support Categories Products exacqVision Integrations

Login refused when adding a Kantech server in exacqVision

Purpose: To allow an exacqVision server to authenticate to a Kantech server successfully, we must first give that user permission to do so. This guide assumes that SmartLink has been installed and is being utilized.

Procedure:

  1. Go to Kantech server and open the Entrapass software
  2. Open the Operator tab
  3. Select desired user
  4. Select Web parameters tab
  5. Check Allow login and Concurrent logins boxes
  6. Select Save on top (disk icon)
  7. Try to reconnect on the exacqVision side to confirm

    NOTE:
     Will not work with default user/pass values
Categories
Knowledge Support Support exacqVision Server Categories Products

Samsung PTZ functionality loss in exacqVision Server 20.03

Issue

 Samsung PTZ functionality loss in exacqVision Server 20.03

<br>

Workaround

Re-enable mechanical PTZ for the camera, via exacqVision Client.

<br>

Version Affected

20.03

<br>

Version Fixed

Fixed in 20.03.111 and forthcoming 20.03.7 RC
Categories
Documentation Integrations Categories Products exacqVision Integrations

exacqVision Serial Integration User’s Guide

exacqVision-Serial-Integration-Users-Guide.pdf
Categories
User Guides Categories Products exacqVision Integrations

How to Create a User in Kantech for Security Integration with exacqVision

Configuring an Operator to Receive Events from the EntraPass server

1. Login to the Workstation using installer credentials.

2. Add a new Workspace (System > Workspace).

    a. Select all applications, gateways, controllers, doors, relays, and inputs under their respective tabs.

        The screenshots below show the workspace permissions for the ‘exacqws’ workspace.

        All applications, gateways, controllers, doors, relays, and inputs are selected.


3. Add a new Security Level (System > Security Level).

    a. Click on the ‘New’ icon and add a new security level. This example shows we have named it ‘exacqsl’.

    b. Workstation > Operation


    c. Note that only the top-level Door, Relay, Input, and Alarm System are selected.

        The sub-items are not selected.


    d. Scroll down to Workspace > Devices. Select Door, Relay, Input, and Integrated Panel sub-items.

        Select the Read checkbox on the left, as shown.


    e. Leave all other options and sub-options to their default values.

4. Add a new Operator (System > Operator).

    a. Create a new operator ‘exacquser’. Remember to enable ‘Concurrent Logins’ settings as this will

        allow you to connect from multiple servers using the same operator credentials.


    b. On the Security tab, select the ‘Login schedule’ and set it to use ‘Always valid’.

        This will allow an exacqVision Server to always remain connected to EntraPass and receive events.


    c. For the ‘Security level’ and ‘Workspace’ fields, select the security level and workspace you created in the steps above. Leave all other options to their default values.

<br>

Configuring an Operator to Send Commands to EntraPass

To increase the security of the exacqVision – EntraPass integration, exacqVision clients require the credentials for a “more privileged” operator if they wish to perform output actions. Some operators may not have the permission to access certain doors, in which case, the controls for performing certain actions are hidden/disabled from the user. It is still possible that an operator is permitted to view that door, but they may not have the security level to unlock a door. This information is currently unavailable to exacqVision Server at this time, so when an operator tries to unlock a given door, that operation will fail. 

To create additional operators with additional security levels on EntraPass, repeat steps 2, 3, and 4 above with the following adjustments.

1. Uncheck restricted doors from the list of doors (or relays, inputs, etc.) in the ‘Create New Workspace’ section. In the screenshot below an operator can only access two out of the nine doors configured.


2. Under System > Security Level > Workstation, make sure that the door lock/unlock and relay activation privileges are granted to the new user when creating a new security level. The example below shows a new security level that allows an operator to lock/unlock a door, enable/disable a door reader and activate/deactivate a relay.


3. When sending a command to EntraPass, the exacqVision Client will prompt for the second operator credentials.


4. Enter the credentials for the second operator. Only those doors, relays, and inputs that this user can access will be highlighted in the client and made available for sending commands to EntraPass.

<br>

How-to-Create-a-User-in-Kantech-for-Security-Integration-with-exacqVision-1.pdf

Categories
Knowledge Support Support exacqVision Client exacqVision Webservice Categories Products

Adding a new server to the exacqVision Integrator Services Portal Outbound Connections Tab

To add a new server to the Integrator Services Portal(ISP) instance you will need a thick client connection to the server.

Proceed to the server outbound connection tab:

  1. Click on Configure to enter your Portal credentials.

    Portal credentials are provided when your dealer ISP instance is created. If you don’t have a portal account submit your information at https://exacq.com/contacts/form/
  2. You can also reset your password for the portal using the Reset password link
  3. Enter your ISP credentials if you are not already logged in.
  4. The new server will show up as connected in your dealer ISP instance.

<br>

Categories
Knowledge Support Support exacqVision Server Categories Products

Can exacqVision Hybrid Systems use MPEG-4 Simple Profile?

Yes. eDVR systems use MPEG-4 Advanced Simple Profile by default, and sDVR systems use H.264 by default. To configure the system, complete the following steps for your system type.

<br>

eDVR Systems

  1. Stop the exacqVision Server in Service Control Manager or by running sudo /etc/init.d/edvrserver stop.
  2. Open c:\windows\XDVAPI.ini in Notepad or run sudo nano /usr/local/xdvapi/etc/XDVAPI.ini.
  3. Add MPEG = 0x2C00 in the [config] section. The default value, if missing, is 0x0C00.
  4. Save and exit.
  5. Restart the exacqVision Server.

<br>

sDVR Systems

  1. Stop the exacqVision Server in Service Control Manager or by running sudo /etc/init.d/edvrserver stop.
  2. Open c:\windows\stretch.conf in Notepad or run sudo nano /etc/stretch.conf.
  3. Find the board in your system and add MPEG4=”1″ to the XML element. The default value, if missing, is 0.
  4. Save and exit.
  5. Restart the exacqVision Server.

<br>

Can-exacqVision-Hybrid-Systems-use-MPEG-4-Simple-Profile.pdf