Feature – Support for Wasabi S3 as archiving target (AESW-11025)
exacqVision Web Service
Bug Fix – Fixed 24.03 issue where iPAD experienced video buffering and timeout errors (AESW-10945, AES-839, AES-863, AES-909)
Bug Fix – Web client supports session timeout detection, respects the login token (AESW-9753, AES-774)
exacqVision Enterprise Manager
Bug Fix – Add missing pagination endpoints
(AESW-11414)
Exacq Mobile 3
Bug Fix – Fixed issue with video failing to play after one hour
Enhancement – Added notification to point users to new exacqVision Mobile app (AESW-9166)
exacqVision Mobile
exacqVision Mobile requires Server version 24.09 or higher
Remote Connectivity requires Client 24.09 or higher as the Client is needed to connect to the cloud switchboard and generate access codes
If SSA expiration or OS requirements prevent updating to Server 24.03, users will need to continue using Exacq Mobile 3, with the exacqVision Web Service
Exacq Hardware
Hardware Revisions
C-Series 16S & 32S
G-Series Micro
G-Series PoE 8ch & 16ch
Q-Series Desktop & Desktop Hybrid
A-Series 2A & 2A Hybrid (no RAID)
A-Series FA & FAR (RAID)
X-Series 1U & 2U (RAID)
exacqVision Advantage
Provides free exacqVision licensing on BBE hardware for most models of Illustra Flex and Pro cameras (Gen3, Gen4, and future generations).
Does not apply to the Flex Gen3 Multisensor, which is ONVIF only, does not have the Illustra API
When configured properly, exacqVision may be configured to react to Elgato Stream Deck to take actions, such as changing camera views or activating output alarms. This is made possible by exacqVision’s Serial Profile settings combined with Event Monitoring or Event Linking. This guide provides the steps needed to get started, which you may customize to suit your needs.
IMPORTANT: This guide is provided for user benefit, but Exacq Support will not provide assistance or troubleshooting for Stream Deck devices or Stream Deck software.
<br>
Stream Deck Configuration
Download and install the Stream Deck software, which includes drivers needed to recognize the device when plugged into your workstation as well as software used to customize its behavior.<br><br>
Open the Stream Deck software from the Start menu or system tray on the taskbar. Stream Deck has limited capabilities out of the box, but provides a marketplace where developers offer plugins to expand its functions, similar to adding apps to your mobile phone or tablet.<br><br>
With the Stream Deck software window open, access the Marketplace by selecting the Marketplace icon, which will open a web browser to the Marketplace page.<br><br>
Use the search field to find CommandSender, which at the time of this writing was the most capable plugin available for this purpose and free to download and install.<br><br>
Click on CommandSender in the search results, then select the Get button. Once installed, return to the Stream Deck software.<br><br>
Locate and expand the Custom section from your actions panel on the right, then expand the CommandSender item. Drag an instance of the Send Command action from the panel onto a button in your layout. This button is customized in the lower part of the window.<br><br>
Set the Communication Type to ‘TCP’.<br><br>
Enter the IP address of the system running your exacqVision Server into the IP Address field. The Port number defaults to ‘45671’, but you may customize this if that port is already being used on your system.<br><br>
In the Command Pressed field, enter something unique and descriptive to the action you want to take. In the pictured example we enter GoToCamera 09 because in later steps we will configure a camera panel to change when pressed. This text can be anything you’d like because you will pair it to an action in later steps.<br><br>
Next, add the code for a line feed, \x0a, to the end of your command. This is used to help separate commands when received by exacqVision.<br><br>
You will not use the Command Released field for use with exacqVision.<br><br>
Finally, you can choose to customize the icon using icons from Stream Deck, import icon packs from the Marketplace, or upload custom icons you’ve created. You also have an optional Title field.<br><br>
You may add as many instances of the CommandSender plugin to your button layout as you wish, but the Command Pressed field should be unique for each one. The IP Address and Port fields should be the same unless you are sending commands to different NVRs.<br><br>
<br>
exacqVision Serial Port Configuration
You will need Full Admin or Power User privileges on the system to perform the following steps. The steps in this section are performed only once on each NVR you are sending commands to.
Open the exacqVision Desktop Client application and enter Configuration mode by selecting the cog wheel icon in the upper-left corner.<br><br>
From the left-hand navigation panel, expand the system name, then select the Serial Ports node on the tree.<br><br>
Under the IP section, press the New button.<br><br>
In the new row that appears, enter something in the Name field, such as “Stream Deck”.<br><br>
Change the Use column to ‘POS’.<br><br>
Change the Profile field to ‘New…’.<br><br>
Change the Type field to ‘TCP Listener’.<br><br>
In the Address column field, enter the IP address of the workstation you have plugged your Stream Deck into.<br> NOTE: It is expected that you will connect the Stream Deck to a Client workstation, but if you are connecting it directly to the system running the exacqVision Server application, the IP Address used here and in CommandSender will be 127.0.0.1.<br><br>
In the Port field, enter the port number displayed in CommandSender, which by default is ‘45671’.<br><br>
The remaining fields are left as is.<br><br>
Because ‘New…’ was selected in the Profile column, when you press the Apply button you will be automatically taken to the Serial Profiles page to configure the profile described in the next section.<br><br>
<br>
exacqVision Serial Profiles Configuration
Begin by providing a descriptive Name to your Serial Profile.<br><br>
Test the ability to receive commands from the Stream Deck by pressing the configured CommandSender button on the panel. You should see the commands you configured on the button appear in the data window.<br><br>
For this use case you do not need to enter anything into the fields for SOT marker or EOT marker.<br><br>
Select the Event Keywords tab.<br><br>
Press the New button.<br><br>
In the String field, enter the text exactly as you entered when configuring the button in CommandSender, without the line feed code.<br><br>
Press Apply to save your changes.<br><br>
<br>
NOTE: If you need additional help with the configuration of Serial Ports or Serial Profiles, please see the exacqVision User Manual or refer to our User Training Videos on the Exacq Support Portal covering these features.
<br>
Event Monitoring and Event Linking
As this document is not intended to be a complete training guide on the use of exacqVision’s Event Monitoring and Event Linking features, we will provide a single example of changing a camera panel to display another camera when the button is pressed. Keep in mind that Event Monitoring provides client-side actions visible to the user of the workstation, such as changing camera panels, live Views, enabling audio, or digital PTZ presets, while Event Linking performs server-side actions, such as recording video, mechanical PTZ presets, auto exports, sending notifications, or triggering webhooks.
NOTE: For additional help with the configuration of Event Monitoring or Event Linking, please see the exacqVision User Manual or refer to our User Training Videos on the Exacq Support Portal on these features.
For this example:
Select the Event Monitoring node on the navigation tree, located near the top of the left-hand panel.<br><br>
Press the New button under the Profiles panel and enter a descriptive Name in the Profile Configuration area to the right.<br><br>
Change the Show Event List field to ‘On Event’.<br><br>
Check the Show Newest Event box.<br><br>
Set the Type selection to ‘Video Panel’.<br><br>
The first Client Action is added for you. Configure the default action by selecting ‘Default’ from the Event Type panel. Default events do not have an Event Source to select.<br><br>
From the Action Type panel, select ‘Switch Video’.<br><br>
Select a camera from the Action Target panel to display when nothing else is being triggered.<br><br>
Press the New button under the Client Actions panel in the middle of the window.<br><br>
From the Event Type panel, highlight ‘Serial Profile’.<br><br>
You may have many items listed on your system, or several systems to select from. The drop-down menu will filter to specific systems or show them all. Select the item displaying the name of the Serial Profile you created earlier with the Keyword you configured. The profile is monitoring the incoming data being sent from CommandSender on your Stream Deck for this Keyword.<br><br>
Select ‘Switch Video’ from the Action Type panel.<br><br>
Choose a camera from the Action Target panel that you want to display when the Stream Deck button is pressed.<br><br>
Next, you’ll set exacqVision to return to the Default camera after a set number of seconds rather than forcing a user to click in the Event List panel to acknowledge it each time.<br><br>
Uncheck the Confirm checkbox near the bottom of the window.<br><br>
Change the Timeout field to “5”.<br><br>
Press the Apply button to save your changes.<br><br>
<br>
Use the same Event Monitoring profile you just created to continue adding additional Client Actions for each CommandSender button you have configured on the Stream Deck.
Navigate to the Live view in the Client window to test your setup.
Drag several different cameras to the layout.<br><br>
Right-click one of the panels. In the menu that appears, expand Event Monitor, and select the name of the Event Monitoring profile you just created. The camera you configured as the Default should display. <br><br>
Press the CommandSender button you created on the Stream Deck. This camera panel should now change from the default camera to the camera you configured in your Event Monitoring profile with the Event Keyword.<br><br>
After the 5 second timeout period you set, the camera panel should return to the Default camera.
<br>
Opening the exacqVision Client
If you’d like to create a button on your Stream Deck to automatically open an instance of the exacqVision Client, this can be done without additional plugins or serial data configuration using the built-in Open action.
Within Stream Deck, perform the following:
Expand the System menu from the actions panel.<br><br>
Drag an instance of the Open action from the panel onto an empty button in the layout.<br><br>
Customize this instance near the bottom of the window.<br><br>
Provide an optional Title and/or customize the button’s icon.<br><br>
In the App/File field, either navigate to the edvrclient.exe file on your machine, or enter the path manually. The default path is C:\Program Files\exacqVision\Client\edvrclient.exe
Users of customized Client .XDV files may open instruct the Open action to open the client using their desired .XDV file by adding the file path to the file. e.g.- C:\Program Files\exacqVision\Client\edvrclient.exe -F"C:\Users\myUserName\Documents\myCustomFile.xdv"
Reports of 23.09.9.0 Server would cause the Capture Card to show video loss on live page. This was not affecting video recording as live and recorded video were searchable.
Product
Server 20.09.9.0
Steps to Reproduce
Update server from server version prior to 23.09.9.0
As with all third-party software not on the Product Integration section, the user assumes the risk of software incompatibility with the exacqVision software suite.
Therefore, if there is an inquiry on what an AV program found and is blocking we should open a ticket with engineering and confirm what the file is, and what it does to help maintain a list of examples that can be excluded.
It is recommended to exempt certain files if they are targeted by scans of the Antivirus program to allow proper functionality of the software.
List of examples for certain scans and why they are important for Exacq Software.The file extension may be ‘.exe’, ‘.ps’ or ‘.ps.1’ for Windows. In Linux it will be ‘.sh’.
curl – Utilized to download updates, email and sync with EM.
dhcpconfig – Utilized for enabling/configuring the DHCP Server
driveprep – For partitioning new data drives.
dvdrwtools – For burning of a DVD/CD.
dvd+rw-mediainfo – For burning of DVD/CD.
evselftest – Utilized to scan disks for errors.
failover – Utilized for failover/failback.
iscsiprep – For configuring Extended volumes.
lshw – Utilized to gather hardware/software information about a system.
mediainfo – For burning of DVD/CD
mdnsd – For discovery of IP devices, Servers and Clients.
mDNSResponder – For discovery of IP devices, Servers and Clients.
mkbadst_config – For configuring Extended volumes.
mount – For mounting new data drives.
netconfig – For configuration of Network Interface parameters.
ntpd – For management of Time Servers and synchronization.
ntpdate – For management of Time Servers and synchronization.
opendhcpd – Utilized for enabling/configuring the DHCP Server
opendhcpserver – Utilized for enabling/configuring the DHCP Server
parted – For partitioning new data drives.
rmfs – For partitioning new data drives.
smartctl – Utilized to gather health (S.M.A.R.T.) data from drives.
sysinfo – Utilized to gather hardware/software information about a system.
teaming – For creating NIC bonds.
tzutil – For configuring the Time Zone settings of the OS.
update – Utilized to download and install updates as well as failback of recorded data.
w32time – – For configuring the Time settings of the OS.
wodim – For burning of a DVD/CD.
winio – This script is part of sysmgmtpi which monitors the health of the server and drives. The winio64.sys is the driver that allows part of that functionality.
Learn how to navigate the exacqVision Client software and get an introductory look at many of its features.
Chapters
00:00 Intro
00:19 Three Client Modes
00:29 Live Viewing
01:03 Camera Associations
01:13 Mechanical & Digital PTZ
01:50 Fisheye/Dewarp
02:06 View Analytics
02:38 Search & exacqReplay
03:08 Search
03:34 Serial Search & Analytic Filters
03:59 Bookmarks & Cases
04:20 Configuration
05:55 Help Menu
06:27 User Training Videos
This article describes why some menu options may not appear to all users of the exacqVision Client software.
Products
exacqVision Client (all versions) – on Windows OS
Issue
When pressing the Show Help button (?) in the upper-right corner of the exacqVision Client, some menu options are missing.
When selecting Support Diagnostics from Show Help menu, the only button provided is Save.
Expected Results
Pressing the Show Help button provides many options, several of which link to useful pages on Exacq.com or the Exacq Support Portal.
Actual Results
The Show Help menu provides only Help, Support Diagnostics, and About options.
When exporting Support Diagnostics, the Upload button is not available to directly access and use the support web form page.
Solution
This is expected behavior when the exacqVision Client software is not run with administrator privileges. This is controlled by the operating system.
To resolve temporarily, right-click on the exacqVision Client icon and choose Run as Administrator, or if performing from the Start menu Favorites, right-click the exacqVision Client icon, select More, then choose Run as Administrator.
To resolve permanently, add the operating system user to the local OS Administrator group.
NOTE: Solutions listed above may not be possible if the IT policies at the site do not permit exacqVision Client workstation operators to have admin access.
This document will guide you through step-by-step procedures for keyboard use and suggested button mappings.
Product
Axis TU9001 Control Board
TU9002 Joystick
TU9003 Keypad
The Axis TU9001 Control Board consists of the combination of the TU9002 Joystick and the TU9003 Keypad.
IMPORTANT: The TU9002 and TU9003 appear to the operating system as separate devices. As of Client version 24.03 only one Joystick device may be enabled on a workstation at a time. This article will be updated in the case of further enhancements.
<br>
Setup
Follow the Installation Guide from Axis for the steps to attach the two devices and connect the corresponding USB cables.<br><br>
Plug the keyboard’s USB cable into the USB port on the Client viewing machine, where the keyboard will be operated from.<br><br>
Navigate to the Joystick configuration page within the exacqVision Client.
Select the cog wheel icon in the top left-hand corner of the Client window to enter Configuration settings.
Expand Client from the navigation tree on the left-hand side.
Select Joystick from the tree to load the Joystick configuration page.<br><br>
Select the joystick that appears from the drop-down menu. If the device fails to appear, close and re-open the exacqVision Client instance. <br><br>
Select the Calibrate button to zero out the joystick positioning.<br><br>
Adjust the sensitivity to your liking.
X/Y Axis controls camera Pan/Tilt, while Z Axis controls zoom.
Suggested settings include increasing the sensitivity on the X/Y Axis and Z Axis.
<br><br>
Pressing any of the buttons on the keyboard will highlight that number in the button menu to help you find the corresponding mapping. You may need to scroll the window if you do not see the button highlighted when pressed. <br><br>
Once you have located the button, you may use the drop-down menu to select the action you wish to assign to the button.<br><br>
After applying changes to the keyboard configuration, return to the Live camera view and the controls will be available for use.
<br>
Buttons on the TU9002 Joystick
The TU9002 features 7 buttons across the top of the device and 2 buttons on top of the joystick. The center Toggle button along the top acts as a Function Key. When pressed this will highlight button 17 in the button map, but you should notice the illuminated LEDs shift on the device. This toggles the ability to assign additional actions to each of the other buttons on the device.
For example, when the buttons are illuminated above, pressing J1 will highlight button 1 in exacqVision. If the center button is pressed, the illumination shifts below the buttons. Pressing the same button now highlights button 9 in exacqVision. The actions available in exacqVision Joystick settings do not align with the rewind, play/pause, forward symbols indicated on the device.
The TU9002 Joystick also features the ability to switch between joystick and mouse modes. The default mode is set to act as a joystick. Switch to mouse mode by pressing and holding the center Toggle button then press the J1 button. Moving the joystick now moves the mouse cursor. While in mouse mode the J1, J5, and left joystick button act as a left-click. The J2, J6, and right joystick button act as a right-click. Press and hold the Toggle button then press the J1 button again to revert back to joystick mode.<br><br>
<br>
Troubleshooting
Check that the device is recognized by the operating system.
Windows – Navigate to Start > Control Panel > Game Controllers
Ubuntu/Linux – Open Terminal and run ‘lsusb’ to see if the devices are listed
DebugView is a tool that can be used to collect more data from PS files in cases where we are missing data from streams or exhibiting issues with exported files.
Once you have exported the PS file from a server you can download the DebugView application and open the program. With Debug View opened, perform the following steps:
Run CMD on a Windows machine using Run as Administrator<br><br>
Change your working directory to the directory where the PS file is located, using the ‘cd’ command. Example: In this example the file is located on the Desktop cd C:\Users\username\Desktop<br><br>
Run the file by entering the file name, and add the ‘-V’ parameter to the end. If located in a different directory, enter the file path. Example: In this example the file name is ‘3505-001A0280.ps’ 3505-001A0280.ps -V or C:\Users\username\Desktop\3505-001A0280.ps -V<br><br>
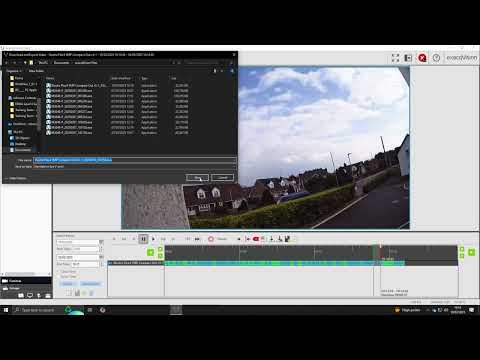
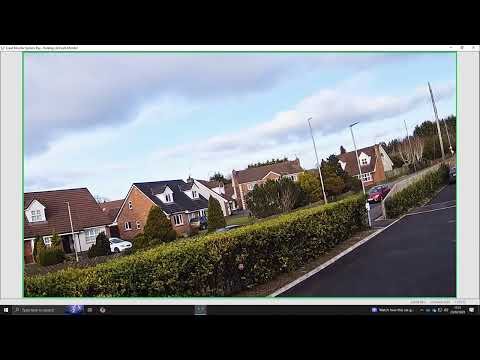
When the Exacq ePlayer opens, press the play button.<br><br>
DebugView will log activity during playback. Save the file as soon as the clip has finished playback to avoid logging your mouse and keyboard activity.
In this Example- We have an issue where the data that was recorded is not viewable when searching, exporting the video. This tells us that the cameras were getting some of the stream information but not all of the stream information that is vital to play back the video that was recorded. This might suggest that the camera was in a bad state, low power mode or there was something taking place.