exacqVision supports connecting to many cameras using HTTPS. Depending on the camera firmware capabilities and the device type plugin used in exacqVision the level of encryption provided may vary.
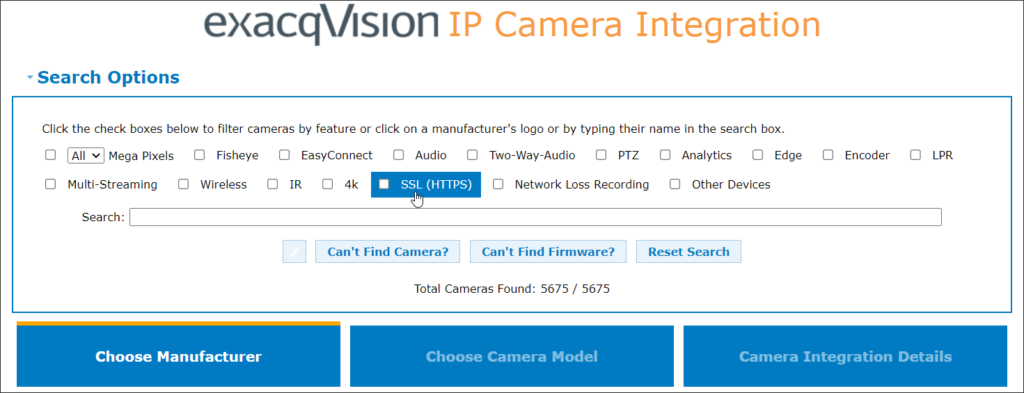
Using the IP Camera Integration Database, you may choose to filter the displayed results by devices which support SSL (HTTPS).

<br>
Connecting with HTTPS
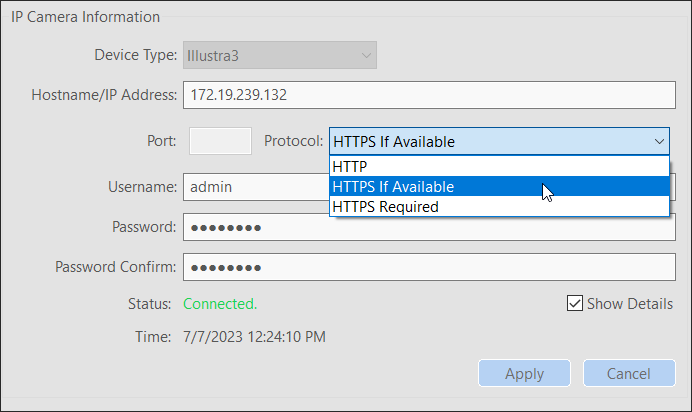
When adding a new camera to an exacqVision Server or editing an existing camera connection, the IP Camera Information section on the Add IP Cameras page provides a Protocol drop-down menu. The following options are available:
- HTTP
- HTTPS If Available
- HTTPS Required

Selecting ‘HTTPS If Available‘ does not permit customizing the Port number field. This option will attempt to connect to the camera using HTTPS on port 443. If this attempt fails it will fall back to attempt connection with HTTP on port 80. This may add a small delay to the initial connection as it tests HTTPS first.
Selecting ‘HTTPS Required‘ will only permit connection to the device using HTTPS. If the device cannot accept such a connection the device will fail to connect. You are permitted to change the Port number field should your camera be configured to provide HTTPS over a custom port number.
<br>
HTTPS Connection Symbols
The IP Camera List on the Add IP Cameras page as well as the Camera Recording page provide symbols in the Protocol column allowing you to quickly view which devices are connected with HTTPS and to what level.

An empty field in the Protocol column indicates an HTTP connection.
The gear icon denotes that the connection is made to the device with HTTPS, which encrypts the login credentials to the device, the camera web interface in the Client’s web panels, and CGI commands made to the camera.
A padlock icon in the Protocol column indicates that the HTTPS connection encrypts the credentials, web page, and CGI commands, but also includes encryption of the video stream.

NOTE: HTTPS between the exacqVision software and camera encrypts only the communications between those two devices.
<br>
Enabling HTTPS on Your Camera
Cameras will vary from manufacturer to manufacturer as well as between versions of firmware. Legacy firmware on some devices may require you to apply your own certificate. Many IP cameras today provide HTTPS support out-of-box using self-signed certificates. Below, we examine the settings on an Illustra IQ camera. For other devices, please refer to your device’s documentation.
NOTE: When accessing a camera through the web browser interface using HTTPS, your browser may warn you or prompt you for permission to continue due to having a self-signed certificate. A self-signed certificate can be used to encrypt communication but cannot provide certificate validation. Certificate validation requires the certificate be issued by a Certificate Authority (CA).
Some devices may require you to generate a new self-signed certificate if you have changed the IP address since the last certificate was created.
<br>
Illustra IQ Cameras
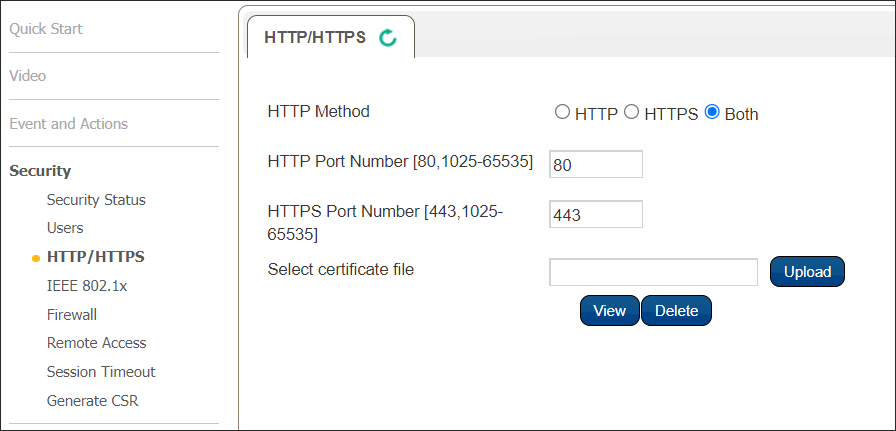
Illustra IQ devices provide self-signed certificates out-of-box. When entering the Setup mode of an Illustra IQ camera expand the Security menu, then navigate to the HTTP/HTTPS page, as shown.

This page allows you to configure the port number used. Using the Upload button will allow you to upload your own certificate from a trusted Certificate Authority rather than using the camera’s self-signed certificate.
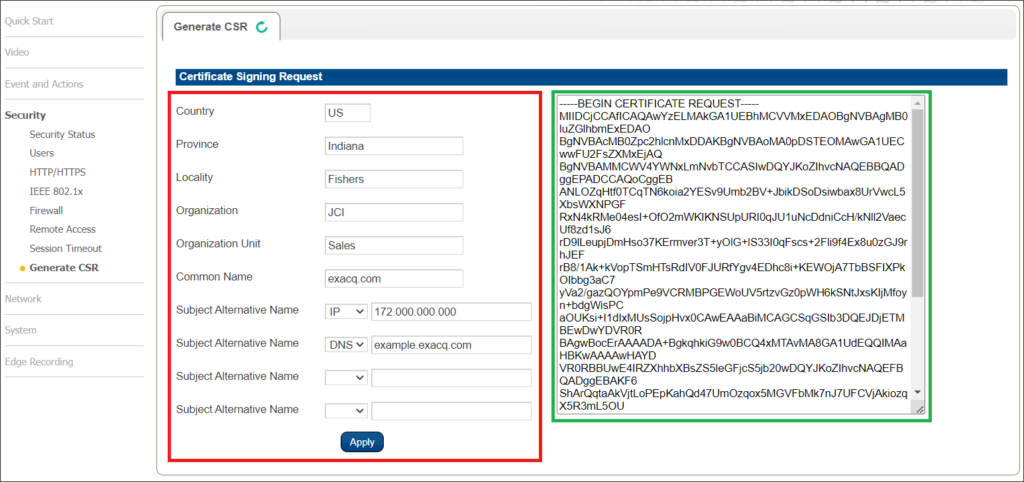
If you decide to use a certificate from a Certificate Authority you must provide them with a Certificate Signing Request (CSR) from the camera. Each camera requires its own, unique certificate from your CA.
NOTE: Do not use wildcard certificates for this purpose.
To generate a CSR file to provide to your CA, navigate to the Generate CSR page, also found under the Security menu. Complete the form on the left as required for your site and needs, then click Apply. The field to the right will populate. You will copy the data from this field into a new text file, but save it as a .CSR file. If you accidentally save the file as .txt, simply replace the .txt file extension with .csr. Provide this file to your CA.

<br>