Categories
Video Library Configuration exacqVision Client Categories Products

Systems

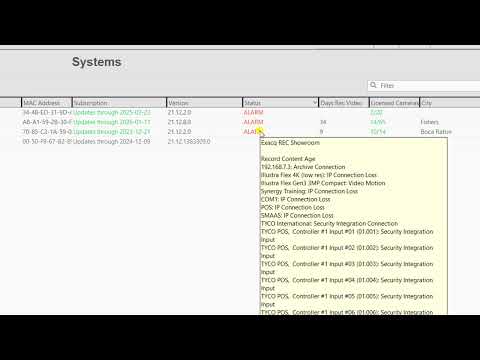
Explore the Systems page, in the ExacqVision Client, and how you can use it to gain a wealth of information about several of your systems at once.
Categories
Knowledge Support Support exacqVision Client exacqVision Server Categories Products

Frequent Restarts on Linux Systems Archiving over Slow Network

Linux-based exacqVision servers could reboot frequently in certain conditions:

  1. Linux operating system
  2. Active hardware monitoring
  3. Archiving over a slow network (WAN or other network with limited resources)

This issue was fixed in version 6.3.33.65575, and it is available in public release 6.4.

To work around this issue in affected versions, complete the following steps to configure an archiving SMB share:

  1. In exacqVision Client, delete the currently enabled archive task. DO NOT disable the archive target.
  2. Open the /etc/fstab file on the server for editing.
  3. Locate the line with mount paths for the archive target.
  4. Add a flag to the comma-separated section of the line specifying other flags (normally, this should immediately follow rw). The flag added depends on the Linux kernel version used:

    Linux kernel 3.0-3.1 (archiving performance will be impacted)

    //10.16.2.4/disk1 /mnt/10.16.2.4.disk1 cifs _netdev,username=admin,password=admin256,rw,forcedirectio 0 0

    Linux kernel 3.2-3.7 (archiving performance will NOT be impacted if oplocks are supported on the archive target)

    //10.16.2.4/disk1 /mnt/10.16.2.4.disk1 cifs _netdev,username=admin,password=admin256,rw,strictcache 0 0

    Linux kernel 3.8 and later

    //10.16.2.4/disk1 /mnt/10.16.2.4.disk1 cifs _netdev,username=admin,password=admin256,rw,cache=strict 0 0
  5. Save the changes to the /etc/fstab file.
  6. Via shell terminal, execute umount [share path]. For example:

    sudo umount /mnt/10.16.2.4.disk1
  7. Via shell terminal, execute sudo mount -a.
  8. Verify that step 5 was implemented correctly by executing cat /proc/mounts in the shell terminal and locating the line corresponding to the share (such as “directio” if you used the forcedirectio option for kernel 3.0-3.1).
  9. In exacqVision Client, re-create the archive task.
Categories
Knowledge Support Support exacqVision Client Categories Products

exacqVision Compatibility with 4K Resolution Monitors

Many large modern monitors and televisions have a horizontal resolution of 4,000 (4K) pixels. When using certain interfaces to display video, 4K resolution is either unsupported, or it can be displayed only at a refresh rate of only 30 Hz, resulting in choppy video. However, 4K resolution can be displayed at 60 Hz over interfaces such as DisplayPort 1.2.

exacqVision system support for 4K monitors varies by model and release versions:

Support for 4K Resolution Through DisplayPort 1.2 Interface

  1. exacqVision A-Series version xx and later
  2. exacqVision Z-Series version xx and later

<br>

4K Resolution Restricted or Not Supported

  1. exacqVision LC
  2. exacqVision ELP
  3. exacqVision A-Series versions before xx*
  4. exacqVision Z-Series versions before xx*

<br>

*These systems can support 4K resolution only at 30 Hz, resulting in choppy video and increased demand on the system’s processor.

Categories
Documentation Integrations Categories Products exacqVision Hardware

Image Sensing

Image-Sensing.pdf
Categories
Knowledge Support Categories Products exacqVision Integrations

ExacqPacq16 – Service Pack for exacqVision Systems running Ubuntu 16.04.

Several changes and fixes to the exacqVision Ubuntu 16.04 image have been rolled into a single installer – ExacqPacq16. 

Information regarding the changes and the version that were included are available below.  You can check the current Image version and what exacqpacq16 versions (if any) on your Linux machine by running the following in terminal:

head /Release_Notes.txt

head /Release-Notes_ExacqPacq16.txt

<br>

To install on an existing system, use the following steps:

1. Access the hidden downloads page at https://exacq.com/files

2. Download ‘exacqpacq16’ under ‘Ubuntu Service Pack > 16.04″

3. On the exacqVision Server, login to the admin Desktop.

4. Copy the ‘exacqpacq16’ file to the Desktop.

5. Run the following 3 commands in a terminal:

cd /home/admin/Desktop

sudo chmod 775 exacqpacq16

sudo ./exacqpacq16

6. Reboot

<br>

Versions

Version 18-10-06-01

* updated exacq Kiosk to version 18.07.09.04
* updated exacq linux utilities to version 18.08.22.01
* updating exacq vision una to version 18.08.09.01
* install exacqnetrules version 18.09.20.01
* Set swappiness to 10 to improve performance
* set cron job to kill initctl process once and hour. Ticket #11739
* DHCP timeout reduced to 30 Second in networking.service
* ifplugd package removed from image. Ticket #14765


Version 18.06.15.01

* change .xsession errors attribute from +a to +i


Version 18.04.23.01

* Installation log can now be accessed by admin account


Version 18.04.19.01

* Removed Indicator-datetime #14784
* Added Python-requests package #15197
* Removed fcitx0module-kimpanel #14374
* Added libwebkitgtk package #14771
* Install ExacqLinuxUtilities Version
* Install Exacq Kiosk User Version
* Update libegl1-mesa Client Dependancy Debs #15785
* Set X-Session Errors files to Immutable #15464
* Turn off automatic apt update package list #15432
* Puts MSM Shortcut on Desktop if Missing #15308
* Patch x-session errors files filling up root partition Ticket #15432 15426
* Disable automatic Periodic Updates #15464
* installed exacqlinuxutilities version 18.04.04.02
* install exacqkiosk version 18.04.04.01

<br>

ExacqPacq16-Service-Pack-for-exacqVision-Systems-running-Ubuntu-16.04.pdf
Categories
Knowledge Support Support exacqVision Client Categories Products

Connecting cameras over 100m in distance from G-Series PoE or Una recorders

ExacqVision G-Series PoE and Una recorders provide Power-over-Ethernet (PoE) ports for direct connections to cameras, rather than accessing cameras through a switched network.

The TIA/EIA 568 standard provide that the maximum allowable length of a Cat5/5e or Cat6 cable is 100 meters (328 feet) for ethernet networks. To connect a camera farther than 100m away, the network connection must be extended using a method other than a network switch.

The following information explains the trade-offs of using various extender/repeater, midspan and injector technologies to extend the network.

PoE and PoE+ Injectors and Midspans

Advantages:

  • Extends the network segment over 100m
  • Provides additional PoE power, reducing the PoE power drawn from the recorder; useful when the combined power draw of all cameras would exceed system limits:
    • 8-port G-Series PoE, Gen2 – 15 watts per port; 120 watts total
    • 16-port G-Series PoE, Gen2 – 15 watts per port; 240 watts total
    • 4-port G-Series PoE, Gen1 – 15 watts per port; 60 watts total
    • 8-port G-Series PoE, Gen1 – 15 watts per port; 120 watts total
    • 16-port G-Series PoE, Gen1 – 15 watts per port; 240 watts total
    • 8-port Una – 25 watts per port; 120 watts total
    • 16-port Una – 25 watts per port; 240 watts total

Disadvantage:

  • Recorder cannot power cycle cameras that are receiving PoE power from the injector or midspan.

PoE and PoE+ Extenders/Repeaters

Advantages:

  • Extends the network segment over 100m
  • Powered by recorder PoE power; does not require a separate power supply.
  • Cameras can still be rebooted from the ExacqVision Desktop Client PoE port management page.

Disadvantage:

  • A small amount of PoE power from recorder is consumed by the in-line extender, reducing power available to the camera.


Exacq Technologies does not test or make specific recommendations for products to extend ethernet networking.

<br>

Categories
Knowledge Support Support exacqVision Server Categories Products

System Recovery using on-board recovery partition

Exacq systems built after 10/17/2015 include a special partition to allow for quick and easy system restoration to factory default conditions. This recovery will only affect your operating system drive.

<br>

To start the Recovery, during system boot up, prior to loading the operating system, press the “S” key on your keyboard.

You will be prompted to confirm:

Press the “Y” key on the keyboard once and the system recovery will complete itself. Follow any prompts to continue, should they appear. The entire process often only takes a few minutes, but depends on the system.

After the recovery process completes, follow any on-screen setup guides to complete system setup if they are prompted for your system.

<br>

Categories
Knowledge Support Support exacqVision Server Categories

StarTech Prolific USB-to-serial Adapter Not Working with exacqVision

Using a StarTech USB-to-serial adapter with a Prolific (PL2303) chipset and StarTech drivers can prevent the serial port on an exacqVision server to remain open on Windows-based exacqVision servers. The port will report an OPEN status for less than a second before changing to UNAVAILABLE.

<br>

This occurs when exacqVision receives an ASCII control character 0x04 after the user clicks Apply in exacqVision Client. This control character causes exacqVision to close the port, as 0x04 represents End of Transmission. It is assumed that the StarTech drivers are sending this control character.

<br>

The solution is to use Prolific’s reference drivers. To do this, complete the following steps:

  1. Download the drivers from http://prolificusa.com/pl-2303hx-drivers/.
  2. Unzip the file.
  3. Uninstall any other drivers that have previously been installed for the USB-to-serial adapter.
  4. Unplug the adapter from the exacqVision server’s USB port.
  5. Restart the system.
  6. Install the downloaded Prolific reference drivers.
  7. Plug the serial adapter back in to the USB port on the exacqVision server.
  8. Verify that Windows installs the drivers successfully by watching the messages in the Windows System Tray. COM port assignment might also be displayed during this time; if so, take note of the COM number.
  9. Click Start and type services.msc.
  10. Find the exacqVision Server service. Right-click it and choose Restart.
  11. Launch exacqVision Client and open the Serial Ports page. Configure the new port as needed.
  12. Click Apply. This port should now remain OPEN.

<br>

StarTech-Prolific-USB-to-serial-Adapter-Not-Working-with-exacqVision-1.pdf
Categories
Knowledge Support Support exacqVision Server Categories Products

Best Practices When Upgrading Hard Drives on exacqVision Servers

The following considerations are for 32-bit Windows-based A-Series systems without a RAID controller:

  • Desktop and 2U A-Series systems do not have a separate physical drive for the operating system. This means that we cannot load Windows on anything larger than 2.2TB. By default, Windows 7 loads with an MBR partition table, which has a maximum addressable space of 2.2TB.
  • UEFI is not supported for booting with 32-bit versions of Windows.
  • The operating system needs its own partition (30-60GB) to use the rest of the drive as storage. If the drive containing the operating system is replaced, you will need to back up your settings and other important information, so plan accordingly. 
  • Although it is possible to use a storage drive that is larger than 2.2TB with GUID Partition table (GPT), we do not support mixed-capacity systems.
  • A BIOS upgrade might be required to detect >2TB drives for older systems.

Bottom line: 2TB drives are the maximum supported upgrade for 32-bit Windows-based Desktop and 2U A-Series systems.

<br>

The following considerations are for 32-bit Windows-based A-Series and Z-Series systems with a RAID Controller:

  • 4U A-Series systems (JBOD or RAID) use a separate boot partition made by the RAID Controller. Windows detects as a separate drive, so MBR may be used and the operating system may be installed here. If the drive containing the operating system is replaced, you will need to back up your settings and other important information, so plan accordingly.
  • All Z-Series systems use a separate physical drive for the operating system. We use this separate drive exclusively to install the operating system. This drive should not have to be changed when upgrading the storage drives.
  • With JBOD and RAID arrays larger than 2.2TB, GPT must be used to see the entirety of the drive.
  • Although it is possible to add larger drives to an existing RAID array, the controller will base the capacity on the drive with the lowest capacity. Even if all drives are replaced with larger capacity drives, the controller will not automatically adjust to the larger size. You will need to destroy and re-create the RAID array, so plan accordingly.
  • Also, it is possible to mix capacities with JBOD arrays. However, JBOD arrays are not fault-tolerant, and the existing data on the drive will be lost, so plan accordingly. Of more importance, we do not support mixed-capacity systems.
  • A BIOS upgrade and/or controller firmware update might be required to detect >2TB drives for older systems.

Bottom line: 6TB drives are the maximum supported upgrade for 32-bit Windows-based 4U-Series and all Z-Series systems.

<br>

The following considerations are for 64-bit Windows-based A-Series and Z-Series systems:

  • We use UEFI partitions and GPT with 64-bit Windows-based systems. This eliminates the 2.2TB limit of MBR partitioning on the operating system drive.
  • However, if the drive containing the operating system is replaced, you will need to back up your settings and other important information, so plan accordingly.
  • Although it is possible to add larger drives to an existing RAID array, the controller will base the capacity on the drive with the lowest capacity. Even if all drives are replaced with larger capacity drives, the controller will not automatically adjust to the larger size. You will need to destroy and re-create the RAID array, so plan accordingly.
  • Also, it is possible to mix capacities with JBOD arrays or single drive systems. However, JBOD arrays are not fault-tolerant, and the existing data on the drive will be lost, so plan accordingly. Of more importance, we do not support mixed capacity systems.

Bottom line: 6TB drives are the maximum supported upgrade for all 64-bit Windows-based systems.

<br>

The following considerations are for Linux-based LC, EL, ELS, ELX, ELP, A-Series, and Z-Series systems:

  • All Linux systems use a separate physical drive for the operating system (except for LC, as explained below).
  • We use either ext3 or ext4 file systems (depending upon the Linux version). In either case, we use a maximum single drive size of 16TB. For systems that have more (RAID systems), the drives must be split up into smaller, equal partitions. Using the diskprep.sh script will achieve this split automatically.
  • Although it is possible to add larger drives to an existing RAID array, the controller will base the capacity on the drive with the lowest capacity. Even if all drives are replaced with larger capacity drives, the controller will not automatically adjust to the larger size. You will need to destroy and re-create the RAID array, so plan accordingly.
  • Also, it is possible to mix capacities with JBOD arrays or single drive systems. However, JBOD arrays and single drive systems are not fault-tolerant, and the existing data on the drive will be lost, so plan accordingly. Of more importance, we do not support mixed capacity systems.
  • LC systems: LC systems do not have a separate boot drive. Before you upgrade the drive, back up the configuration and any other important information. Additionally, the data on the drive will be lost, so plan accordingly. The LC recovery image accounts for the single-drive setup, but it should not be used with other types of systems. LC also uses a different drive model than the other models.
  • A BIOS upgrade might be required to detect >2TB drives for older systems.

Bottom line: 6TB drives are the maximum supported upgrade for all Linux systems if all drives are replaced at the same capacity.

<br>

A note about drive speed:

  • Based on the age of the system, either the RAID controller or the SATA port on the motherboard may only support hard drives at 3 GB/s (SATA II). While this does not limit the motherboard from potentially detecting the larger drive, it will reduce its performance as new drives purchased from exacqVision will be 6 Gb/s (SATA III) drives.
  • Some motherboards do not have SATA III connectors, some only have two to four. Older RAID controllers only support SATA II speeds on drives.
  • For assistance on determining which motherboard you have and which connector to use, please contact Technical Support with your system’s serial number (number beginning with ER).

<br>

Best-Practices-When-Upgrading-Hard-Drives-on-exacqVision-Servers.pdf
Categories
Knowledge Support Support Categories Products exacqVision Hardware

How to Re-order Capture Boards with exacqVision
Purpose: After upgrading the operating system or re-imaging an exacqVision server, the capture board order might be changed. In most cases, the board designated Device 2 is now Device 1, and Device 1 is now Device 2. The following procedure explains how to change the capture board order back to the desired order.

<br>

Step 1: Obtain the serial numbers from the capture boards.

  1. Open exacqVision Client and navigate to the Config (Setup) page (gear icon).
  2. In the left pane, navigate to the first capture board that is out of order.
  3. Select the capture board (such as Stretch VRC6016).
  4. Write down the serial number observed in the device information.
  5. Repeat this process for the other capture board that has changed in the order.

<br>

Step 2: Stop the exacqVision service.

  1. Click Start, type services.msc, and press Enter.
  2. Navigate down the list and find exacqVision Server.
  3. Select exacqVision Server and then click Stop.

<br>

Step 3: Edit Capture Board xml.

  1. Run Start > All Programs > Accessories.
  2. Right-click on Notepad and select Run as Administrator.
  3. Select File > Open. Change the search type from text to all files.
  4. Navigate to Local Disk (C:) > Program Files > exacqVision > Server.
  5. Scroll down the list and select StretchPI.xml (sdvr). Click Open.
  6. With the xml open, press Ctrl+F to open the Find window. Type serial and select Find Next.
  7. Replace the serial number of Device 1 with the serial from Device 2 using the numbers you wrote down in Step 1.
  8. Select Find Next in the Find window. Replace the serial number of Device 2 with the serial from Device 1.
  9. Press Ctrl+S to save the modified xml.

<br>

Step 4: Start the exacqVision service.

  1. Click Start, type services.msc, and press Enter.
  2. Navigate down the list and find exacqVision Server.
  3. Select exacqVision Server and then click Start.

<br>

Step 5: Confirm that the boards are back in the desired order.

  1. In exacqVision Client, make sure the board order has changed as desired. This will be apparent because the camera names will have changed order back to their original order from before the operating system upgrade or re-image.
  2. After this confirmation, close all other open windows.

<br>

How-to-Re-order-Capture-Boards-with-exacqVision-1.pdf