Categories
Knowledge Support Support exacqVision Client Categories Products

Client Settings File Location

Windows 7/10:  C:\Users\%username%\AppData\Roaming\edvrclient\edvrclient.xml
Windows XP:  C:\Documents and Settings\%username%\edvrclient.xml
Ubuntu:  ~/.edvrclient.dir/edvrclient.xml
Mac:  /Users/%username%/Library/Application Support/edvrclient/edvrclient.xml

Replace %username% with the user account name.

<br>

Each operating system user account maintains separate settings for its exacqVision Client. The settings stored include usernames, passwords, and network addresses required for exacqVision Client to access exacqVision Servers, as well as settings configured on the Client Setup page and memory of the position and live mode state of multiple Client instances. Passwords are encrypted within the file.

<br>

The file is stored in an operating system user-specific location. The user-specific directory is specified by an environment variable. The following environment variables are searched in order to determine the user specific directory: HOME, HOMEDRIVE/HOMEPATH, USERPROFILE, application directory. On Windows 7 and later, this directory is C:\Users\%username%. If you experience trouble when saving Client settings, ensure that a valid directory is specified by one of these environment variables. You can check this by running Start->Settings->Control Panel->System, selecting the Advanced tab, and then clicking the environment variable button. You must restart the exacqVision Client after making any changes.

<br>

It is possible to specify a settings file independent from the operating system user account by using the -I command line parameter. Examples where this might be useful are:

  1. A regional manager might have several sites to monitor. They could create a Client settings file to connect to all the Servers in Indiana and a second settings file to connect to all the Servers in Ohio. Then, when looking for something in Indiana, the connection process would be faster and there would be fewer servers and cameras to navigate through in the tree.
  2. A user with Admin permission on several exacqVision Servers might want to connect to them from a Client workstation that does not normally have Admin permission on the Servers. Instead of changing the login credentials through the Add Systems page in the Client, the user could store the settings file on a USB Flash drive and start the exacqVision Client on the workstation pointing to the USB drive’s settings file.

<br>

To add this command line parameter into a shortcut, create a shortcut to the exacqVision Client, right-click the shortcut, select Properties, and edit the target field as follows:

“C:\Program Files\exacqVision\Client\edvrclient.exe” -Iuser.xml

Any settings changed during this Client session are stored to the XML file specified on the command line. If the file does not exist at Client startup, it is created automatically. If a path is not specified with the filename, it will be assumed to be in the same directory as the exacqVision Client application

<br>

Linux: For Linux the file is located in the Start>places>home folder. Click view at the top and select Show Hidden Files. Open the .edvrclient.dir folder to locate the edvrclient.xml file

<br>

Mac: In Finder, select Go and then Go To Folder. Type  /Users/%username%/Library/Application Support/edvrclient/

<br>

Categories
Configuration Video Library exacqVision Client Categories Products

Exacq Client Settings

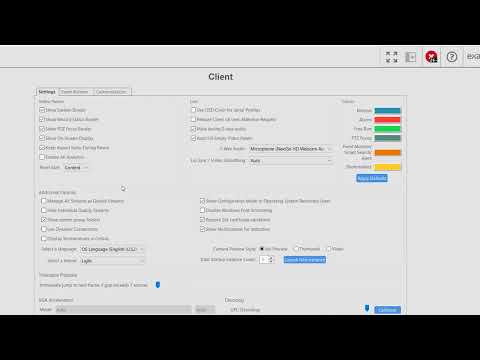
Use the Client settings page to customize the look and behavior of your ExacqVision Client software.

Change the look of the video panel displays, select audio devices for 2-Way Audio use, change how video streams are managed, change client color themes, enable or disable VGA Acceleration or GPU Decoding, enable Video Push, and more.

Categories
Knowledge Support Support exacqVision Client Categories Products

E-Series encoders show invalid resolution and framerate after changing settings

Affected Versions

exacqVision Server/Client 7.3.4 or later

<br>

Description

After changing the framerate or resolution, exacqVision will show an invalid resolution and framerate

<br>

Workaround

None

<br>

Resolution

Update exacqVision Server and Client to 7.8.0 or higher

<br>

Categories
Knowledge Support Support exacqVision Enterprise Categories Products

Changing/Testing advanced ESM settings manually

For some more advanced settings/options on ESM, navigate to ESM installer directory/folder. Here on the commandline as an admin user, you can use the installer.exe (windows), or installer executable for different actions.

<br>

Check/Change database settings

Commands to run:

Linux:

  • sudo ./installer decrypt (will generate EnterpriseManager.tmp – View or change settings here)
  • sudo ./installer encrypt (do this only if you changed settings)

<br>

Windows:

  • installer.exe decrypt (will generate EnterpriseManager.tmp – View or change settings here)
  • installer.exe encrypt (do this only if you changed settings)

<br>

Encrypt Results:

  • -3: EnterpriseManager.tmp does not exist in the current directory
  • -2: The tmp file could not be opened
  • -1: EnterpriseManager.ini could not be opened
  • 0: EnterpriseManager.ini has been created in the current directory

<br>

Delete the EngerpriseManager.tmp file.

Note: If you have changed database settings. Restart all esm services. Preferably, starting with the importer Verify ESM is functioning as expected.

<br>

Test Migrations 

(checks conditions for running a migration and returns an integer value)

Commands to run:

  • sudo ./instaler testmigration (Linux)
  • instaler testmigration (Windows)

<br>

Results:

  • -3: no default database connectivity
  • -2: nolegacy database connectivity
  • -1: migration has already ran
  • -0: it is okay to run a migration if wanted

<br>

Run database migrations 

(runs the actual migration and returns an integer value)

Commands to run:

  • sudo ./installer runmigration (Linux)
  • sudo ./installer runmigration (Windows)

<br>

Results:

  • -1: migration succeeded

<br>

Run ESM diagnostics

Currently this will run diagnostics for Email and Domain server connectivity

Commands to run:

  • sudo installer diagnostic (Linux)
  • installer.exe diagnostic (Windows)

<br>

Update the haystack search indexes 

(adds missing entries)

Commands to run:

  • sudo ./installer update_index (Linux)
  • sudo ./installer update_index (Linux)

<br>

Test connectivity to the given database

Commands to run:

  • sudo ./installer testconnection (Linux)
  • installer.exe testconnection (Windows)

<br>

Test the given port for availability

Commands to run:

  • sudo ./installer testport [port] (Linux)
  • installer.exe testport [port] (Windows)

<br>

Results:

  • -1: no connectivity
  • 0: in use

<br>

Test the given SSL port for availability

Commands to run:

  • sudo ./installer testsslport [port] (Linux)
  • installer.exe testsslport [port] (Windows)

<br>

Results:

  • -1: no connectivity
  • 0: in use

<br>

Get an available port starting at startport

Commands to run:

  • sudo ./installer getfreeport [startport] (Linux)
  • installer getfreeport [startport] (Windows)

<br>

Get an available SSL port starting at startport

Commands to run:

  • sudo ./installer getfreesslport [startport] (Linux)
  • installer getfreesslport [startport] (Windows)

Categories
User Guides exacqVision Webservice Categories Products

Settings for motion detection sensitity on Samsung cameras may appear different when deleting and re-adding camera

Description

exacqVision displays a value 1-100 for motion sensitivity. The camera itself only uses a 1-10 scale. When the user sets the sensitivity to 23, the actual value maps to 2, but the GUI still displays 23. If the camera is deleted and re-added, the sensitivity would display 20, rather than 23.

<br>
Settings-for-motion-detection-sensitity-on-Samsung-cameras-may-appear-different-when-deleting-and-re-adding-camera.pdf