Categories
User Guides Documentation exacqVision Server Categories Products

Recording different resolution or frame rates on event

Description

Some users may desire to record a different resolution or frame rate from a camera when an event such as motion or an analytic is triggered. Reasons for this vary by site, but often comes down to wishing to record a lower amount of data when very little is happening, but they require high frame rates or high resolution recordings for forensic playback.

In the steps below, we step through creating a secondary stream but configuring them with different settings and schedules. These steps are examples and you will need to adjust the settings for your site’s needs. Mix and match resolution, frame rate, or recording format as desired.

<br>

Setup Steps

  1. Navigate to the Camera Settings page for the camera you wish to configure.<br><br>
  2. Configure the settings for your first stream using the Recording tab on the bottom half of the page. It’s best to use this primary stream for your highest resolution and frame rate settings simply because most cameras provide fewer options for secondary streams.
    <br>In this example, our primary stream is configured for a resolution of 3840 x 2160 (4K/8MP) and an image rate of 25 fps.<br><br>
  3. Assuming your camera supports Multistreaming, select a new Context from the Multistreaming settings and click the Add Stream button.
    <br><br>
  4. After pressing the Add Stream a new sub-stream, or child stream, will appear on the system navigation tree to the left, nested beneath the primary, or parent, stream you just configured. The Camera Settings page should update to display the settings for this stream.
    <br><br>
  5. Configure the Format as needed, then configure the Resolution and Image Rate desired for your lower end stream.
    <br>In this example, the stream is configured for a resolution of 1024 x 576 and an image rate of just 10 fps.<br><br>
  6. Select the high resolution, high frame rate primary stream from the system tree and choose the Schedule tab. In this example, we’re going to configure the high resolution, high frame rate stream to only record on an analytic, in this case person detection.<br><br>
  7. Highlight the entire schedule grid and change these from the default of Motion to None. Apply your change.
    <br><br>
  8. Select the lower resolution, lower frame rate, secondary stream from the system tree, then select the Schedule tab. You could choose to set it to Free Run recording for continuous recording, or highlight the entire schedule and change it to Motion recording.
    <br><br>
  9. The low resolution, low frame rate stream will record based on the schedule configured on the Schedule tab. We need to tell the system when to record the higher resolution, high frame rate stream. Click the New button.<br><br>
  10. Navigate to the Event Linking node on the system tree.<br><br>
  11. We’re triggering off an analytic in this example, but you may use any Event Type you wish, such as Motion or an Input Trigger. We select Analytics, then choose the Enter Rule analytic, previously configured on the camera, from the Event Source panel.<br><br>
  12. Our Action Type will be Record Video.<br><br>
  13. The Action Target will be the high resolution, high frame rate primary stream.
    <br><br>
  14. Returning to the Schedule for this primary stream, we see the red corner flags are set indicating hours of the day in which our configured Event Link will record this camera stream. By default this will occur for all hours and days. Event Linking Source Groups could be used to configure specific days and hours to record on this event.
    <br><br>
  15. Save your configuration by selecting the Apply button.<br><br>
  16. Your configuration is complete and ready for testing. When performing a search you may search for recordings from either, or both, the primary and secondary streams but will likely rely on the primary stream for those high resolution or high frame rate forensic investigations of incidents.<br><br>
  17. Repeat these steps for other cameras where you may want the similar recording behavior.<br><br>

<br>

Categories
Video Library Configuration exacqVision Client exacqVision Server Youtube Video Library Categories Products

Camera Settings

Nested in the configuration tree, beneath Camera Recording, is the list of all cameras connected to the system. Clicking on any of these cameras will display the settings page for that individual camera. From here, you have access to important settings, such as the camera name, configuring the optional on-screen display (OSD), picture settings, motion settings, recording settings, recording schedule, as well as advanced features for PTZ and fisheye cameras or Suspect Tracking windows.

Categories
Knowledge Support Support exacqVision Client Categories Products

Multistreaming and Auto-Context Switching

Multistreaming

Multistreaming provides the ability to display or record camera video streams at alternative settings for a number of different use cases. Examples include:

  • Displaying higher resolution video to users on the local network than those connected remotely to constrain bandwidth consumption. This is achieved through Auto-Context Switching, described below.
  • Recording high resolution streams while displaying lower resolution to live viewing workstations, ensuring forensic searches provide the greatest level of detail. This is achieved by simply using different recording schedules for each stream.

NOTE: Multistreaming is not available for exacqVision Start users and your cameras must support multistreaming. Refer to the IP Camera Integration database to search for supported camera models.

<br>

Adding Streams

In the cameras Settings page, use the ‘Add Stream‘ button to create a secondary context stream and make any changes to the recording quality or frame rate settings.

Light Theme
Dark Theme
Classic Theme

The resulting secondary stream will appear nested under the primary stream on the configuration tree. Here, it’s been given a name to indicate it is the lower resolution.

Light Theme
Dark Theme
Classic Theme

TIP: Cameras typically provide fewer settings options with each additional stream. Typically, you want to select the lowest context number available since most cameras provide less settings options as the stream number increases. As an example, a 4MP camera may provide 4MP for the primary stream, but the secondary stream may not be set above 2MP. Some fisheye cameras may only provide camera-side dewarped options.

<br>

Auto-Context Switching

The exacqVision Client has the built-in capability to select the best stream for your display panel based on the scale of the video display and connection speed. This can be used to help optimize performance in the client.

Example: You have a camera configured with a high resolution primary stream but also have a low resolution secondary stream. Auto-Context Switching by the Client will select whether to display the low or high resolution stream based on the size of the image in the client or connection speed. This results in improved bandwidth utilization and performance when viewing multiple camera streams in Live View or connected over a slower remote network.

<br>

Managing Streams as Quality Streams

Auto-Context Switching takes place automatically if the sub-stream(s) are in the same aspect ratio; e.g. – 16:9 to 16:9, or 4:3 to 4:3. This does not take place automatically if they are of different aspect ratios, such as a 16:9 primary and a 4:3 secondary, or in cases where the FOV has been cropped. However, the exacqVision Client provides some settings for controlling this behavior as well as the appearance.

Navigate to the Client Settings.

Light Theme
Dark Theme
Classic Theme

Under the Multistreaming dialogue, enabling ‘Manage All Streams as Quality Streams‘ will override the default behavior to perform Auto-Context Switching regardless of aspect ratios. Note, that this could lead to distinguishable changes in the Live display based on the aspect ratio of the camera panel grid when the streams have different dimensions.

Light Theme
Dark Theme
Classic Theme

In Live View parent devices are shown using a purple icon, with the context streams nested beneath them shown with blue icons if you are using the Light or Dark themes. When using the Classic theme, the parent device will now be shown with a gold asterisk.

Light Theme
Dark Theme
Classic Theme

Drag the primary device name to a panel. This contains both the high and low resolution streams. The exacqVision Client software will automatically determine which stream to display based on the panel size.

This can be observed by first using a layout in which camera panels are small in size, such as the 5×5 layout shown below. Note that the stream named ‘(Low Res)’ has been selected and view the data rate at the bottom.

When changing the display to the single panel layout, the Client software automatically switches to the full resolution stream and the data rate at the bottom increases.

Besides changing the size of the panels by changing the layout, this can also be observed when resizing the Client window, particularly when viewing the single panel layout.

In addition to panel size as a factor, exacqVision will also consider the connection speed of the Client to the Server. This is manually configured when connecting to a server on the Add Systems page. Located beneath the server address and login credentials, this setting defaults to LAN. But users connected offsite may benefit from selecting the proper setting.

Light Theme
Dark Theme
Classic Theme

Local – Should be reserved for instances of the Client being run directly on the NVR hosting the exacqVision Server.

LAN – Used by workstations on the same local network, typically within the same building and without routers between the workstation and NVR.

WAN – Used by workstations on a wide area network, say on a municipal or university network, or even across town.

Remote – Used by workstations connected further away over several router hops, or with bandwidth limitations between the Client and NVR. Also encouraged if connected to remote exacqVision Edge applications using a cellular/wireless connection.

<br>

Hiding Quality Streams

By default the Live Cameras tree will display all configured streams, as seen in this example.

Some users may not wish to see the secondary context streams listed under their cameras in the Live Cameras tree. These may be hidden by entering the Client settings page and enabling the ‘Hide Individual Quality Streams‘ setting.

With this enabled, returning to the Live Cameras screen shows only the parent stream, managed automatically by the Client as described above using Auto-Context switching.

<br>

Categories
Knowledge Support Support exacqVision Client Categories Products

Changing the Resolution of additional streams Illustra Flex Cameras

Problem

If multistreaming is enabled on an Illustra Flex camera, you cannot use ExacqVision Client to change the resolution on any stream except for the last stream added. Affects firmware earlier then 3.0.5.

Workaround

If you want to change the resolution on a previously added stream, you must first delete any streams added after that stream. After the resolution is changed, you can then add streams as desired.

Solution

Update camera firmware to version 3.0.5 or higher.

Categories
Knowledge Support Support Categories Products exacqVision Integrations

Panasonic 360-degree Network Camera Multistreaming
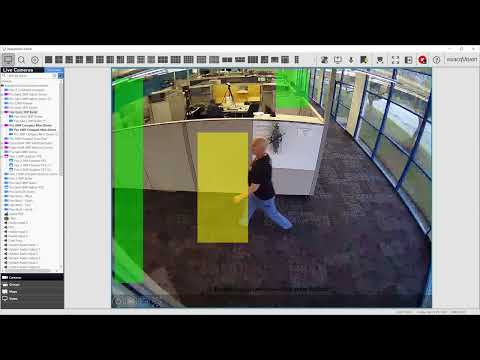
Panasonic 360-degree network cameras can send up to three streams to exacqVision. This includes one JPEG stream, and two H.264 streams. All three streams are configured on the same page in the camera’s web configuration page.


If you configure two additional streams on the camera in exacqVision Client, either the main stream or one of the secondary streams must be JPEG. If you select JPEG for the main stream, the secondary streams will automatically be H.264. Similarly, if you select H.264 for both the main stream and first secondary stream, the other secondary stream will automatically be JPEG.


NOTE:
 The Image Capture Mode and Image Capture Size selected on the camera’s configuration page for each stream will also be the mode and size used by exacqVision. If you select a PTZ mode for more than one stream, any PTZ functions performed on one PTZ stream will also be performed on the other PTZ stream. You cannot control PTZ separately on multiple streams from the same camera.

<br>

Panasonic-360-degree-Network-Camera-Multistreaming.pdf