Downgrading ExacqVision Enterprise Manager from 23.06.0.0 to any version lower will prevent users from accessing the ExacqVision Client software due to the migration to AES-128 from ARC4 Encryption methods used on earlier ExacqVision Enterprise Manager versions.
Downgrading or “Rolling Back” Enterprise Manager software from versions 23.06.0.0 and up to a lower version is not recommended due to this encryption migration.
Note: It is advised to take an Enterprise Manager backup of your system prior to attempting any upgrades/downgrades. Best Practices would include taking a database back up of PostgreSQL or Microsoft SQL.
Product
ExacqVision Enterprise Manager versions 23.06.0.0 and higher subsequently released versions.
Steps to Reproduce
Downgrade ExacqVision Enterprise Manager software to any prior version from 23.06.0.0
Expected Results
This downgrade should complete reflecting the new version, and all functionality should remain intact.
Actual Results
ExacqVision Client users will receive the error: “Invalid Username/Password account locked or disabled” upon trying to log in after the downgrade has been performed.
Solution
Do not downgrade from ExacqVision Enterprise Manager versions 23.06.0.0 to a lower version. If you find this needs to happen for an unforeseen reason it is recommended to uninstall the current version of Enterprise Manager 23.06.0.0 or higher, followed by installing the desired legacy version which will require rebuilding the configuration.
Customer was getting odd results when trying to edit the name of either a group or username in EM.
Product
exacqVision Enterprise Manager 21.06
exacqVision Enterprise Manager 22.09
Steps to Reproduce
From the EM dashboard access either Users or GroupsSelect an existing user or group Click the pencil icon to edit Change the name of the group or change either the first or last name of a userClick Apply
Expected Results
The change is saved, and you are returned to either the group or users page
Actual Results
The save fails and returns the following
Solution
It was discovered that REST POST and PUT operations were being blocked by firewall and once exceptions were made EM began working normally.
For Instructions on exacqVision Enterprise Manager version 22.03 or older see Knowledge Base Article #12724
The following document details how to enable HTTPS connections to exacqVision Enterprise System Manager from update 22.06 and later.
For a trusted certificate, it is recommended that you purchase a third-party intermediate certificate from one of many online providers. If you are using a third-party certificate you may skip ahead to the section titled, “Obtaining a Third-Party Certificate”.
These steps will detail how to create a self-signed certificate, but be aware that web browsers will warn users that the certificate is untrusted if you are using a self-signed certificate or one from a private/internal certificate authority.
CREATING A SELF-SIGNED SSL CERTIFICATE
Windows
1) Click on the Windows Start button and type ‘CMD’. Right-click on the CMD icon and choose ‘Run as Administrator’.
2) Set the environmental variable that will be used by OpenSSL later by typing:
set OPENSSL_CONF=C:\Program Files\exacqVision\EnterpriseManager\apache\conf\openssl.cnf
Press Enter.
3) Change your working directory by typing:
cd "C:\Program Files\exacqVision\EnterpriseManager\apache\bin\"
You will be prompted to enter a PEM pass phrase. Enter anything you like but you will need to re-enter this in the following steps.
PEM pass phrase:
5) You will be prompted with several questions for the certificate, answer these according to your needs. COMMON NAME should be the IP address or FQDN that users will access to reach the ESM web site (ex. www.domain.com or esmserver.domain.com).
You will be prompted with a series of questions. – Use data specific to your site. – Items can be left blank with the exception of Common Name – Common Name (e.g. server FQDN or YOUR name) should be the IP address of EM Server
Verify the md5 hashes match, if they DO NOT then see the troubleshooting section below before proceeding.
Step 3 Edit Apache Configuration
cd /usr/local/exacq/esm/apache/conf/extra
sudo gedit httpd-ssl.conf
Make the following changes, save the file and then close gedit.
Step 4 Restart the enterprise-webservice
sudo service enterprise-webservice stop
sudo service enterprise-webservice start
<br>
OBTAINING A THIRD-PARTY CERTIFICATE
If you are planning to acquire a third-party certificate from a trusted provider, you may need to provide them with a Certificate Signing Request (CSR) file.
Enter all the fields click on the ‘Submit’ button to download the ZIP file. Inside this ZIP file is the CSR file and RSA key to give to your certificate provider.
If you purchased a chained certificate, be sure to download the appropriate intermediate bundle.
Once you have downloaded the files from your provider:
Rename the .crt file to ‘server.crt’.
Rename the .key file to ‘server.key’.
If you have a chained certificate, rename the chain file to ‘server-ca.crt’.
Place the renamed files from your Certificate Authority (CA) into the following directory:
When purchasing an SSL certificate, many providers offer an Intermediate Bundle, or additional certificates that must be present to link your certificate to a root certification authority. Usually the provider will have documentation on how to accomplish this with Apache, but it is a good idea to ask them before or during the purchasing process. Exacq is not responsible for making your certificates capable of working with Apache.
It is possible to combine all the intermediate certificates that a provider may give you into one file. Consult your provider for more information.
<br>
ENABLING SSL FOR HTTPS CONNECTIONS
Be sure that you have followed the steps above to place the certificate files necessary for either a third-party certificate or a self-signed certificate into the correct directory before continuing with the following steps.
Windows
1) Click on the Windows Start menu and find the Windows Notepad program. Right-click on this and choose to ‘Run as Administrator’. If you do not run Notepad as an administrator you will be unable to save your changes.
2) With Notepad open, click on the ‘File’ menu and choose ‘Open’ or press CTRL-O on the keyboard.
In the Open browser, change the drop-down menu for File Type from ‘Text Documents (*.txt)’ to ‘All Files (*.*)’.
Use the Open browser to open the C:\Program Files\exacqVision\EnterpriseManager\apache\conf directory and highlight the file titled ‘httpd.conf’ then click ‘Open’.
3) Find the following line:
LoadModule ssl_module modules/mod_ssl.so
Remove any pound (#) sign in front of this line if there is one.
Now, find the following line:
Include conf/extra/httpd-ssl.conf
Remove any pound (#) sign in front of this line if there is one.
Save the file.
4) Still using Notepad, open the file titled ‘httpd-ssl.conf’ located in C:\Program Files\exacqVision\EnterpriseManager\apache\conf\extra
Find the following line:
ServerName www.example.com:443
Change the ‘www.example.com’ portion of this line to ‘localhost’.
Save the file and close the window.
5) Restart the solrApache or exacqVision Enterprise Manager Apache in Windows services (services.msc).
Linux
1) Open a Terminal prompt.
2) Change your working directory by typing:
cd /usr/local/exacq/esm/apache/conf
Press Enter.
3) You may use any editor you feel comfortable with, such as vi or nano, but if your are more inclined to using a graphical interface you may use a program called ‘gedit’ to make the following changes.
In the Terminal, type:
sudo gedit httpd.conf
Press Enter.
4) Find the following line:
LoadModule ssl_module modules/mod_ssl.so
Remove any pound (#) sign in front of the line if there is one.
Now, find the following line:
Include conf/extra/httpd-ssl.conf
Remove any pound (#) sign in front of the line if there is one.
Save the file and close the ‘gedit’ editor window to return to the Terminal prompt.
5) In the Terminal, type:
sudo gedit extra/httpd-ssl.conf
Press Enter.
Find the following line:
ServerName www.example.com:443
Change the ‘www.example.com’ portion of this line to ‘localhost’.
Save the file and close the window to return to the Terminal prompt.
6) Restart the service in the Terminal by typing:
sudo service ESMWebservice restart
<br>
FORCED REDIRECT FROM HTTP TO HTTPS
If you want to force users who try to access the site on port 80, using HTTP, to use the secure HTTPS connection you will need to enable a redirection.
Windows
1) Click on the Windows Start menu and find the Windows Notepad program. Right-click on this and choose to ‘Run as Administrator’. If you do not run Notepad as an administrator you will be unable to save your changes.
2) With Notepad open, click on the ‘File’ menu and choose ‘Open’ or press CTRL-O on the keyboard.
In the Open browser, change the drop-down menu for File Type from ‘Text Documents (*.txt)’ to ‘All Files (*.*)’.
Use the Open browser to open the C:\Program Files\exacqVision\EnterpriseManager\apache\conf directory and highlight the file titled ‘httpd.conf’ then click ‘Open’.
Remove the pound (#) signs in front of these two lines.
Save the file.
4) Restart the solrApache or exacqVision Enterprise Manager Apache service in Windows services (services.msc).
Linux
1) You may use any editor you feel comfortable with, such as vi or nano, but if your are more inclined to using a graphical interface you may use a program called ‘gedit’ to make the following changes.
Remove the pound (#) signs in front of these two lines.
Save the file and close the ‘gedit’ window to return to the Terminal prompt.
3) Restart the service in Terminal by typing:
sudo service ESMWebservice restart or sudo service enterprise-webservice restart
<br>
TROUBLESHOOTING
1) Some versions of Internet Explorer do not easily work with services running locally or may display pages incorrectly. If this happens, try clearing the browser’s cache by pressing CTRL-F5 on the keyboard. If the problem is persistent try installing another web browser, such as Chrome.
2) If the solrApache service fails to start after configuring it for SSL:
[Wed Mar 04 09:08:54.512004 2017] [ssl:emerg] [pid 19116] AH02565: Certificate and private key www.example.com:443:0 from server.crt and server.key do not match AH00016: Configuration Failed
c) If you see this log entry, complete the following steps:
1) Change your working directory to the location of openssl.exe
Windows (CMD) – cd C:\Program Files\exacqVision\EnterpriseManager\apache\bin
3) Compare the resulting values output after running each of the preceding commands. Each resulting string should be identical. If the values do not match, confer with the certificate authority that issued the certificate.
When setting up the Dynamic DNS feature on exacqISP, integrators with a “Shared” host type utilize multitenancy resulting in EM returning an incorrect domain name which causes error 776.
The hostname will default to the name of the server but can be changed if desired
Select Apply
Expected Results
the settings will be saved, and the Dynamic DNS service enabled
Actual Results
An error message will appear similar to the one below
Also notice that the domain name does not match that of the customers Integrator Service Portal instance.
Expected slo003 but EM returned ele062
Solution
This is a result of the Host Type for a given Instance being “Shared” vs “Dedicated”. Customers with a Host Type of “Shared” cannot use the Dynamic DNS feature whereas those with a Host Type of “Dedicated” can. This has to do with multitenancy for shared instances. Currently there is no workaround and new integrators will by default have a shared host type.
Microsoft provides customers a choose of Server Core or Server with Desktop Experience. Choosing either Microsoft Windows 2019 or 2022 Server Core results in EM being inoperable when installed.
Product
exacqVision Enterprise Manager
Microsoft Server 2019 Core
Microsoft Server 2022 Core
Steps to Reproduce
Install exacqVision Enterprise Manager on a machine running either Microsoft Windows 2019 or 2022 Server Core
Expected Results
exacqVision Enterprise Manager installs and runs normally
Actual Results
exacqVision Enterprise Manager is inoperable
No errors reported during install
The dashboard is not accessible via a web browser
Further inspection shows the following services are not present
enterprise-importer, enterprise-sendemail and enterprise-datarolloff
Solution
When installing Windows Server, you have the option between Server Core or Server with Desktop Experience. If you intend to run exacqVision Enterprise Manager, you must choose Server with Desktop Experience. This has been confirmed on both Windows Server 2019 and Server 2022 Core installs.
We have observed EM successfully installed and running on Windows Server 2019 Standard with Desktop Experience and If you are looking for a headless server solution, we recommend Ubuntu Server.
Live video freezes and is very choppy and upon further investigation the Audit Trail is being spammed with EntMgr Configuration entries
Product
exacqVision Enterprise Manager 21.12.2.0
Steps to Reproduce
Start all exacqVision Enterprise Manager services
Expected Results
Live video continues to work normally
Actual Results
Live video is sporadically freezing and choppy
The Audit Trail is being spammed with EntMgr Configuration entries similar to the following
Solution
Stop enterprise-importer
Note: The Enterprise Manager Team feels this may have been resolved in the EM version 22.03.3 or higher, but this has not been confirmed. See trac ticket #23414 for additional details.
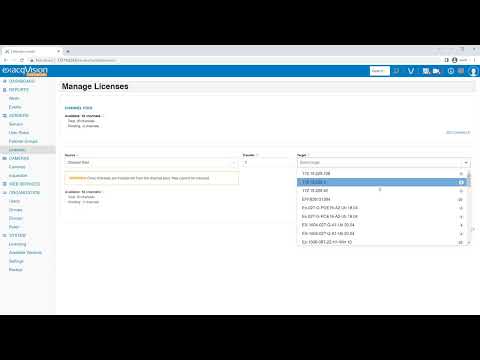
You can use the Manage Licenses page to assign channels from the exacqVision Enterprise Manager CHANNEL POOL to one or more servers. In addition, you can move an existing channel or channels from one server to another server. For example, you can move existing camera channels from an old server to a newly acquired one. Only the first 100 NVRs are visible, you must filter to access additional servers.
Product
exacqVision Enterprise Manager
Steps to Reproduce
In EM select Licenses
If there are more than 100 NVRs connected to EM then a message similar to the following will appear under Source
Expected Results
Clicking the dropdown will show the next 100 NVRs
Actual Results
Only the first 100 NVRs are available.
Solution
This is by design, to view servers not listed in the first 100 you must filter by server name.
Type the name of the server in the “Select source” box
The same is true for Targets, you must filter by typing the servers name in the “Select target” box.
Use Enterprise Manager to manage channel licensing, including moving available channels between ExacqVision servers or allocating from your Enterprise Manager channel pool.