Categories
Video Library Configuration User Guides Illustra exacqVision Client exacqVision Server Youtube Video Library Categories Products

How to Add IP Cameras – Quick Add

Learn how to use the new Quick Add feature, introduced in exacqVision Server/Client 24.03 to remove the multistage process of setting up and adding new cameras to your exacqVision system. Quick Add combined with the Illustra Registration License tool provide an easy to use experience when pairing Illustra cameras with Exacq.

For a written article of these steps, see the Add IP Cameras – Quick Add article.

<br>

Categories
User Guides Documentation Illustra exacqVision Client Categories Products

Add IP Cameras – Quick Add

Description

The Quick Add tab, found on the Add IP Cameras page of the exacqVision Client is a recently added feature. Introduced in version 24.03, this feature accelerates the configuration and addition of supported camera models to your exacqVision system.

<br>

Products

  • exacqVision Server 24.03 and higher
  • exacqVision Client 24.03 and higher
  • Illustra IQ Pro Gen4
  • Illustra IQ Pro Gen3
  • Illustra IQ Flex Gen4
  • Illustra IQ Flex Gen3

Quick add requires both exacqVision Server and exacqVision Client versions 24.03 or higher. Only Illustra Pro and Flex Gen3/4 cameras are supported at this time. The Flex Multisensor (IFS16-M10-BT03) does not support Quick Add.

<br>

Pro Tip: If your Illustra IQ cameras are eligible for free licensing, apply your updated license key prior to adding cameras to avoid consuming paid camera channels. Contact your integrator or dealer for details.

<br>

Steps

  1. Connect out-of-the-box or factory defaulted Illustra IQ cameras to your NVR’s network.<br><br>
  2. Navigate to the Add IP Cameras page within the exacqVision Client.<br><br>
  3. Select the Find IP Cameras tab on the bottom half of the page.<br><br>
  4. Discover cameras by pressing the Rescan Network button.
    <br><br>
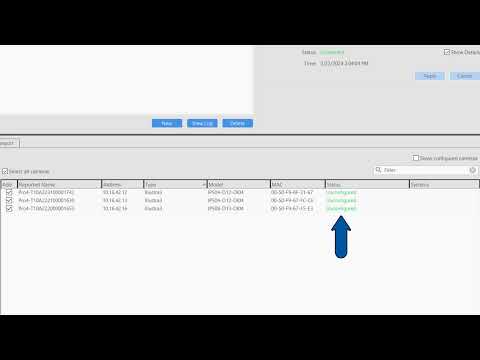
  5. The Find IP Cameras tab will list all discovered devices whether Quick Add is supported or not. The Quick Add tab will display the number of Quick add supported devices found. You will also see a note beside the Add Selected button. Select either of these to be taken to the Quick Add tab.
    <br><br>
  6. Select the Quick Add supported devices you wish to configure and add using the checkboxes from the list.<br><br>
  7. Press the Edit button and enter the desired Username and Password credentials to be used for the selected devices. Click Save when done.
    <br><br>
  8. Press the Add Selected button in the bottom corner to begin the Quick Add process. The status of the devices will change as each configuration stage is completed on the device. Each selected device will then appear in the IP Camera List above and begin the process of securely connecting to the server.
    <br><br>
  9. After initial use of the Quick Add feature, the created credentials may be used for subsequent Quick Add operations. Username and Password fields are pre-filled with the previously used credentials when returning to the Quick Add tab.<br><br>
  10. Selecting the Edit button allows you to enter a different set of credentials from those previously used.<br><br>
  11. Selecting the View button will prompt users to authenticate to the server with Admin credentials. Once authenticated, the Password will display in plain text for 20 seconds. You may choose to use the copy icon beside the Password field to copy this to the system’s clipboard. The clipboard contents are also cleared after 20 seconds.
    <br><br>

<br>

Categories
Exacq Legacy Camera Support Knowledge Support Support exacqVision Server Categories Products exacqVision Integrations

The Device Type I need isn’t listed

Details

When adding an IP device to your ExacqVision Server, each device will be associated with a Device Type that selects the underlying plugin used for communication.

The article, What IP cameras are supported by ExacqVision?, will tell you more about how to use the IP Camera Integration database to find the proper Device Type.<br><br>

Problem

You are unable to find the required Device Type when attempting to add the device. <br><br>

Cause

When using an existing ExacqVision install, possible reasons are:

  1. The plugin was not selected to be included in the initial installation.<br><br>
  2. The first version of the plugin was released after your initial server installation version.<br><br>

In the first example, running the installer manually, a dialogue window appears providing users with the option to select or deselect each individual plugin to be included with the server installation. Most users are fine using the default selections. There are some plugins not selected by default because they may be older or used only in rare instances.

When performing automated updates using the Check for Updates button the software updates only the plugins already installed. It does not install additional plugins.

In the second example, you may be looking for a plugin used for a newer integration. This may also eventually lead to the cause mentioned above. <br><br>

Resolution

  1. Download the ExacqVision Server installer directly from the Software Downloads page.<br><br>
  2. Run the downloaded installer file manually.<br><br>
  3. Watch for the dialogue in which the listed plugins may be selected for install.<br><br>
  4. Scroll to the plugin you need and be sure it is check marked for install.<br><br>
  5. Complete the remainder of the installation steps. After the service restarts, the desired plugin should be listed in the Device Type options.

<br>

Categories
Video Library Configuration exacqVision Client exacqVision Server Youtube Video Library Categories Products

How to Add IP Cameras – Manual Method

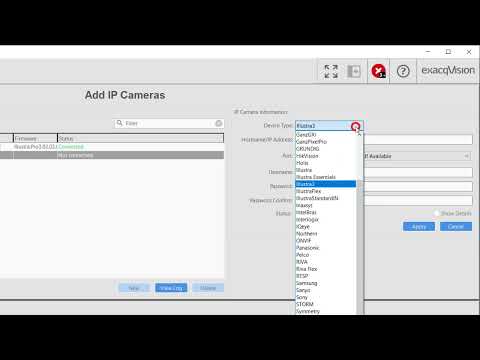
This video provides instruction on how to add an IP camera to your ExacqVision system, as well as details on the settings used to add your devices.

Categories
Knowledge Support Support exacqVision Server Categories Products

The IP Camera Detect Plugin Doesn’t Load on Server v20.06.4 if Installed on Ubuntu 18.04 Systems

Issue:

The IP camera detect plugin does not load on server software version 20.06.4 if installed on servers with the Ubuntu 18.04 operating system.
Description:

On the server software 20.06.4/18.04 OS combination, IPCamDetectPI fails to load, and in turn, IP camera detection is not available in the exacqVision Client interface. The “Add IP Cameras” page does not display the “Find IP Cameras” and “Address IP Cameras” tabs on the bottom half of the page.

Logs show the following:

Core     Critical     Core: Failed to load plugin 'IPCamDetectPI.so': /usr/local/exacq/server/plugins/IPCamDetectPI.so: undefined symbol: _ZTIN7testing4TestE

Introduced In:

Version 20.06.4

Fixed In:

Version 20.06.5+