Categories
Knowledge Support Support Categories Products exacqVision Hardware

Adjustments for Loud Fan Complaints

Description

Some users with newer exacqVision server hardware have complained of their systems having louder than expected system fans.

<br>

Product

  • A-Series 2A
  • A-Series 2A Hybrid
  • A-Series FA
  • A-Series FAR
  • Q-Series Desktop
  • Q-Series Desktop Hybrid

<br>

Steps to Reproduce

No specific steps are needed to reproduce since this was a factory setting.

  1. Enter BIOS by rebooting the system and pressing F2 prior to booting. The default BIOS password is ‘admin256’.
  2. Use the arrow keys to navigate to the ‘H/W Monitor‘ screen. The default settings are displayed below.

A-Series 2A & Q-Series Models

A-Series FA & FAR Models

<br>

Solution

  1. If you have not already done so, enter BIOS by rebooting the system and pressing F2 prior to booting. The default BIOS password is ‘admin256’.
  2. Use the arrow keys to navigate to the ‘H/W Monitor‘ screen.
  3. Use the arrow keys to highlight each of the fan settings according to your server model, pressing Enter to change them, to match those illustrated below.
  4. When settings changes have been completed, use the keyboard arrows to navigate to the Exit screen, then select ‘Save Changes and Exit‘ to reboot the system with these changes in effect.

A-Series 2A & Q-Series Models

A-Series FA & FAR Models

<br>

Categories
Documentation Quick Start Guides Categories exacqVision Hardware Products

Installing A-Series Rails on Racks with Threaded Round Holes

The rack mount rails that ship with exacqVision A-Series NVRs are designed to be toolless when used with server racks that have square or unthreaded round mounting holes on the rack uprights. The following guide describes how to adapt these rails, using tools, for use with rack uprights with threaded round screw holes.

  1. Examine the each end of the rail and take note of the pegs, as indicated in the illustration below.
  1. Insert a Phillips-head screwdriver into the slot at the end of each peg and turn to remove the pegs. Repeat this on the opposite end of the rail. The rear end does not have a center peg.
  1. Each end of the rail should have all pegs removed.
  1. Depending on the spacing of the holes on your rack, the L-bracket on the end of the rail may fit around the upright, facing outward, or may need to be placed behind it, as pictured. Here, the screw threads through the rack and then into the threads on the end of the rail where the pegs you removed from previous steps were located. Use installer provided screws to secure the rail to the rack’s upright.

<br>

Categories
Video Library Documentation Quick Start Guides Installation Highlighted Video Guides Youtube Video Library Categories Products exacqVision Hardware

exacqVision A-Series Quick Start Video

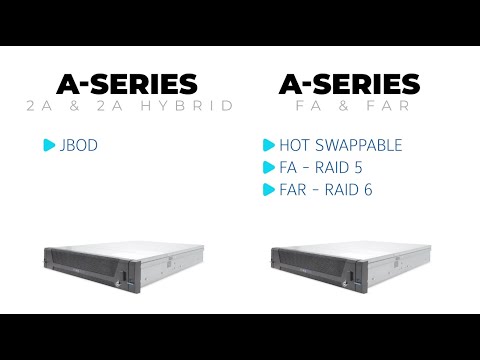
The A-Series Network Video Recorders from Exacq provide a versatile range of options and are some of the most popular choices for most users. Choosing the best model for your deployment will be largely based on your storage and configuration needs. This video compares features of A-Series NVR models and steps through unpacking and setup.<br><br>

Chapters:<br>
00:00 Intro<br>
00:15 Unboxing<br>
01:03 Model Comparison<br>
02:06 Port Identification<br>
03:30 Rack Installation<br>
05:18 Hard Drive Installation<br>
06:08 Setup<br>
07:09 Licensing<br>

Related Articles

Installing A-Series Rails on Racks with Threaded Round Holes

<br>

Categories
Knowledge Support Support Categories Products exacqVision Hardware

Non-RAID A-Series Systems with LSI HBA Should Have Adjacent Drive Placement
The new F2A, A-Series chassis models will have front-loading drive bays. The front-loading bays will resemble the Z-Series, but these drives are not hot-swappable. 

This new model is a 2U chassis with 2 rows of drive bays in 4 columns for a total of 8 drive bays. 

Bay 1Bay 2Bay 3Bay 4
Bay 5Bay 6Bay 7Bay 8


In a system that is half-full, the example below will display correctly in the client’s Storage > Hardware page.

HD 1HD 2HD 3HD 4
EMPTYEMPTYEMPTYEMPTY


The following example will erroneously appear the same way in the client but should not. 

HD 1EMPTYHD 2EMPTY
EMPTYHD 3EMPTYHD 4


Currently the server cannot recognize gaps. This is not an issue for older A-Series systems where the hard drives are connected to the motherboard or SIIG HBA.

Field techs should be advised to always keep hard disks “packed” together and avoid such gaps between drives. 

Categories
Documentation Data Sheets Categories Products exacqVision Hardware

US-27618-A1-UL A-Series

US-27618-A1-UL-A-Series.pdf
Categories
Documentation Data Sheets Categories Products exacqVision Hardware

KSA Declaration A-Series

KSA-Declaration-A-Series.pdf
Categories
Documentation Data Sheets Categories Products exacqVision Hardware

CE Declaration of Conformity A-Series DT

CE-Declaration-of-Conformity-A-Series-DT.pdf
Categories
Documentation Data Sheets Categories exacqVision Hardware Products

CE Declaration of Conformity A-Series

CE-Declaration-of-Conformity-A-Series-1.pdf
Categories
User Guides Documentation Categories Products exacqVision Hardware

exacqVision A-Series Pro Hybrid Server

exacqVision-A-Series-Pro-Hybrid-Server.pdf
Categories
User Guides Documentation Categories Products exacqVision Hardware

exacqVision A-Series IPS F2A

exacqVision-A-Series-IPS-F2A.pdf