exacqVision Hybrid tDVR Driver^Version 1.3.5.129409^https://www.exacq.com/reseller/tdvr-Setup_x64.exe^23 March 2018^17.5MB,
Category: exacqVision Hardware
New Documentation Request workflow. This applies to User Manuals, QSG’s, Integration Guides, etc…
In Jira, we can create a new ticket and set Project to Technical Communications (TCOM).
Required Fields:
- Issue type will normally be “Enhancement”
- Under Description:
- Product – leave default option
- Set Component to “Exacq”
- Summary – as needed
- Description – as needed
- Set Priority – as needed
- Under Resolution:
- Set Label to “Documentation”
After creation assign it to Jack Murphy if it doesn’t happen automatically.
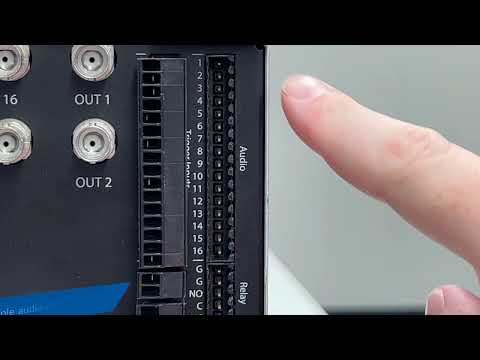
A walk through, how-to video on connecting analog audio base stations from Louroe to ExacqVision Hybrid NVRs.<br><br>
See also: Line Level vs Mic Level Audio for more details on the differences in these audio signals from various devices.
<br>
About Audio Signals
Audio signals are not all the same. There are four different types of audio signals:
- Microphone (Mic) level
- Instrument level
- Line level
- Speaker level
This article will focus on the two forms commonly encountered around NVRs and surveillance equipment, Mic Level and Line level.
Mic level signals, those coming from a microphone, are the weakest. These signals are usually in the range of 0.001 to 0.01 volts. Devices in this range require a pre-amp to increase the signal to line level voltage.
Line level signals, from pre-amps, are stronger than mic level. These signals usually range from 0.3 to 1.2 volts. Consumer devices are on the lower end of that range, while professional devices tend to be on the higher end of the range.
Connecting a device sending mic level output to a line level input will leave you unable to hear anything. The voltage is too low for what the input requires. Likewise, if you connect a line level device to a mic level input the result is clipping and distorted sound that is too loud because it is providing too much voltage for the input. <br><br>
System Audio Connectors
The style of connector used does not necessarily tell you whether to expect line level or mic level signals.
The system board audio inputs on many ExacqVision systems include 3.5mm jacks for line level input and mic level input, as illustrated below. While the terminal inputs for Hybrid systems are line level only.
<br><br>
Audio Devices in ExacqVision Software
ExacqVision IP NVRs will only have audio inputs and outputs on the system board. These connections are found on the same panel as the network ports, monitor outputs, and USB ports on the rear of the server.
Within the ExacqVision Desktop Client software, in Configuration mode, you will find these inputs by expanding the Server name from the navigation tree along the left-hand side. Then expand Configure System and the System Audio node. Click on the Audio Inputs/Outputs node under System Audio to find these devices.
ExacqVision Hybrid NVRs have additional hardware for analog audio/video inputs. Video connections are made by BNC connectors. Audio connections are made via terminal inputs. Some legacy systems could still be encountered that used with wiring harnesses in which both video and audio were connected via BNC.
On these Hybrid systems audio inputs are found in two locations within the Client software. The system board inputs are found, as noted above. The additional analog input terminals will be found by expanding the analog board node on the navigation tree. Modern ExacqVision systems list this as tDVRxxxx. Expanding this board on the navigation tree and clicking the Audio Inputs/Outputs node beneath it reveals the analog audio input terminals.
<br>
This document will outline the procedures expected from Exacq Support staff in the event of discovering a previously unreported security vulnerability in an exacqVision product.
Product
Any exacqVision product
Procedure:
- Verify the vulnerability has not already been properly reported at: https://www.johnsoncontrols.com/cyber-solutions/security-advisories
- Email the GPS (Global Product Security) team at: productsecurity@jci.com
- Provide vulnerability analysis in this email and any relevant links
- Provide customer details and contact information in this email
- Provide software product and software versions in this email
- CC the customer on the email
- Inform the customer you have notified the appropriate team (GPS) and will be closing the Support ticket.
Our Global Product Security team will then be responsible for following up with this customer and resolving vulnerability.
<br>
Recording Not Possible – Windows DST Issue
Description
If the exacqVision Server data drives are full and are displaying “Recording Not Possible” on the storage page then it is possible an invalid hour folder was created during the switch to Daylight Savings Times (DST). Use the following instructions to verify and resolve the issue.
Product
- exacqVision Server
Solution
These instruction are based on Windows OS and North America DST.
- Check DST Rules for your area here.
- Make note of the Date and Time of the change to DST and determine if an invalid folder exist.
- For this example most of North America changed to DST on March 12th, 2023 at 02:00 AM
- Therefore any .ps or .psi files stored in the folder D:\2023\03\12\02 are in the wrong folder.
- The folder either needs to be removed or the files need to be moved to D:\2023\03\12\03
- Note: D: is the disk letter which will vary across systems with more than one disk.
i.e. – E:\2023\03\12, F:\2023\03\12, etc.
Use File Explorer to Edit Directory
- Log into the Exacq server OS using your Admin credentials
- Open “File Explorer”
- When File Explorer opens navigate to data drive
D: > 2023 > 03 > 12 - NOTE: If your system has more than 1 data drive, you will also need to look in each mount point/disk letter and repeat this process listed below.
i.e. – look in E: > 2023 > 03 > 12, F: > 2023 > 03 > 12, etc. - If you find a folder named “02” within
D:\2023\03\12 you will need to copy the contents to
D:\2023\03\12\03 then delete this 02 folder. - Repeat this process for all data drives attached. Optionally, you can delete this 02 folder altogether, but only with permission from the system administrator.
- Restart the ExacqVision server service from the services.msc console:
Note:
Depending on the amount of data retention the system has it may be necessary to go back to previous years to make the same edits for Daylight Savings Time changes.
In Example:
DST change was March 13th in 2022. You would find the 03/13/2022 directory, and make the same edits removing the 02 hour folder or moving the contents of the 02 hour folder to the 03 folder in this directory.
Description:-
Some of the drives on the raid system are not working on the same raid array with the other drives even if it’s Identical, except the logical sectors showing 512b for the majority and 4K for the new drive or vice versa, so to convert this drive, you will need to use a unique tool provided by Western Digital called WDCKIT.
We have two tools. One can be working with the JBOD drive and another tool that can be working behind the Riad system
!!!!!!! WARNING Proceed With CAUTION !!!!!!!!!!!
Multiple Drives IN a Virtual Drive (Actively Recording) = Works BUT deletes the Virtual Drive and data !!!Warning!!!
Multiple Drives IN a Virtual Drive with Data (evServer Stoped) = Works BUT deletes the Virtual Drive and data !!!Warning!!!
Multiple Drives IN a Virtual Drive with NO Data (evServer Stoped) = Works BUT deletes the Virtual Drive !!!Warning!!!
Multiple Drives IN a Virtual Drive NOT formatted = Works BUT deletes the Virtual Drive !!!Warning!!!
Procedures:-
- Identify the hard drive(s) that are set with a 4K or 512b logical sector size using one of the following methods:
a. $>storcli /c0/e252/s? show all | findstr Logical
b. Login to the RAID graphical utility --> Controler ID 0 --> Drives --> Unconfigured Drives
c. $> smartctl -i /dev/sd? | findstr Sector - Once the drive(s) have been identified, copy the Serial Number and/or the Model Number.
We suggest using the Serial Number if a small number of drives need to be changed. If there are many Drives to be changed, then We recommend using the Model Number. - You can either install the Western Digital “wdckit” utility or use an interactive command prompt window that runs the “wdckit” utility.
- $> wdckit show == Shows all the drives in the system with Serial number and Model Number.
$> wdckit show -g == Shows the geometry of the drives. (ie 512 or 4096)
$> wdckit format –serial (serial Number) -b 512 –fastformat
$> wdckit format –model “(Model Number)” -b 512 –fastformat
Power cycle the drive or the system
5. Verify the Logical sector size has changed to 512b
a. $>storcli /c0/e252/s? show all | findstr Logical
b. Login to the RAID graphical utility --> Controler ID 0 --> Drives --> Unconfigured Drives.
c. $> smartctl -i /dev/sd? | findstr Sector
Download the WD tool for Windows and Linux.
https://support.exacq.com/#/file-manager/0540836d-3300-44da-a062-c00e171bb837/wdckit
Description: We have seen where ExacqVision is reporting a false alarm on the hardware page with systems that have the OS on RAID. The system drives show up RED in the GUI. This is a result from storcli reporting back “unkown” for the temperature.
Product: The option for OS on RAID is available for all Z-Series, S-Series and EM-Series. The A-Series it is only available in the 4U (R4A) and the Front accessible 2U (F2A).
Repro:
This was introduced in the last available retail key 22.12.1
Work Around:
Fix: Engineering is currently working on a fix
Description
The audio is not working on the Exacq server and is giving a message “PA_OpenStream (-9996) Invalid device.”
Solution
The issue is a failed sound card, so it needs an RMA to replace the motherboard or install another sound card
Description
We have seen cases on NVRs running Windows 7 where a drive has been working properly and was not just replaced that the status incorrectly shows Needs Prep
Product
- exacqVision Server 22.12.5.0
- exacqVision Server 23.03.1.0
- Microsoft Windows 7
Steps to Reproduce
Within the exacqVision Client navigate to Configuration> YOUR Server > Storage > Hardware Tab
Expected Results
All drives listed are high-lighted in green and have a status of Healthy
Actual Results
One or more drives are high-lighted in orange and have a status of Needs Prep
Solution
Validate
Before going ahead with the following workaround, you must first confirm that the Needs Prep status is false
- Using File Explorer access the contents of the effected drive(s)
- Confirm that recent video files (those ending in .ps) are present and can be played back
- If the drive is not accessible then it should be prepped
- If video is present and can be played then DO NOT RUN PREP, go ahead with the workaround
Workaround
WARNING: This change is not permanent and will be overwritten during an exacqVision Server update! If necessary it can be re-applied
- Stop the exacqVision Server Service
- Open Notepad++ or a similar text editor as an Administrator
- Open the file “C:\Program Files\exacqVision\Server\scripts\sysinfo.ps1”
- Locate the line containing
write-stdout ("drive-needs-prep=1")
(typically line 288) - Comment out the line by adding a # at the beginning of the line
- It should now be
# write-stdout ("drive-needs-prep=1")
- Save the file
- Start the exacqVision Server Service
Branch Build 23.06.3032801 is available and confirm fixes the issue.
September 2023 release should house this fix.
AES-427