Categories
Configuration Knowledge Support Documentation Support exacqVision Enterprise exacqVision Client exacqVision Server Products exacqVision Integrations Uncategorized

Enterprise Manager supports LDAP authentication with Azure Active Directory 

Azure Active Directory supports the LDAP interface when properly configured, and therefor LDAP can be used to sync the ExacqVision Enterprise Manager software with the Azure AD instance.

Background Information: Lightweight Directory Access Protocol (LDAP) is an application protocol for working with various directory services. Directory services, such as Active Directory, store user and account information, and security information like passwords. The service then allows the information to be shared with other devices on the network. Enterprise applications such as email, customer relationship managers (CRMs), Video Management Software (VMS – ExacqVision), and Human Resources (HR) software can use LDAP to authenticate, access, and find information.

Azure Active Directory ( sometimes referred to as Azure AD) supports this pattern via Azure AD Domain Services (sometimes referred to as AD DS). This allows organizations that are adopting a cloud-first strategy to modernize their environment by moving off their on-premises LDAP resources to the cloud. ExacqVision has supported the use of LDAP authentication since early versions, and now has been enhanced to support the use of LDAP authentication when integrated with Azure Active Directory as a modern solution to cloud based computing.

When a network hosting Enterprise Manager on-premise has been properly configured for communication with an Azure Active Directory instance by verifying no port restrictions or other environmental variables inhibit communication – ExacqVision Enterprise Manager has the ability to support the use of LDAP authentication with Azure Active Directory as of December 15th, 2022 – and subsequent releases thereafter.  

Products 

  • ExacqVision Enterprise Manager version 22.12.0.0 and up

Minimum Requirements for ExacqVision Enterprise Manager Software: 

  • Enterprise Manager version must be 22.12.0.0 or later
  • Your network configuration must be properly configured to communicate with your Azure AD instance
  • you must have Azure Active Directory credentials with access to the following Active Directory parameters – as supplied by your Local IT Department or Network Administrator: objectClass (specifically “group” & “user”), userPrincipalName , sAMAccountName , inetOrgPerson , krbPrincipalName

Configuration Steps for Enterprise Manager: 

  • Properly configure the network to communicate with Azure Active Directory instance without restriction.
  • Verify you possess the minimum credential requirements needed to complete the integration as listed above (supplied by your Local IT Department or Network Administrator) and login to Enterprise Manager user interface with administrative privileges
  • Navigate to the Domain settings page
  • Under “Add Domain” enter the address of the Azure Active Directory instance in the “Hostname or IP” field and enter the above mentioned credential criteria with the proper port number, security protocol, Search Criteria information, and Attribute names information in their corresponding fields – as supplied by your Local IT Department or Network Administrator
  • Apply the changes.

Expected Results 

The above steps when executed properly will sync with the Azure AD Instance, allowing LDAP authentication in ExacqVision Enterprise Manager.

For more information on how to configure ExacqVision Enterprise Manager for use with LDAP authentication please see the ExacqVision Enterprise Manager user manual.

Categories
Video Library Configuration Illustra Youtube Video Library Categories

Illustra Tools Mobile App

Using the Illustra Tools Mobile App to discover, connect to, and configure cameras
Categories
Configuration Knowledge Support Support exacqVision Server Categories

System Unexpectedly Reboots Into Recovery Mode Then Enters Factory Restore

Issue

When system reboots and boots up to recovery mode it selects “Factory Capture” by default leading the system to commit a full factory restore upon pressing “enter”.

Solution

Windows

  1. Open CMD, using Run as Administrator
  2. Enter mountvol z: /s
  3. Enter z:
  4. Enter dir
  5. Enter cd EFI/BOOT
  6. Enter notepad refind.conf
  7. Search for the default_selection entry
  1. Set the parameter to “1” instead of “factory restore”
  1. Save your changes and reboot the NVR

<br>

Linux System

The file at ‘/boot/efi/EFI/BOOT/refind.conf’ will need to be edited in the same way it is for the Windows instructions. Instead we would follow these steps:

  1. Open Terminal (CTRL+ALT+T)
  2. Enter sudo -i
  3. Enter caja (this should open a file explorer type window)
  4. Navigate to /boot/efi/EFI/BOOT/refind.conf
  5. Right-click and open file a text editor
  6. Edit the text as shown in Step 6 of the Windows instructions above.
  7. Save your changes, close the file, and restart the system

<br>

Categories
Configuration Knowledge Support Support Categories exacqVision Webservice Products

Creating a Self-Signed SSL Certificate

Before Beginning…

  • Self-signed certificates are NOT secure. It is recommended to use Let’s Encrypt (configurable via the web service UI) if you do not wish to pay for the cost of a trusted HTTPS certificate.
  • A self-signed certificate allows you to use a web browser, but does not work with mobile devices. Only trusted third-party certificates work with mobile devices.
  • This document assumes that ExacqVision Web Service 3.0 or later has been installed with the default settings.

Requirements

You will need the OpenSSL program to create a self-signed certificate. The method of obtaining this program varies based on the operating system used.

  • Linux – OpenSSL is included by default on all modern Ubuntu distributions. If for any reason it is not, run:
    sudo apt-get install openssl
    in a Terminal window and follow the prompts.
  • Windows – The easiest way is to obtain a pre-compiled executable from SourceForge:
    1. Navigate to http://gnuwin32.sourceforge.net/packages/openssl.htm
    2. Under the ‘Download’ section, click the link labeled ‘Zip’ beside the row labeled ‘Binaries’.
    3. After downloading, extract (unzip) the contents of this file.
    4. The executables extracted may then be run independently without installation. OpenSSL.exe is located within the ‘bin’ folder of the extracted Zip file contents. The following procedures explain how to continue.

Note: A certificate generated on either platform will work on the other
(i.e.- a certificate generated using openssl on Linux can be used with a Windows web service).

Windows Procedure

  1. Open a CMD window.
  2. Navigate into the unzipped directory, then into the ‘bin’ directory in which the recently extracted OpenSSL executable resides.
  3. Create a self-signed certificate by typing the following:
    openssl.exe req -new -x509 -sha256 -days 365 -nodes -out server.crt -keyout server.key -config ..\share\openssl.cnf
  4. When running this command you will be prompted to enter several fields. Answer the questions according to your needs. COMMON NAME should be the IP address or FQDN that you use to access your ExacqVision Web Service (www.domain.com).
  5. Place the resulting files (server.crt, server.key) according to your ExacqVision Web Service version:
    • 8.4 and above: Use the web service configuration interface to configure HTTPS using the generated files.
      1. Log in to your Web Service Configuration page
      2. Expand the Configuration menu
      3. Click HTTPS
      4. Click Configure
      5. Select External and import your generated .crt and .key files.
      6. Apply the changes
      7. Click the link to restart the web service
    • 3.0 to 8.2: use the file explorer and CMD
      1. place the files in the following directory
        C:\Program Files[ x86 ]\exacqVision\WebService\Apache\conf
      2. Using CMD, stop the web service: net stop webservice
      3. Using CMD, start the web service: net start webservice

Linux Procedure

  1. Open a Terminal window
  2. Create a self-signed certificate by entering the following command:
    openssl req -new -x509 -sha256 -days 365 -nodes -out server.crt -keyout server.key
  3. When running this command you will be prompted to enter several fields. Answer the questions according to your needs. COMMON NAME should be the IP address or FQDN that you use to access your ExacqVision Web Service (www.domain.com).
  4. Place the resulting files (server.crt, server.key) according to your ExacqVision Web Service version:
    • 8.4 and above: Use the web service configuration interface to configure HTTPS using the generated files.
      1. Log in to your Web Service Configuration page
      2. Expand the Configuration menu
      3. Click HTTPS
      4. Click Configure
      5. Select External and import your generated .crt and .key files. Apply the changes
      6. Click the link to restart the web service
    • 3.0 to 8.2: use the file explorer and Terminal
      1. place the files in the following directory
        /etc/evapache
      2. Using Terminal, restart the web service:
        sudo /usr/local/exacq/webservice/service.sh restart
Categories
Knowledge Support Video Library Configuration Support Illustra Youtube Video Library Categories Products exacqVision Integrations

Illustra Body Worn Camera Setup (Legacy) – Support Training

IMPORTANT: This video was made for BWC Kiosk Software version 1.x and was deprecated upon release of version 2.x

This video is for internal support training and includes Troubleshooting information towards the end, beginning at the 15:00 mark.

<br>

Categories
Cloudvue Video Library Configuration Cloudvue Access Control Youtube Video Library Categories Products

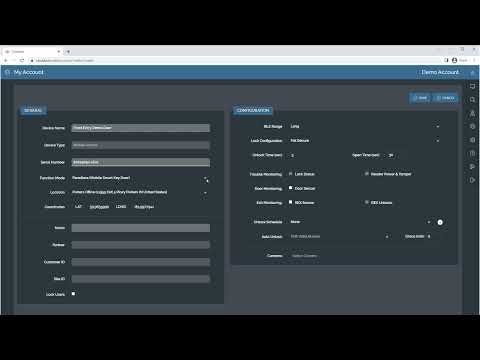
Cloudvue Access Control Subscriptions for Cloudvue Partners

This video explains where to change Cloudvue account subscription settings for access control, as well as the differences between the various subscription types so that Cloudvue Partners, dealers, and integrators will know which ones their clients will need.
Categories
Video Library Configuration Cloudvue Highlighted Video Guides Cloudvue Access Control Youtube Video Library Categories Products

Cloudvue Access Control Credentials

Learn how to add Credentials to your Cloudvue hosted access control devices to permit them to enter using your installed readers.
Categories
Configuration Cloudvue Video Library Highlighted Video Guides Cloudvue Access Control Youtube Video Library Categories Products

ioSmart Reader Panelless Enrollment

Learn how to enroll a Kantech ioSmart Reader in panelless mode for use with Cloudvue access control.
Categories
Cloudvue Cameras Video Library Configuration Cloudvue Illustra Youtube Video Library Categories Products

Configuring Illustra Cameras to Cloudvue Mode

Follow steps involved in converting an Illustra IP camera to Cloudvue Mode.
Categories
Cloudvue Cloudvue Cameras Video Library Configuration Highlighted Video Guides Youtube Video Library Categories Products

Enrolling Camera to Cloudvue – Customer Side

This video shows the steps a customer may take to enroll their Cloudvue enabled camera within their Cloudvue account.