Title
Replacing MegaRAID Storage Manager (MSM) With LSI Storage Authority (LSA) – Linux
Description
MSM has been found to have some exposure to CVE-2021-44228, the Apache Log4j remote code execution vulnerability, see statement from Broadcom Log4j2 Exposure (CVE-2021-44228). As a result you may be able to replace MSM with LSA on a Windows machine using the following instructions.
Product
- MegaRAID 92xx Series RAID Controllers
- MegaRAID 93xx Series RAID Controllers
- Ubuntu 16.04 LTS and Earlier
- Ubuntu 18.04 LTS
- Ubunutu 20.04 LTS
Prerequisites
First determine which version of Ubuntu the NVR is currently running using Knowledge Base Article #9996 “How to Identify the Current Linux OS Version”
Next identify the RAID controller model using Knowledge Base Article #7244 “How to Identify the MegaRAID Controller Model on an exacqVision Server”
Ubuntu 16.04 LTS or earlier Operating Systems
Broadcom has not provided an LSA version for 16.04 LTS or older versions of Ubuntu.
- If possible, Re-image using Ubuntu 18.04 or 20.04 LTS
- See exacqVision Field Recovery Instructions to see if your system meets the criteria for an update.
- If re-image is not possible then use the first option listed in the 92xx series RAID Controllers section below.
92xx series RAID Controllers
Machines with 92xx series RAID controllers have the following options.
- Uninstall MSM
- Manage the array using the BIOS available on boot
- Manage the array using storcli
- Update MSM
- Software, instructions, and support for your particular controller card are provided by the card Manufacturer, Broadcom
- Information is available at https://www.broadcom.com/support/download-search (Legacy Products > Legacy RAID Controllers)
93xx series RAID Controllers
For Machines with 93xx series RAID controllers MSM can be replaced with LSA using the following instructions.
Objectives
- Uninstall MSM
- Install LSA
- Update Desktop Icon
- Configure/ Restart LSA
- Verify LSA can be accessed and login is working
- Verify Storage information in exacqVision client is correct and video is being recorded
Uninstalling MSM
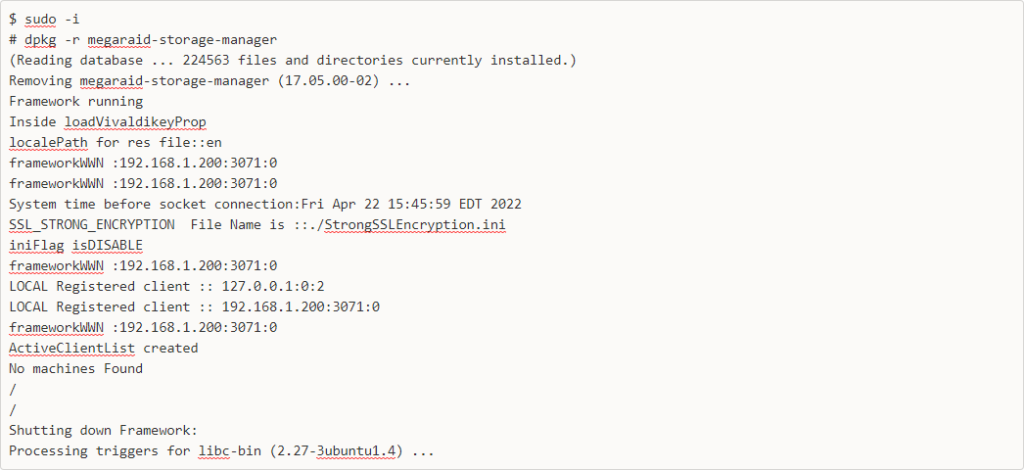
- Double-click the Terminal icon on the desktop
- Elevate to root using sudo -i
- Remove the MSM package using dpkg -r
- Ensure that the dpkg command completes with no errors.
- Close the Terminal window

Install LSI Storage Authority (LSA)
- Download and save LSA from https://docs.broadcom.com/docs/007.020.014.000_LSA_Linux-x64.zip
- The LSI website will require reading a download agreement, (scrolling down to the bottom of the agreement), clicking an acknowledgement checkbox, then clicking the “I Agree” button
- Once downloaded, close Firefox
- On the desktop double-click the Computer icon.
- Select Downloads, locate and right-click on the LSA zip file and select extract here
- Right-click the newly created x64 folder and select Open as Administrator
- A caution window may appear, click OK to continue
- Enter the Administrator Password and click Authenticate
- Click File menu and Select Open in Terminal
- In the terminal window type ./install_deb.sh and press Enter
- The License agreement (EULA) will be displayed
- Type Y to accept the License Agreement then press Enter
- Type 1 to choose “Since last shutdown” and press Enter
- Type 2 to choose “Standalone” and press Enter
- Type 2463 for Web Server port and press Enter
- Type 9000 for LSA Port and press Enter
- Type Y and press Enter to install openslp
- When you see “LSA installation successful” the install is complete
- Close the Terminal window
Edit the Desktop Icon
- Right-click on the MSM desktop icon and select properties
- Change these fields to the following:
- Name: LSA
- Command: /opt/lsi/LSIStorageAuthority/startupLSAUI.sh
- Comment: LSI Storage Authority
- Click Close
Modify LSA.conf
- Double-click the Computer icon on the desktop to open a new file explorer.
- Select File System
- Navigate to /opt/lsi/LSIStorageAuthority/conf
- Click the File menu and select Open as Administrator
- Enter the Administrator Password and click Authenticate
- In the explorer windows labeled conf (as superuser) double-click on LSA.conf to open it for editing
- Line 189 should read “full_access_groups = root”
- Append “, adm” to this line so it now reads “full_access_groups = root, adm”
- Click Save and close the file

Restart LSA Service
- Double-click the Terminal icon on the desktop
- Type sudo service LsiSASH restart
- Wait for the command to complete, it will take 20-30 seconds
- Close the Terminal Window

Verify desktop icon
- Double-click the LSA desktop icon to launch LSA in the browser
- Log in to LSA using Administrator credentials.
Verify Storage
- Open the exacqVision Client
- Navigate to the Hardware tab on the Storage page (Configuration > YOURSERVER > Storage > Hardware tab)
- Select Tree and verify the RAID Controller, the Unit (Virtual Drive) and the Ports (Physical Drives) are present.
- If possible verify video is being recorded and can be played back by searching to using exacqReplay