NOTE: The Desktop Recycle Bin is removed on purpose. This is intended to prevent users from using the Recycle Bin as a file directory for storage. Consider this when choosing to add this back to your system.
WARNING: The following steps involve editing the Windows Registry. Only experienced administrators should edit the registry. Incorrect edits can cause drastic changes in the operating system or the OS may fail to work altogether if the wrong keys are changed. Before you edit the registry you should export a copy of the key(s) you plan to change so that this can be restored if problems are encountered.
Windows 11 / 10
- Within the Registry Editor (regedit), use the navigation tree to reach the following location:
HKEY_LOCAL_MACHINE\SOFTWARE\Microsoft\Windows\CurrentVersion\Policies\NonEnum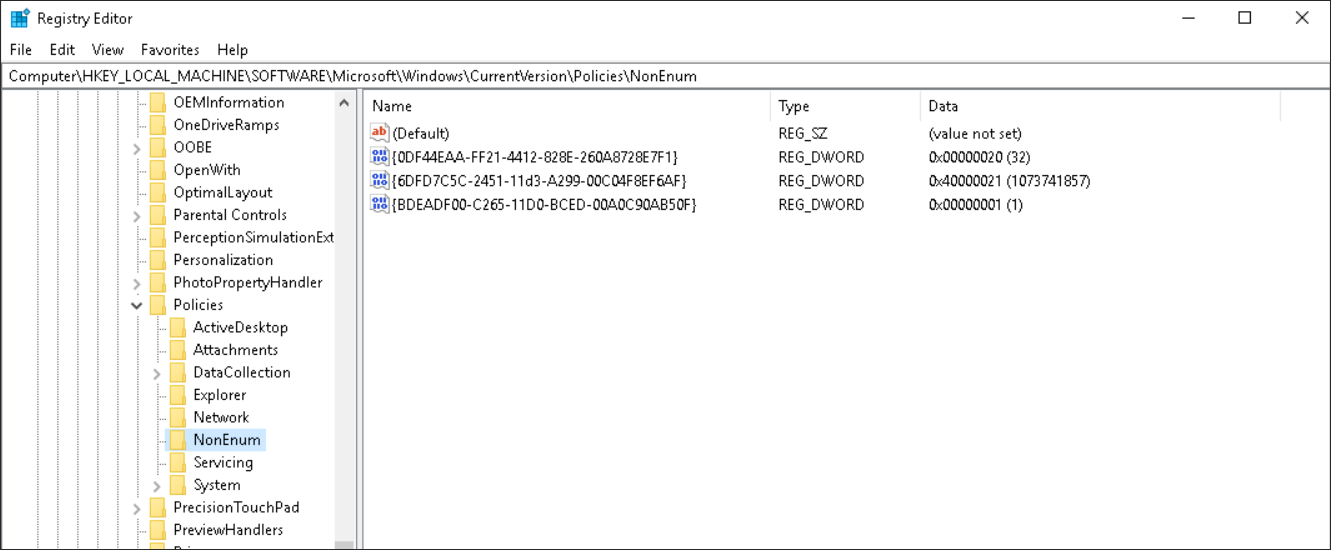 <br><br>
 - Look for a REG_DWORD key, named
{645FF040-5081-101B-9F08-00AA002F954E}
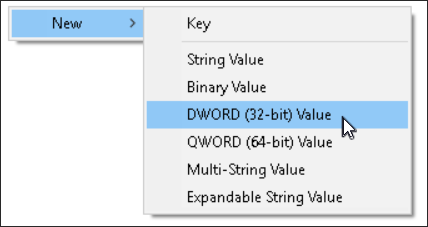
If this value doesn’t exist, you will need to create it.<br><br> - To create the key, right-click in the window, select New, then DWORD (32-bit) Value.
 <br><br>
 - In the Name field, enter:
{645FF040-5081-101B-9F08-00AA002F954E} <br><br>
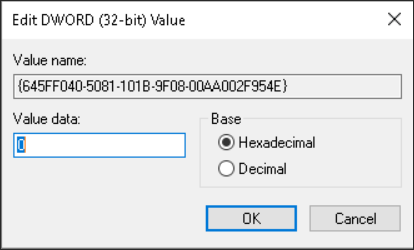
 - After entering the name, double-click the new key and ensure the Base is set to Hexadecimal and the Value data field is 0, before clicking OK.
 <br><br>
 - The Recycle Bin should now appear on the Desktop. If it does not, you may need to log out and back into Windows on this system.<br><br>
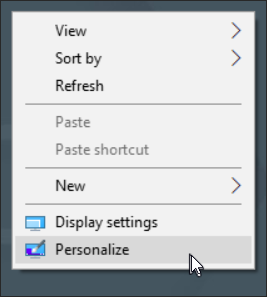
- Toggling the display of the Recycle Bin after this is simple. Right-Click the desktop and select Personalize.
 <br><br>
 - Select Themes from the menu options.<br><br>
- Find and click on Desktop icon settings.<br><br>
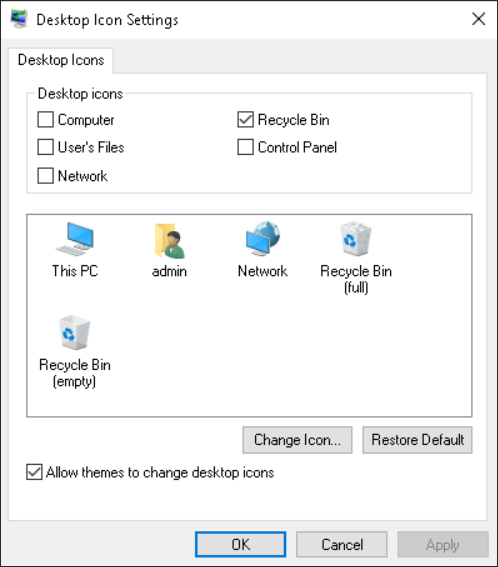
- The resulting dialog that appears permits you to check or uncheck the display of the Recycle Bin from the Desktop. Take care in deciding which options your users should have access to on your ExacqVision NVR.
<br>