Description
As a result of KB https://support.exacq.com/#/knowledge-base/article/5610 the C1410 MK II can not alone create event linking to trigger through Exacq software. Exacq currently does not support the use of webhooks seen in the above KB. This guide will assist you with configuring an Axis D3110 Connectivity Hub to trigger the C1410 MK II via an HTTP output. Allowing the Exacq software to trigger the D3110 based off a motion event or analytical event from a camera through Exacq Server’s event linking.
Product
Axis D3110 Connectivity Hub
Axis C1410 MK II Speaker
A method to allow the C1410 MK II to work via exacqVision event linking rules is to use the Axis D3110 Connectivity Hub in tandem with the C1410 MK II.
If the cameras are from other manufactures this process will work the same. In some cases Axis cameras are able to send the HTTP event straight to the C1410 MK II speaker. See Axis Manuals on how to configure this if the intent is to bypass the use of Exacq Event linking.
To do this follow the steps below to allow a Trigger to be sent from exacqVisions Event linking, via the D3110 output module using a HTTP call to the C1410 MK II.
We start with Logging into the C1410 MK II Mini Speaker and navigating to the Audio Clip menu.
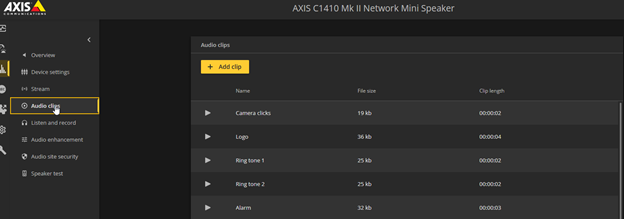
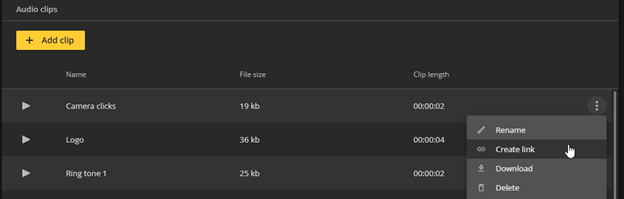
Select an Audio Clip you want to use and click on the 3 dots to the right and select Create Link.
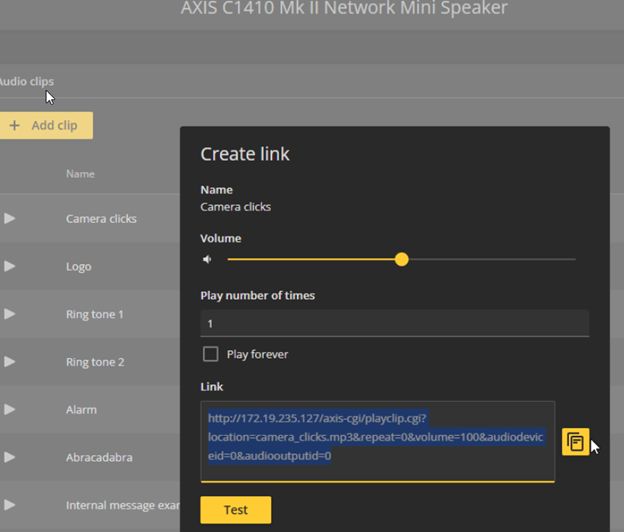
In the Create Link Pop up box test the link first to confirm it is good.
Then copy the link from shortcut icon option seen below and save the url in a txt document for use later.
That is all that is needed for configuration of the C1410 Mk II.
See Axis documentation on how to upload your own audio clips to the C1410 MK II.
Configuring the D3110:
Navigate to the D3110 and log into the hub interface.
Navigate to the Event Menu.
First thing we need to do is create a Recipient for the HTTP call sent to the C1410 MK II.
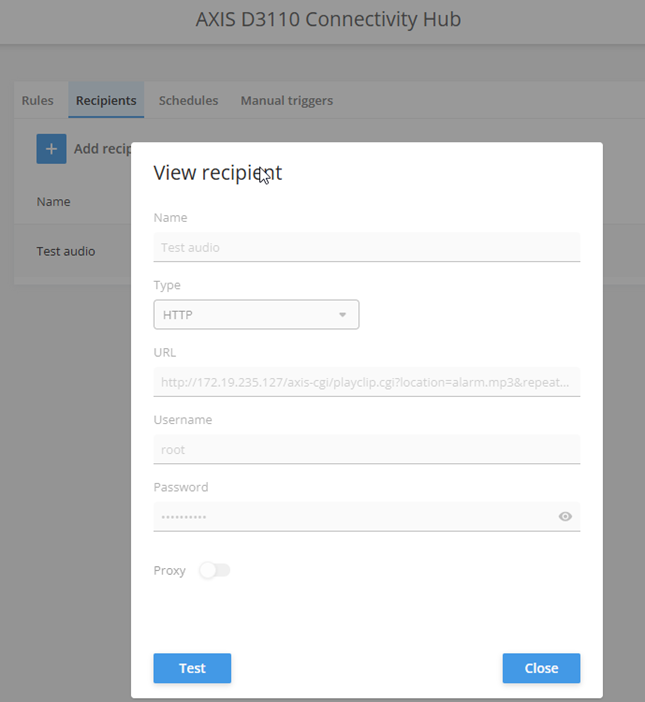
Click on Recipients at the top of the page and Select Add Recipient.
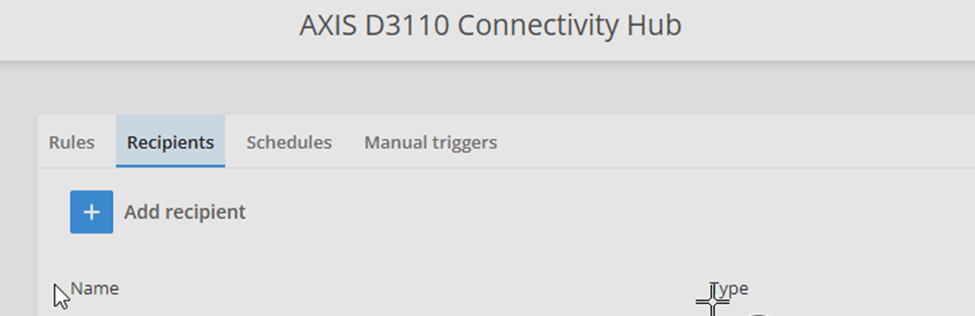
Seen below, you can give this a name. In this example we used Test Audio.
Select HTTP from the Type Drop down box.
In the URL box copy the URL from the C1410 MKII in the above step and paste it in the URL box.
Add the Username and Password that is used for the C1410 MK II unit for authentication.
Hit the Test button to make sure it succeeds.
Then Save the settings.
Navigate to the Accessories Menu.
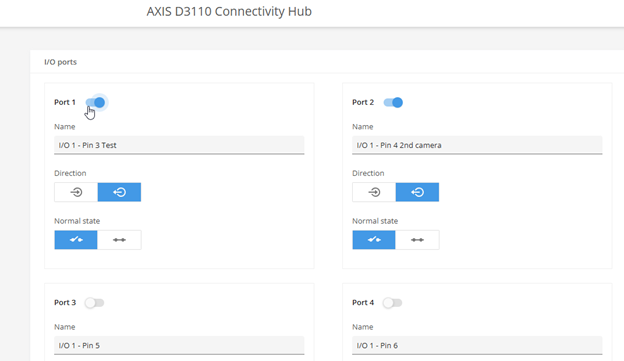
Here we are going to configure the Outputs to trigger the C1410MK II.
In the photo below, If the Inputs are active, we need to change them to an Output.
Simply Click on the Direction to select the output icon and make sure that the Port being used is enabled.
We recommend Renaming the I/O to make this easier for configuration as you configure this with other items.
1. Setting up the Event Rule:
Navigate to the Event menu.
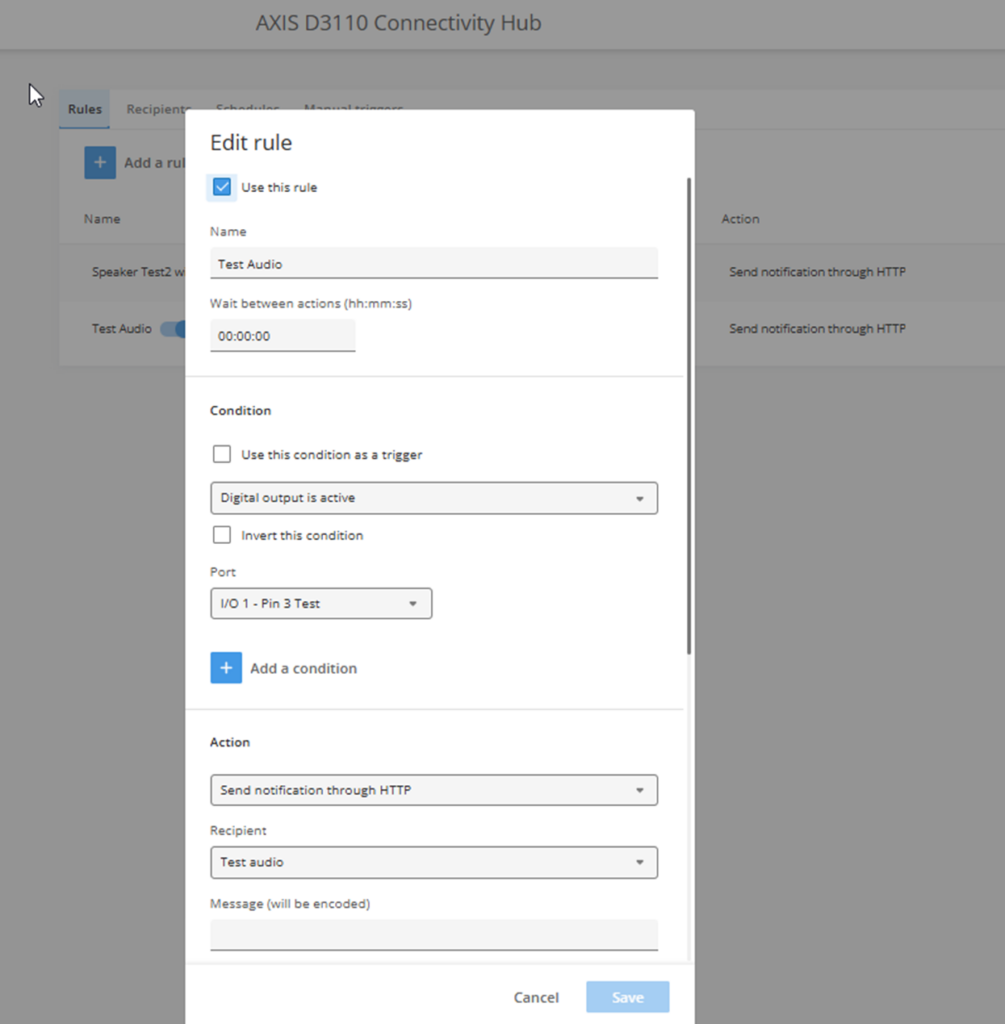
Click the ADD a Rule option.
Give the Rule a name. Seen in the below photo,
For this example, I used Test Audio.
Select the Condition to be used.
Seen below in the photo, for this example, we are using the Digital Output is Active.
NOTE: If Digital Output Is Active does not show up then the Accessories outputs are not configured properly, or the device needs it’s fw update to at least 10.12.280.
In the Port drop down you will select the I/O module configured above from the Accessories menu, and should see the name of the IO.
Example: I/O 1 – Pin 3 Test
2. Actions:
In the drop-down menu for the Action select Send Notification Through HTTP.
Recipient- is the name you used from the Recipient Added from the Events menu section seen above.
This example is named Test audio.
We do not need to configure anything else on this Rule page.
Click the save option.
Here is the Configuration of the rule set up:
NAME: Test Audio
CONDITION: Digital output is active
PORT: I/O-Pin 3 Test
ACTION: Send Notification through HTTP
RECIPIENT: Test Audio
Creating Event Linking in Exacq Software
Once in Event linking click on the New button at the bottom.
We are adding a rule so that when an Analytical event happens on a camera, for example: Person Test, on a Q1808-LE Axis camera, it will send an output trigger to the D3110, which will in turn send a HTTP trigger to the C1410 Speaker.
Event Type – We select Analytics
Event Source- We select the camera analytic already setup on the camera.
Action Type- We select Output Trigger
Action Target- We select the D3110- I/O 1 – Pin 3 Test option configured above.

NOTE:
It is possible to use the D3110’s other Output Triggers for other trigger events. It needs to be configured in the Accessories of the D3110 to trigger another speaker in the same network, or to be used with another camera that might trigger the same speaker to play an audio clip.
The same process applies, however you need to create additional Event Linking Items in Exacq to support this.
In the photo above you can see multiple Action Targets available from the D3110.
That is because I have Enabled those I/O’s as outputs seen below.
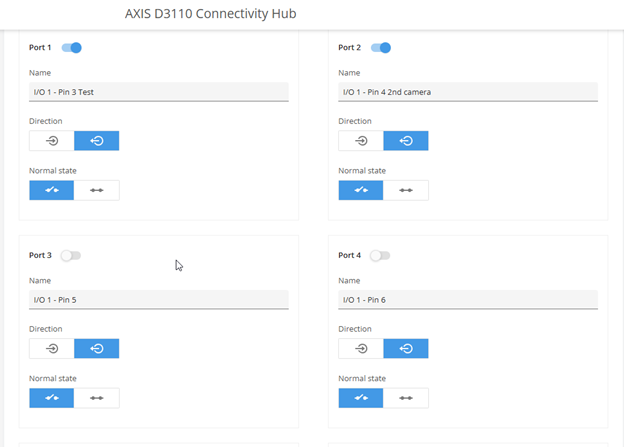
We can create a New Rule in the D3110 to trigger the C1410 for a second camera event, such as a motion event, to play the audio clip at the C1410 when an event is triggered.
Go to the Events page in the D3110 and add a new rule.
Name the Rule and select the same Conditions as above step.
For this example: . I used I/O 1-Pin 4 2nd Camera as my port seen below.
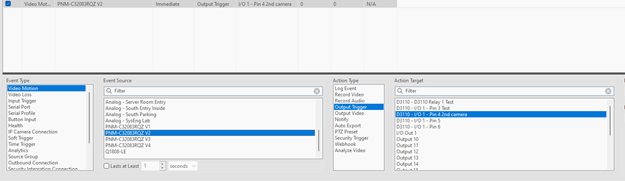
This rule was created to have another Camera trigger the same speaker when motion was detected seen below in our event linking.
Event Type: Video Motion
Event Source: PNM-C32083RQZ V2
Action Type: OutPut Trigger
Action Target: D3110-I/O 1 Pin 4 2nd camera
NOTE: This KB is to be used with the following KB and video from our video Scenario Series.
Using Axis Networked Speakers with exacqVision for Pre-Recorded Clips
https://support.exacq.com/#/knowledge-base/article/5610
Exacq Scenario Series – Audio and Email Notifications After Business Hours
https://support.exacq.com/#/knowledge-base/article/20481