Support has been added in exacqVision 25H1 for archiving to Amazon S3 or Wasabi target.
exacqVision Edge brings the comprehensive capabilities of a VMS to a supported camera, enabling camera-only installs. exacqVision Edge solution avoids the need to have an NVR on premise that needs to be deployed and maintained. The video data was vulnerable as it was only stored on SD cards that can fail or the evidence can be removed by someone disposing of the camera or the SD card.
With this release, customers can easily upload video to the cloud and access video remotely using the mobile application. End users may sometimes lack a fully developed IT or security department to manage on-premises equipment. A camera-only solution, combined with remote access and cloud storage capabilities, enables minimum on-prem footprint with remote access to view and search video from anywhere.
Benefit from data redundancy in cloud. The Exacq Wasabi integration is very cost competitive compared to other offerings. Also, customers who leverage Edge for remote stations stand to benefit, and dealers who service them can remotely access video.
Background Information
exacqVision can archive data to a preconfigured SMB share drive, such as those on an exacqVision S-Series storage server. The Archiving page allows you to configure exacqVision to back up recorded data for quick retrieval from any client machine using the Search page. Archiving is different from Extended Storage in that a drive used for extended storage is used as if it is a disk installed in the system. New data is written to it and exists in a single place. In archiving, a copy of the data on the exacqVision system is created on the storage target. This acts as a backup to chosen data. In some instances, depending on storage capacity, retention rules, and archiving configuration, the archived data may permit data to be retained further back than on the recording system.
Procedure
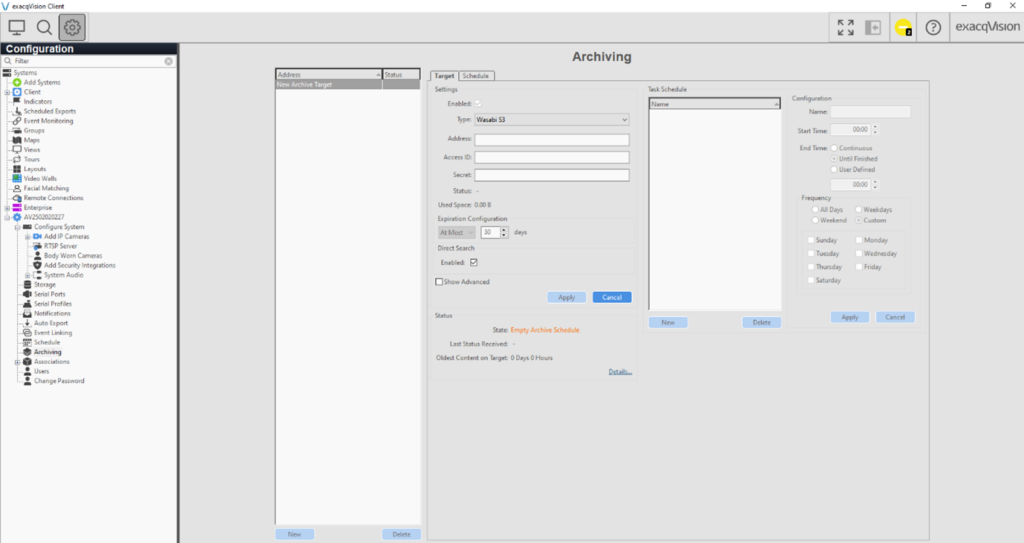
- On exacqVision Client, navigate to the Storage Node and click the New button at the bottom-left corner. Multiple archiving profiles may be created.
- Select the required option from the Type dropdown.
- Type in the path to the archive target folder in the Address textbox.
- Enter the Username and Password, if required, to log into the shared network drive.
- Configure the Percent To Use slider as required to configure the amount of space on the drive that should be used for archiving.
- Configure the Desired Content Age setting as required. If you were to set the desired content age to 60 days and the oldest content on the archive drive is 55 days, the system would trigger an alarm.
- Configure the Expiration Configuration setting as required. Archiving provides an At Most expiration configuration similar to that on the Storage page for adhering to local regulations if needed.
- Configure Direct Search settings if required. This feature allows client workstations to connect directly to the archive, but they must have a direct network path to reach the archive. This can potentially speed up video downloads, reduce network bandwidth usage when searching, or enable archive video to be searched even if the recording Exacq server is offline.
- Once you are happy with your configuration, click the Apply button to save your changes.
Configure the Archive Task
The archivetarget defines where the archive data will be located while the archive task tells the system when to begin archiving the data.
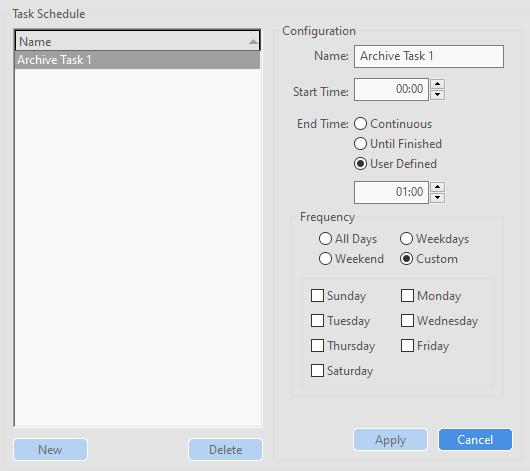
- Navigate to the Storage Node, click the New button and enter a Name for the configuration.
- Configure a Start Time.
- Select an End Time.
- Continuous: will tell the system to scan for new data to be archived every 5 minutes
- Until Finished: Select this option if you want the archiving task to run until no new data is found and then stop until the next scheduled time period
- User Defined: This option allows you to set a stop time even if it has not completed archiving all data. This can be useful if you must free up system or network resources during certain times of the day.
- If you select Until Finished or User Defined you’ll be able to set the Frequency of the specific days you wish the archiving to run.
- Once you are happy with your configuration, select the Apply button.
Configure the Specific Data to Archive
With both the archive target and tasks done you will now select the specific data you want to archive.
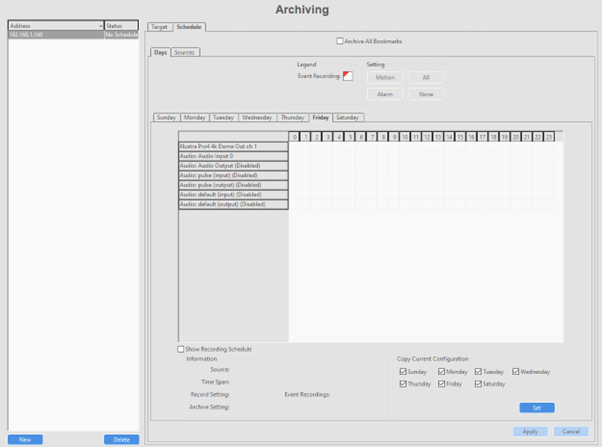
- Navigate tothe Schedule tab.
- On the Days tab, highlight the sources you wish to configure. Clicking the green All button will set all selected sources to archive all data.
- Click on Set to apply this configuration to all days and click Apply.
- You can also view the schedule options by selecting the Sources tab.
- Select a camera then select the boxes for the days and times you want to archive. You can combine different settings for different days and hours.
- Once you are happy with your configuration, click the Apply button.