Overview
DSX is a powerful access control system monitoring application. This integration solely supports PTZ, Live View and Recorded View video and utilizes evAPI.
<br>
Requirements
- Licensed exacqVision Server 23.09 or later
- WinDSX version 3.7.52 or later
<br>
Installation
Before configuring WinDSX for use with the exacqVision System, complete the following steps:
- Obtain a valid Username and Password from the exacqVision Server that will be used with WinDSX.<br><br>
- Obtain the IP address of the exacqVision system. Alternatively, you may use the domain hostname if the system is on the same domain as WinDSX.<br><br>
- Obtain the User ID and Password for the WinDSX Database/Server.
NOTE: It is strongly advised to use or create an account with limited privileges for this purpose. (e.g. – Live + Search)<br><br> - Download the exacqVision plug-in for WinDSX from https://support.exacq.com <br><br>
- Proceed with the Configuration section
<br>
Configuration
- On the WinDSX server, install the exacqVision plug-in for WinDSX. Follow the on-screen prompts.<br><br>
- From the Start menu, select All Programs > WinDSX. Log in using the User ID and Password obtained previously.<br><br>
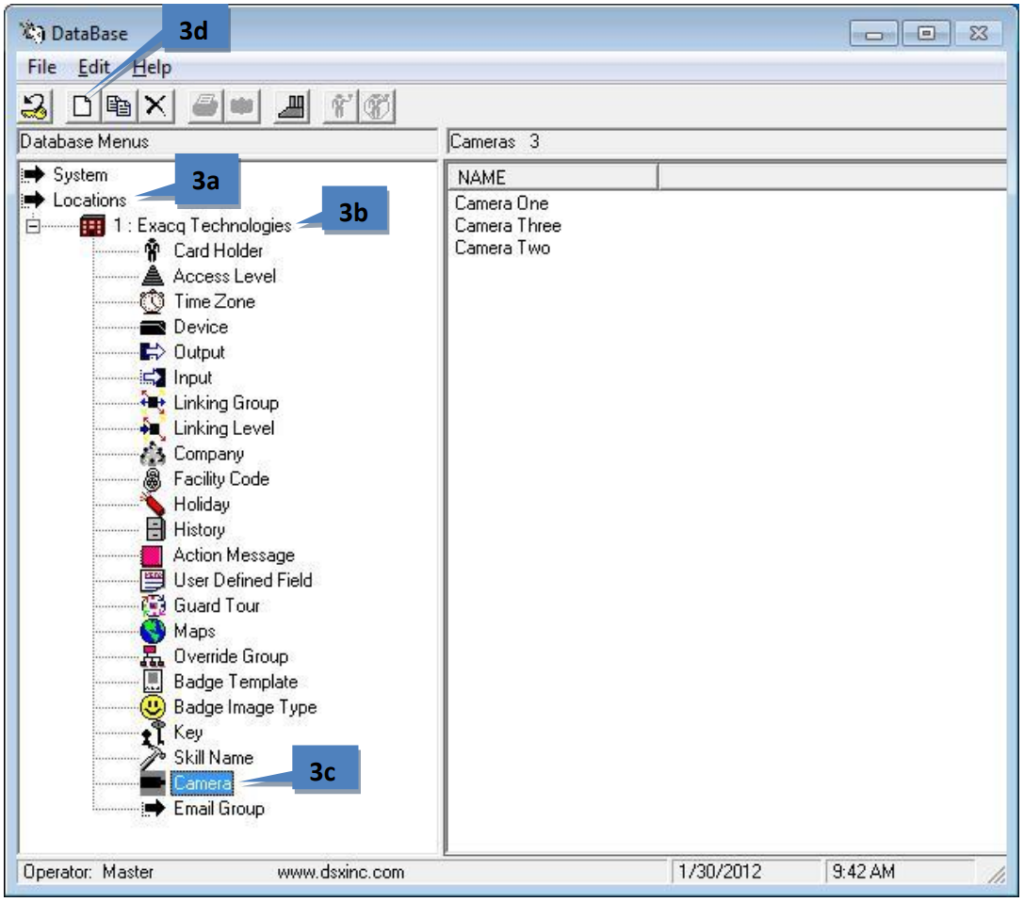
- Click the Database window:
a. Double-click Locations.
b. Double-click your location.
c. Click Camera.
d. Click on the New button in the menu to display the New Camera window.
<br>
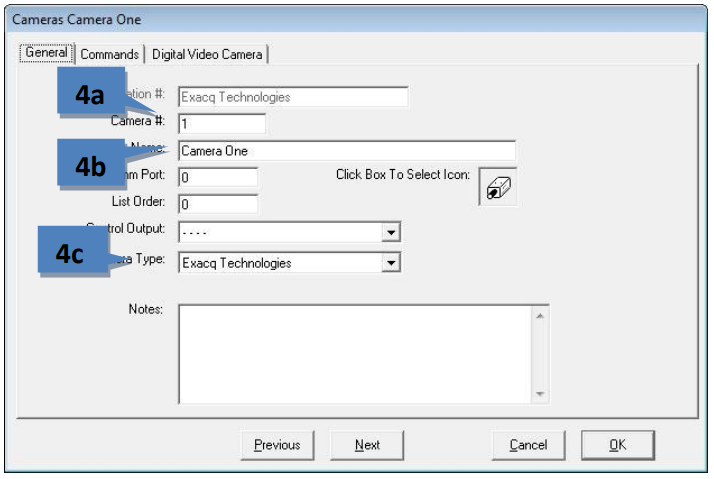
- On the General tab, enter the following information:
a. Camera #: This is generic, such as 1, 2, 3, and so on. It is not the same as the camera number on the exacqVision Server.
b. Name: This can be any name that you want to assign to the camera.
c. Camera Type: Select Exacq Technologies from the drop-down list.
<br>
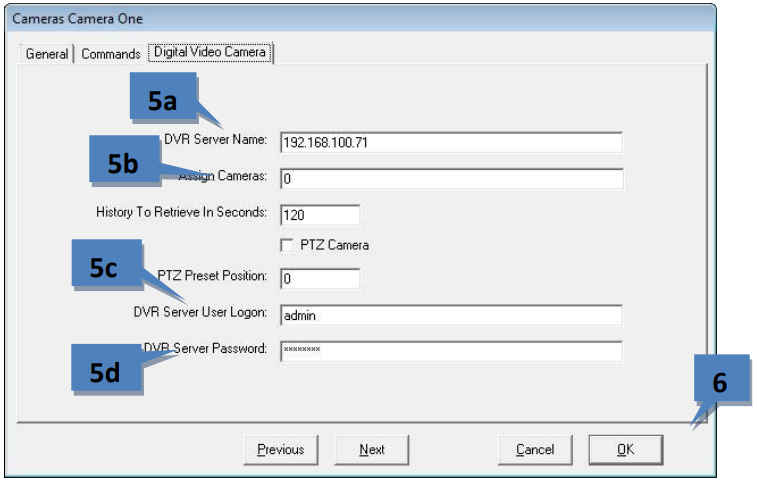
- On the Digital Video Camera tab, enter the following information:
a. DVR Server Name: Enter the IP address of the exacqVision Server.
b. Assign Cameras: The number of the exacqVision camera (numbering starts at zero). See TIP below.
c. DVR Server User Logon: The exacqVision Username obtained previously.
d. DVR Server Password: The exacqVision Password obtained previously.
TIP: Clicking Help > Camera List from the exacqVision Driver window will show all camera names, camera IDs, and input numbers on the server. Use the camera ID in step 5b above.
NOTE: If you are using a PTZ camera, select the PTZ box and enter any preset position you want to see in the PTZ Preset Position field.
<br>
- Click OK.<br><br>
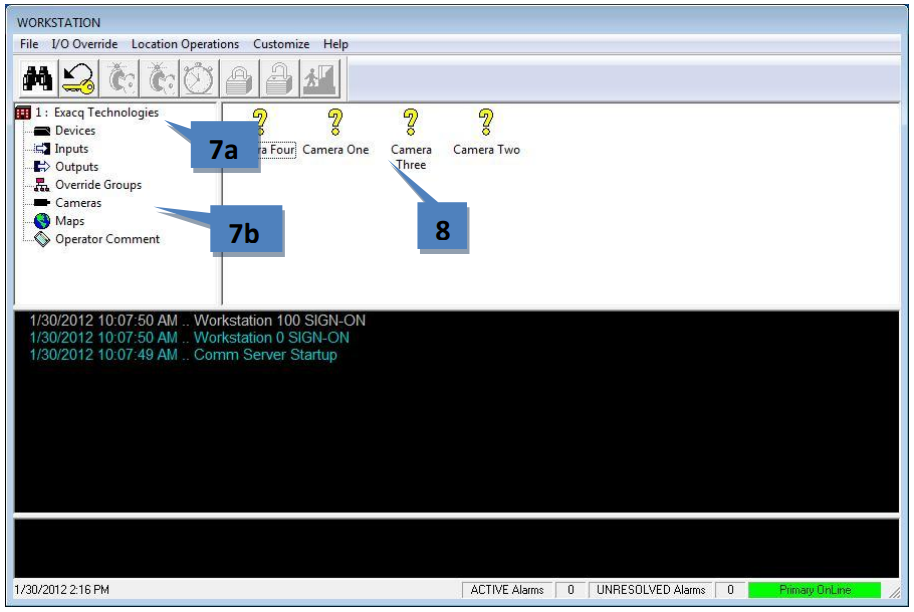
- Click the Workstation window.
a. Double-click your location.
b. Click Cameras.
<br>
- The cameras defined for your location appear in the right window. Right-click any camera and choose Live Video or Recorded Video from the pop-up menu. A window with the desired video is displayed.
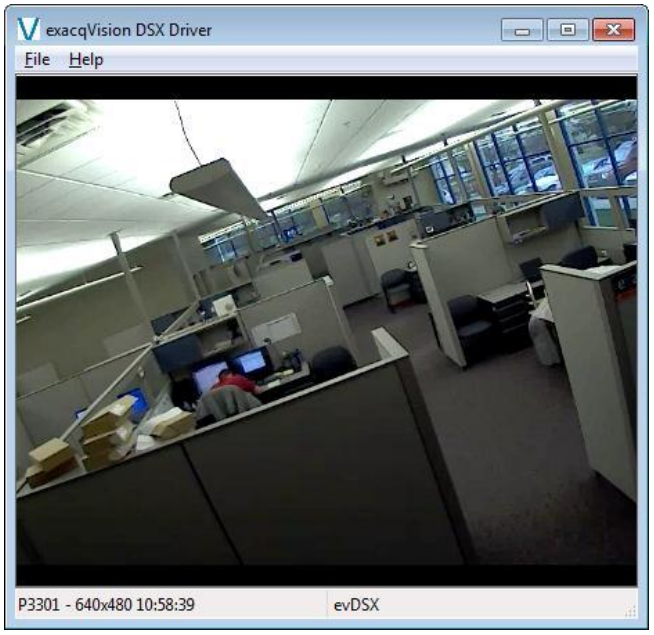
<br>
NOTE: If socket errors appear when you try to view live or recorded video, ensure that the dongle is correctly plugged in and the DSXKey service is running on the WinDSX server.
<br>