Description
Typically end users will access archived video via Cloudvue Web or Cloudvue Mobile. They can search for a specific date/time on a camera and then use Save Clip to export the video in one, five, fifteen or custom increments up to 2 hours.
In certain cases this can fail and will result in a 0 KB MP4 file.
Product
- C2C
Steps to Reproduce
- Navigate to the Archive Page
- Set the Start Point
- Use the Date/Time fields to set the starting point or
- Drag the green indicator bar in the timeline
- Save Clip
- Choose one of the preset lengths one, five, fifteen or create a custom increment up to 2 hours
- Click Save
Expected Results
- An MP4 file of the video is downloaded
Actual Results
- An MP4 is downloaded but has no video and the files size is 0 KB
Solution
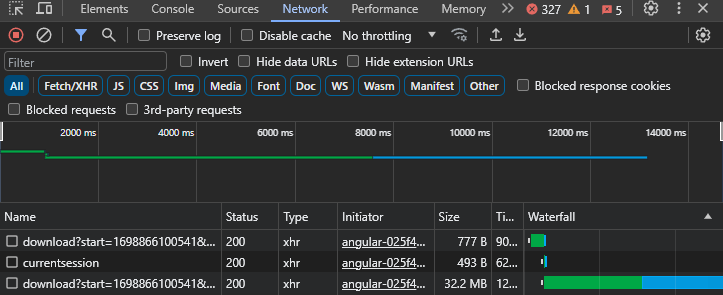
If the video can be viewed in Cloudvue then it should exist either on the device or in the cloud. To determine the source you will need to open Chrome’s Dev Tool (F12 or Ctrl+Shift+J) and locate the download url being used.
- Open the Chrome Dev Tools (F12 or Ctrl+Shift+J)
- Use the Steps to Reproduce above but stop after setting a Start Point
- In the Dev Tools Window
- Select the Network Tab
- Click the clear network log icon

- In Cloudvue Save the desired Clip
- Items will begin to appear in the Dev Tools network log

- Hover over each Network Log entry to reveal the full url
- You want the one that begins with “https://archive.cloudvue.com/camera”
- Right click the log entry
- Expand Copy
- Choose copy link address
- Open a new tab in Chrome
- Paste the copied url into the address bar
- It will look similar to this
- https://archive.cloudvue.com/camera/0050f9635b40/streaming?start=1698753630603&stop=1698753660603&location=c2c
- Note the ending, if it is =c2c then change it to =cloud or vice versa
- Launch the modified url
- An mp4 video file should download
URL Explained
Where
[CAMERAS_MAC] = Cameras MAC address [Action] =- streaming? = playback/stream the video
- download? = download the video
- C2C = Cameras microSD card
- Cloud = Cloud Storage