Categories
Knowledge Support Support exacqVision Client Categories Products

Analytics not Shown as Alarm on Event Linking

Description 

If you are setting up an event linking using an Analytic Event Type this will not show as alarm in the status window.

Product 

  • exacqVision Client
  • exacqVision Server

Steps to Reproduce 

  • Select Event Linking.
  • Add a New Event and select Analytics.
  • Select your Event source, Action Type and Action Target.
  • Click Apply.

Expected Results 

The Status will change from Off to Alarm

Actual Results 

The Status always stays Off

Solution

This is as designed, many analytics triggers happen so fast that the Status on the Event Linking page never appears to change or it does so for only a split second.

Here is one way to verify it is working.

  • Change the Action Type to Log Event
  • Trigger the analytic
  • Search Events, there should be a red indicator in the timeline when the analytic triggered.
Categories
Knowledge Support Support exacqVision Client Products

Linux Client Crashes with Axis Camera When Dewarping

Title

Linux Client Crashes with Axis Camera When Dewarping

Description

Trying to dewarp an Axis camera on a C-series with the Linux Client on a Server or Linux Workstation using the ExacqVision Client software causes the ExacqVision Client to crash.

Product

  • ExacqVision Client

Steps to Reproduce

  • Try dewarping an Axis Camera on a Linux Server or Workstation

Expected Results

  • Dewarping does not crash the ExacqVision Client Software

Actual Results

  • Once you select Axis from the Digital PTZ/Fisheye tab and try dewarping it crashes the ExacqVision Client

Solution

  • Pick Generic or use a Windows workstation to dewarp

This works as expected on Windows Servers or Windows Workstations running the ExacqVision Client Software.

Client Version 23.06.105.0 will resolve the client from crashing on Linux systems. The version should be released in the September 2023 version of software.
NOTE: In some cases it is needed to remove the camera from the Camera IP list and re add the camera. Not doing this might result in the same issue occurring after updating the Client Software past Client version 23.06.105.0.

Categories
Knowledge Support Support Categories exacqVision Integrations

Live Chat – Access and Settings

Title

Live Chat – Access and Settings

Description 

This Knowledge Base Article contains information regarding the recommended intercom account settings for Exacq Live Chat operators.

Accessing Intercom

https://app.intercom.com

Note:  You should have received an invite to initially setup an account, if not please contact your manager.

Intercom Support Forum

For answers to questions and information on advanced features of Intercom see their Interconnected Forum  at https://forum.intercom.com/s/?utm_medium=in-app&utm_source=onboarding&utm_campaign=20211006-onboarding

Inbox Preferences 

Assignment Preferences

Inbox > Your Preferences > Assignment preferences

Determine if a conversation is assigned to you or remains with the team when you reply 

Should be “Assign it to me

Account Settings

Availability 

Use the “Set as away” slider to set your current availability.

If set to away, a 2nd option appears, “Reassign Replies”  In theory chats should not be left open; but either be resolved and closed or evolve into a Salesforce Case and be closed.  Therefore, this option can be ignored and left in the default off position.

Log Out

Log out of Live Chat

Your Details

(Account Settings > Your Account)

Access additional settings specific to your Intercom account.

Your Details 

(Account Settings > Your Account  >  Your Details)

  • Upload a photo (optional) 
  • Change Password 
  • Setup Two Factor Authentication (Recommended) 

Notifications

(Account Settings > Your Account  >  Notifications)

Desktop/Email Notifications

Your settings may vary but it is recommend to have the Desktop and Email options checked for the following: 

  • Activity in all unassigned conversations (Required)
  • Activity in anything assigned to you (Required)
  • Any mentions of you in a conversation (Required)

Browser Notifications

(Account Settings > Your Account  >  Notifications)

  • Assigned to you – (enabled)
  • Unassigned – (enabled recommended)
  • Assigned to any of your teams –  (optional)

Daily email (optional)

Categories
Knowledge Support Support Categories exacqVision Hardware

Import or Clear Foreign Configurations Using LSA (LSI Storage Authority)

Title

Import or Clear Foreign Configurations Using LSA (LSI Storage Authority)

Description 

A foreign configuration is a RAID configuration that already exists on a replacement set of drives that you install in a computer system.

Product 

  • MegaRAID 93xx Series RAID Controller
  • LSI Storage Authority

Importing or Clearing the Foreign Configurations

A foreign configuration is a RAID configuration that already exists on a replacement set of drives that you install in a computer system. You can use the LSI Storage Authority software to import the foreign configuration to the controller or clear the foreign configuration so that you can create a new configuration using these drives.  Perform the following steps to import or clear foreign configurations.

  1. Navigate to the Controller dashboard.
  2. Click Configure and then click Foreign Configuration.
    • The Foreign Configuration window appears, which lists all of the foreign configurations.
  3. Click one of the following options:
    • Import All: Import the foreign configurations from all the foreign drives.
    • Clear All: Remove the configurations from all the foreign drives.
  4. Click Re-Scan to refresh the window.
Categories
Knowledge Support Support Categories exacqVision Hardware

Managing Physical Drives using LSA (LSI Storage Authority)

Description 

All physical drives connected to the MegaRAID controller can be managed using LSI Storage Authority.

Product 

  • MegaRAID 93xx Series RAID Controller
  • LSI Storage Authority

Start and Stop Locating a Drive

If the physical drives are in a disk enclosure, you can identify them by making their LEDs blink.Perform the following steps to identify the physical drives.

  1. Navigate to the physical drive on the Controller dashboard, and select the drive you want to identify, such as Unconfigured Good drive, online physical drive, configured drive, and so on.
  2. Select Element(s) Actions > Start Locate, the corresponding LED on the physical drive starts blinking.
  3. Select Element(s) Actions > Stop Locate to stop the LED from blinking.

Making a Drive Offline

Perform the following steps to place a drive offline.
ATTENTION: After you perform this procedure, all of the data on the drive will be lost.

  1. Navigate to the Controller dashboard, and click a drive group name (for example, DG_1).
    • Click the + icon that corresponds to a drive group to display its contents.
    • The virtual drives and physical drives associated with the selected drive group appear.
  2. Click the Physical Drive tab, and select a drive that you want to place offline.
  3. Select Element(s) Actions > Make Offline.  The drive status changes to Offline.

Making a Drive Online

You can change the state of a physical drive to online. In an online state, the physical drive works normally and is a part of a configured virtual drive.

  1. Navigate to the Controller dashboard, and click a drive group name (for example, DG_1).
  • Click the + icon that corresponds to a drive group to display its contents.
  • The virtual drives and physical drives associated with the selected drive group appear.
  • Click the Physical Drive tab, and select the offline drive that you want to make online.
  • Select Element(s) Actions > Make Drive Online.
    • The drive status changes to Online.

Replacing a Drive

You might want to replace a drive if the drive shows signs of failing. Before you start this operation, be sure that an available unconfigured good replacement drive is available. The replacement drive must have at least as much capacity as the drive you are replacing. Perform the following steps to replace a drive.
ATTENTION: Make sure to back up the data on the drive before you replace it.

  1. Navigate to the Controller dashboard, and click a drive group name (for example, DG_1).
    • Click the + icon that corresponds to a drive group to display its contents.
    • The virtual drives and physical drives associated with the selected drive group appear.
  2. Click the Physical Drive tab, and select a drive which you want to replace.
  3. Select Element(s) Actions > Start Replace Drive.
    • The Replace Drive dialog appears
  4. Select a replacement drive, and click Replace Physical Drive.
    • A confirmation message appears.
  5. Select Confirm and click Yes, Replace Drive to proceed with the replace operation.
    • The drive is replaced and the data is copied to the selected component.

Assigning Global Hot Spares

A global hot spare replaces a failed physical drive in any redundant array, as long as the capacity of the global hot spare is equal to or larger than the coerced capacity of the failed physical drive. Perform the following steps to assign global hot spares.

  1. Navigate to the Controller dashboard, and click the Drives tab.
    • All of the associated drives appear.
  2. Expand Unconfigured Drives, and select an unconfigured good drive.
  3. Select Element(s) Actions > Assign Global Hot Spare.
    • The unconfigured good drive is changed to a global hot spare. The status of the unconfigured good drive appears as a global hot spare in the Hot Spares section.

Removing Global Hot Spares

Perform the following steps to remove a hot spare.

  1. Navigate to the Controller dashboard, and click the Drives tab.
    • All of the associated drives appear.
  2. Expand Hot Spares, and select a hot spare that you want to remove.
  3. Select Element(s) Actions > Remove Global Hot Spare.
    • The hot spare drive is removed and is listed in the Unconfigured Drives section as an unconfigured good drive

Converting an Unconfigured Bad Drive to an Unconfigured Good Drive

Perform the following steps to convert an unconfigured bad drive to an unconfigured good drive.

  1. Navigate to the Controller dashboard, and click the Drives tab.
    • All of the associated drives appear.
  2. Expand Unconfigured Drives, and select an unconfigured bad drive.
  3. Select Element(s) Actions > Make Unconfigured.
    • A confirmation message appears.
  4. Select Confirm and click Yes, Make Unconfigured to proceed with the operation.
    • A confirmation message appears.
  5. Select Confirm and click Yes, Make Good to proceed with the operation.
    • The unconfigured bad drive is changed to unconfigured good drive. The status of the unconfigured bad drive appears as unconfigured good in the Unconfigured Drives section.

Erasing a Drive

You can erase data on non-SEDs (normal HDDs) by using the Drive Erase option. For non-SEDs, the erase operation  consists of a series of write operations to a drive that overwrites every user-accessible sector of the drive with specified patterns. It can be repeated in multiple passes using different data patterns for enhanced security. The erase operation is performed as a background task. Perform the following steps to erase a drive.

  1. Navigate to the Controller dashboard, and click the Drives tab.
    1. All of the associated drives appear.
  2. Expand Unconfigured Drives and select an unconfigured good drive.
  3. Select Element(s) Actions > More Actions > Drive Erase.
    1. The Physical Drive Erase dialog appears.
    2. The dialog shows the following modes:
      1. Simple
      2. Normal
      3. Thorough
  4. Select a mode, and click Erase Physical Drive.
    1. A warning message appears asking for your confirmation.
  5. Click Yes, Erase Drive.
    1. After the drive erase operation has started, the Stop Erase option is enabled in the Element(s) Actions menu. You can monitor the progress of the erase operation.

<br>

Categories
Knowledge Support Support Categories exacqVision Hardware

Resizing a Partition on Ubuntu Linux

Title

Resizing a Partition on Ubuntu Linux

Description 

If the capacity of a Virtual Drive has been increased, then it will be necessary to resize existing partitions. 

Product 

  • Ubuntu Linux 18.04

Overview

  • Stop exacqVision Server
  • Identify virtual drive mount point and Device
  • Unmount the virtual drive mount point
  • Launch GParted
  • Resize the partition
  • Mount the virtual drive mount point
  • Verify partition size increased
  • Start the  exacqVision Server
  • Check storage size, status, video both existing and new in the exacqVision Client

Terminal Commands

  • Open Terminal (Applications > System Tools > Terminal)
    • Note: See Terminal Commands Start to Finish below for a detailed example
    • Stop the exacqVision Server service 
    • List block devices and mount points 
    • Unmount the virtual drive storage volume
    • Launch GParted , the GParted Window will appear

GParted

  • Note:  A Libparted Warning similar to the following may appear, if so, select Fix
  • Use the Dropdown to select the device the virtual drive is using in this example “/dev/sda”
  • You should now see the existing partition and unallocated space 
  • Right-click on the existing partition, a context menu will appear
  • Select Resize/Move, the Resize/Move window will appear 
  • Change the New Size (MiB) to match the Maximum size listed 
  • The Free space preceding and following should now be zero
  • Select Resize/Move, the Resize/Move window will close
  • There should be 1 operation pending to grow the partition
  • Click the green check mark to begin the operation
  • Select Apply to confirm the operation, the Applying pending operations window appears
  • Note: The time will to complete will vary based on the size of the expansion but will typically be 15 minutes or less. 
  • A green check mark will appear next to the Grow operation when complete
  • Click Close
  • Close GParted

Terminal Continued

  • The Terminal Window should still be open from earlier
  • Note: See Terminal Commands Start to Finish below for a detailed example
  • Mount the partition
  • List device blocks and mount points 
    • Confirm that the Size of the Virtual Drive mount point has increased
  • Start the exacqVision Server Service
  • Close Terminal

exacqVision Client

  • On the Drive tab verify the Capacity reported is correct and the status is Healthy
  • Search for previously recorded video 
  • Verify current video is being recorded 

Congratulations the partition has been successfully expanded 

Terminal Commands Start to Finish

Categories
Knowledge Support Support Categories exacqVision Hardware

Firefox – Updating Old Ubuntu Repositories
Title

Firefox – Updating Old Ubuntu Repositories
Description 

Once an Ubuntu release has hit it’s end of life (EOL) date it may be necessary to manually add sources to the repository sources.list in order to update Firefox to a version that will have meet the minimum requirements to work with modern websites and software. 

Product 

  • Firefox 
  • Ubuntu (EOL) Releases

Solution

NOTE:  The preferred solution would be to re-image to a version of Ubuntu which has not reached end life! 

  1. Uninstall Firefox
    • Close all instances of Firefox, then open a terminal window and run the following command:

sudo dpkg -P firefox

  1. Update sources.list to include old-release repositories
    • From terminal

sudo gedit /etc/apt/sources.list

Append the lines appropriate for the OS to the end of sources.list, then save and close gedit.


Ubuntu 8.04 May 9, 2013

deb http://old-releases.ubuntu.com/ubuntu/ hardy main restricted universe multiverse

deb http://old-releases.ubuntu.com/ubuntu/ hardy-updates main restricted universe multiverse

deb http://old-releases.ubuntu.com/ubuntu/ hardy-security main restricted universe multiverse

deb http://old-releases.ubuntu.com/ubuntu/ hardy-backports main restricted universe multiverse


For 10.04 April 30, 2015

deb http://old-releases.ubuntu.com/ubuntu/ lucid main restricted universe multiverse

deb http://old-releases.ubuntu.com/ubuntu/ lucid-updates main restricted universe multiverse

deb http://old-releases.ubuntu.com/ubuntu/ lucid-security main restricted universe multiverse

deb http://old-releases.ubuntu.com/ubuntu/ lucid-backports main restricted universe multiverse


For 12.04  April 28, 2017

deb http://old-releases.ubuntu.com/ubuntu/ precise main restricted universe multiverse

deb http://old-releases.ubuntu.com/ubuntu/ precise-updates main restricted universe multiverse

deb http://old-releases.ubuntu.com/ubuntu/ precise-security main restricted universe multiverse

deb http://old-releases.ubuntu.com/ubuntu/ precise-backports main restricted universe multiverse


For 14.04 April, 2019

deb http://old-releases.ubuntu.com/ubuntu/ trusty main restricted universe multiverse

deb http://old-releases.ubuntu.com/ubuntu/ trusty-updates main restricted universe multiverse

deb http://old-releases.ubuntu.com/ubuntu/ trusty-security main restricted universe multiverse

deb http://old-releases.ubuntu.com/ubuntu/ trusty-backports main restricted universe multiverse


For 16.04 April, 2021

deb http://old-releases.ubuntu.com/ubuntu/ xenial main restricted universe multiverse

deb http://old-releases.ubuntu.com/ubuntu/ xenial-updates main restricted universe multiverse

deb http://old-releases.ubuntu.com/ubuntu/ xenial-security main restricted universe multiverse

deb http://old-releases.ubuntu.com/ubuntu/ xenial-backports main restricted universe multiverse

  1. Install libcap2-bin
    • From terminal

sudo apt-get update

sudo apt-get install libcap2-bin

  1. Install Firefox
    • From terminal

sudo apt-get install firefox

Categories
Configuration Video Library exacqVision Client Categories Products

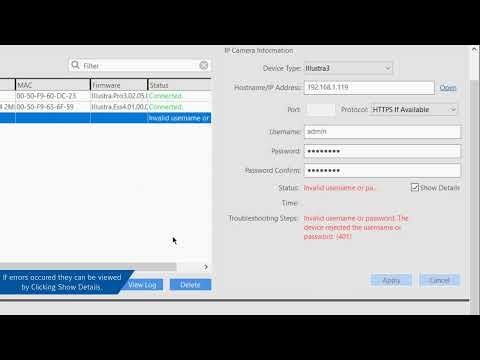
Add IP Camera

Categories
Video Library Configuration exacqVision Enterprise Categories Products

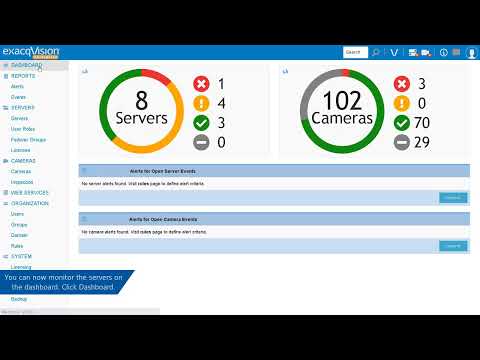
Exacq Enterprise Manager

Categories
Video Library Configuration Categories Products exacqVision Integrations

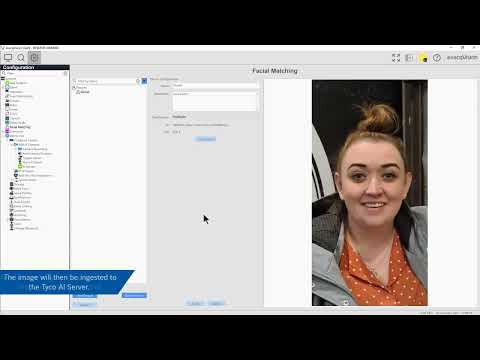
Exacq Facial Matching