This document will guide you through step-by-step procedures for keyboard use and suggested button mappings.
Prerequisites
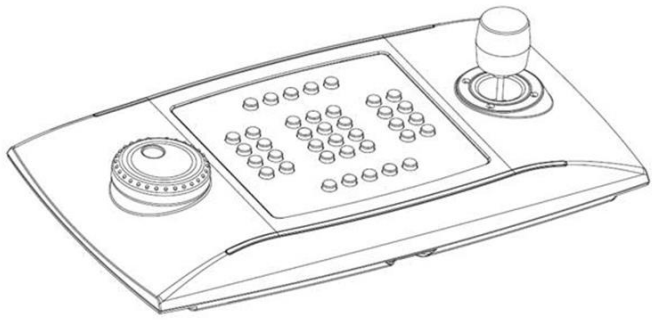
For proper operation of the American Dynamics ADVCPTZKEY1 PTZ USB Keyboard, both the exacqVision Client and Server must be on version 22.03 or higher.
Product
ADVCPTZKEY1 American Dynamics Surveillance Keyboard
<br>
Setup
- Install, or update, the exacqVision Server and Client as mentioned in Prerequisites above.<br><br>
- Plug the keyboard’s USB cable into the USB port on the Client viewing machine, where the keyboard will be operated from.<br><br>
- Navigate to the Joystick configuration page within the exacqVision Client.
- Select the cog wheel icon in the top left-hand corner of the Client window to enter Configuration settings.
- Expand Client from the navigation tree on the left-hand side.
- Select Joystick from the tree to load the Joystick configuration page.<br><br>
- Select the joystick that appears from the drop-down menu. If the device fails to appear, close and re-open the exacqVision Client instance.
 <br><br>
 - Select the Calibrate button to zero out the joystick positioning.<br><br>
- Adjust the sensitivity to your liking.
- X/Y Axis controls camera Pan/Tilt, while Z Axis controls zoom.
- X Position corresponds to the jog wheel on the left of the keyboard.
- Suggested settings include increasing the sensitivity on the X/Y Axis and Z Axis, but slightly decreasing the sensitivity on the X Position.
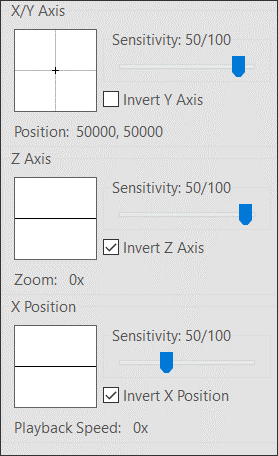
In the example above, the Z Axis and X Position have also had their Invert checkboxes selected to mimic the default controls of the exacqVision Surveillance Keyboard.<br><br>
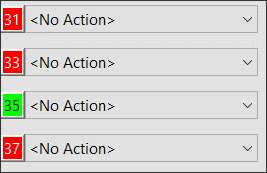
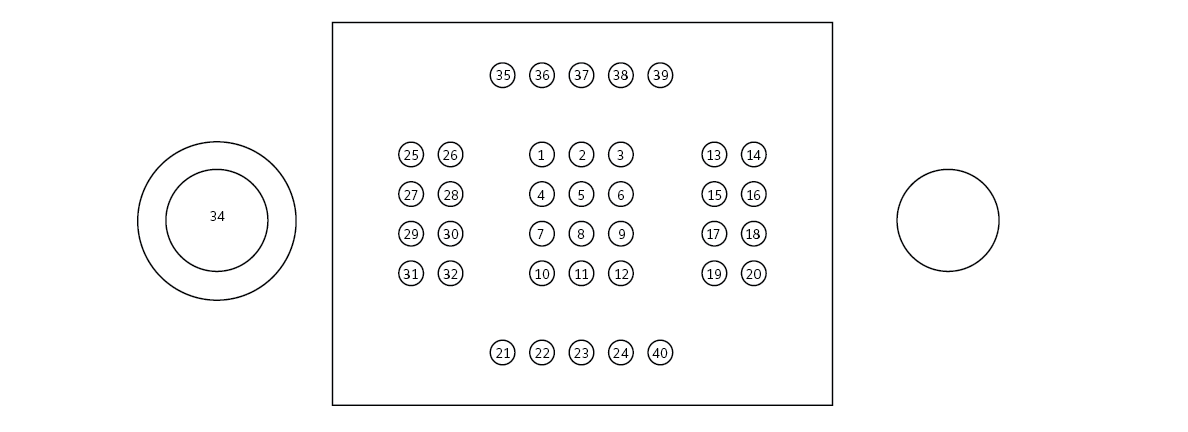
- Pressing any of the buttons on the keyboard will highlight that number in the button menu to help you find the corresponding mapping. You may need to scroll the window if you do not see the button highlighted when pressed.
 <br><br><br><br>
 <br><br><br><br>
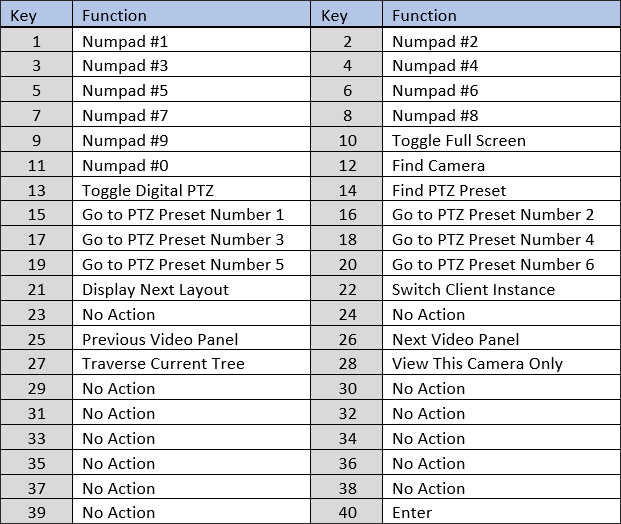
 - Once you have located the button, you may use the drop-down menu to select the action you wish to assign to the button. While this can be customized to your operator’s liking, a suggested mapping for new users can be found below.
 <br><br>
 - After applying changes to the keyboard configuration, return to the Live camera view and the controls will be available for use.
<br>