The S-series come defaulted for Archiving. This article will walk you through the steps of preparing the S-series for Extended Storage and assumes you have already configured the IP address of the S-series for your network.
Extended Storage relies upon an iSCSI connection to the S-series device. If using an exacqVision Server and exacqVision S-series storage device the iSCSI initiation is handled automatically. If using third-party hardware you will need to create the iSCSI initiation manually.<br>
Steps
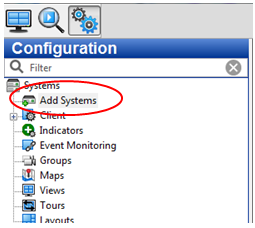
- Within the exacqVision Client, add the S-series connection. Navigate to the Add Systems page.<br>
 <br><br>
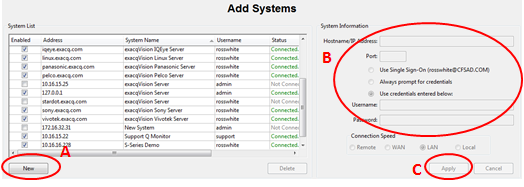
 - Click on the New button (A) and enter the IP address (B) of the S-Series unit, as well as the Username and Password (default admin/admin256). Click Apply.<br>
 <br><br>
 - With the S-Series unit now added to the navigation tree on the left, expand your options under this server name and go to the S-Series Storage settings page.<br>
 <br><br>
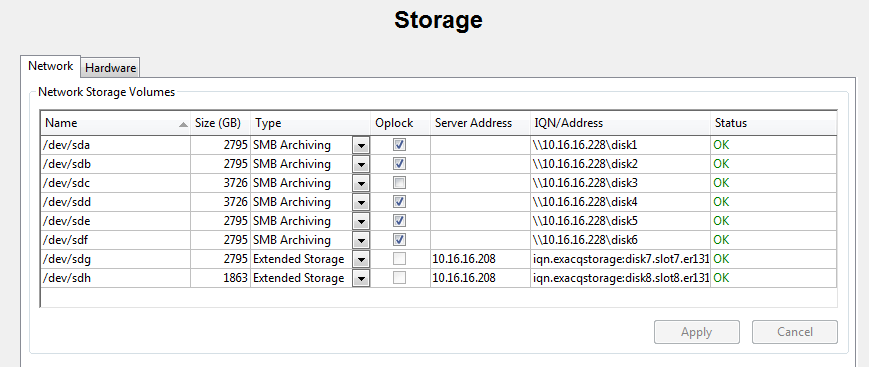
 - On the Network tab is a list of the Storage Volumes contained in the S-Series. The Type will be defaulted to None. The volumes in an S-Series may be of mixed types to achieve your desired storage configuration, so some volumes may be Archiving while others are Extended.<br>
 <br><br>
 - To change existing volumes to Extended, first change the Type column on your desired volumes to None and press Apply. Give the system a few minutes to complete the change.<br>
Warning: Changing volume types will erase any existing data on the storage volume.<br>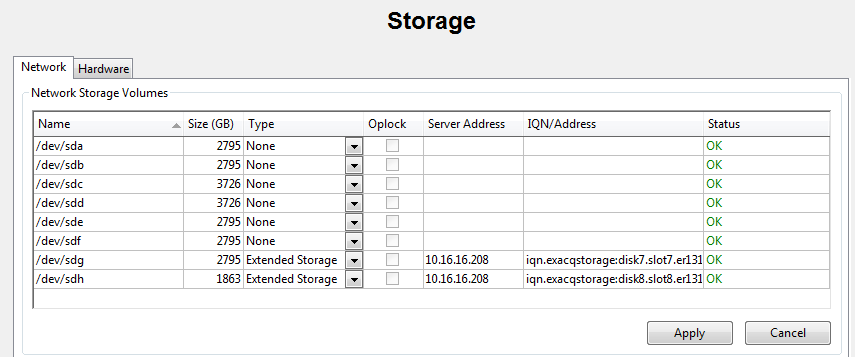 <br><br>
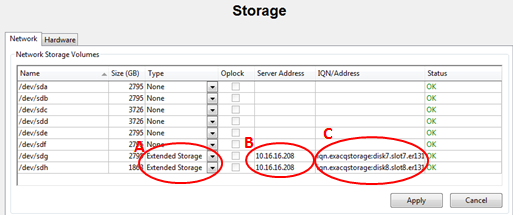
 - Change the Type of the desired volumes to Extended Storage (A). In the column labeled Server Address, enter the IP address of the exacqVision recording server (B). Press Apply. It may take a few minutes for the Status to cycle through the steps needed and finally display ‘OK’. There should now be an IQN listed in the Address column (C).<br>
 <br><br>
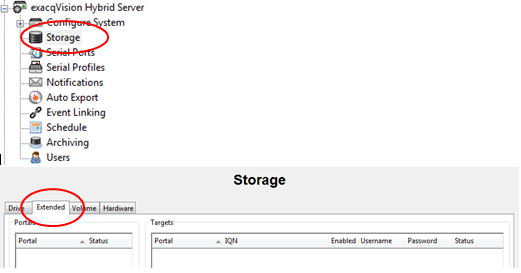
 - Return to the recording server’s Storage page and select the Extended tab.<br>
 <br><br>
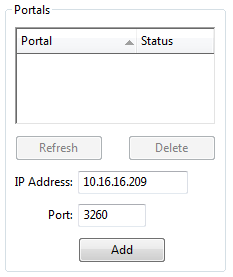
 - Under the Portals section, enter the IP address of the S-Series system. Leave the port as 3260 and click the Add button.<br>
 <br><br>
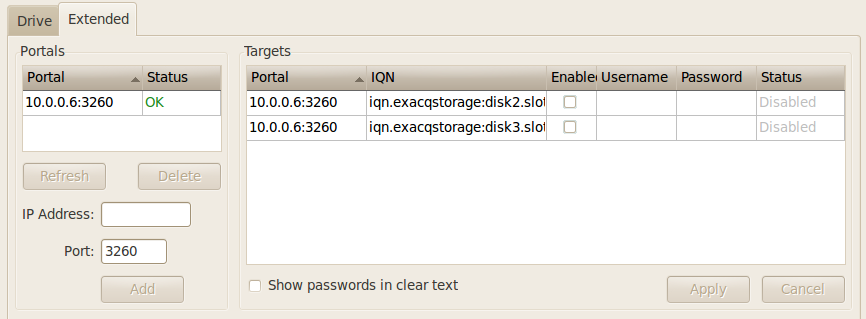
 - The S-Series will be scanned and a list of Targets will appear.<br>
 <br><br>
 - Place a check mark in the Enabled column for each Target. If using an exacqVision S-Series, you will not need to enter a Username or Password. Press the Apply button.<br>
 <br>* Username and Password are required for use with third-party iSCSI hosts. Exacq support cannot provide assistance in setup or troubleshooting third-party iSCSI hosts or devices.<br><br>
 - After pressing Apply, each of the Targets will be prepared. As they finish preparing they will appear in the Partitions panel below.<br>
 <br><br>
 - Once the Status in the Partitions panel is ‘OK’, a Mount point will also be displayed. This indicates the Target on the S-Series is now being seen on the local recording server as if it were a local drive.<br>
 <br><br>
 - Return to the Drive tab on the recording server and your new Extended Storage drives should now appear in the Drive list.<br>
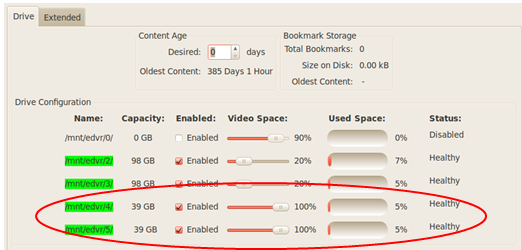 <br>* The above image is an example from a Linux/Ubuntu system. On a Windows system, the Drive names will appear as letters (e.g. – C, D, E, F, etc.)<br><br>
<br>